

I absolutely love the final fit of this Assembly Line Multi-sleeve Midi dress but it took a couple of muslins and a good bit of tracing to get there.
The fabric is a lovely wool twill with a little stretch that was kindly gifted to me by the New Craft House. I think this works really well with this pattern.
I used lining instead of facing for the bodice
There are facing pieces for the neckline included with the pattern but I didn’t want to topstitch those down on this wool and I hate facings flapping about. So I lined the bodice with this beautiful red Liberty silk that I got on sale a few years ago (you may remember the Zadie jumpsuit that I made from it last year).
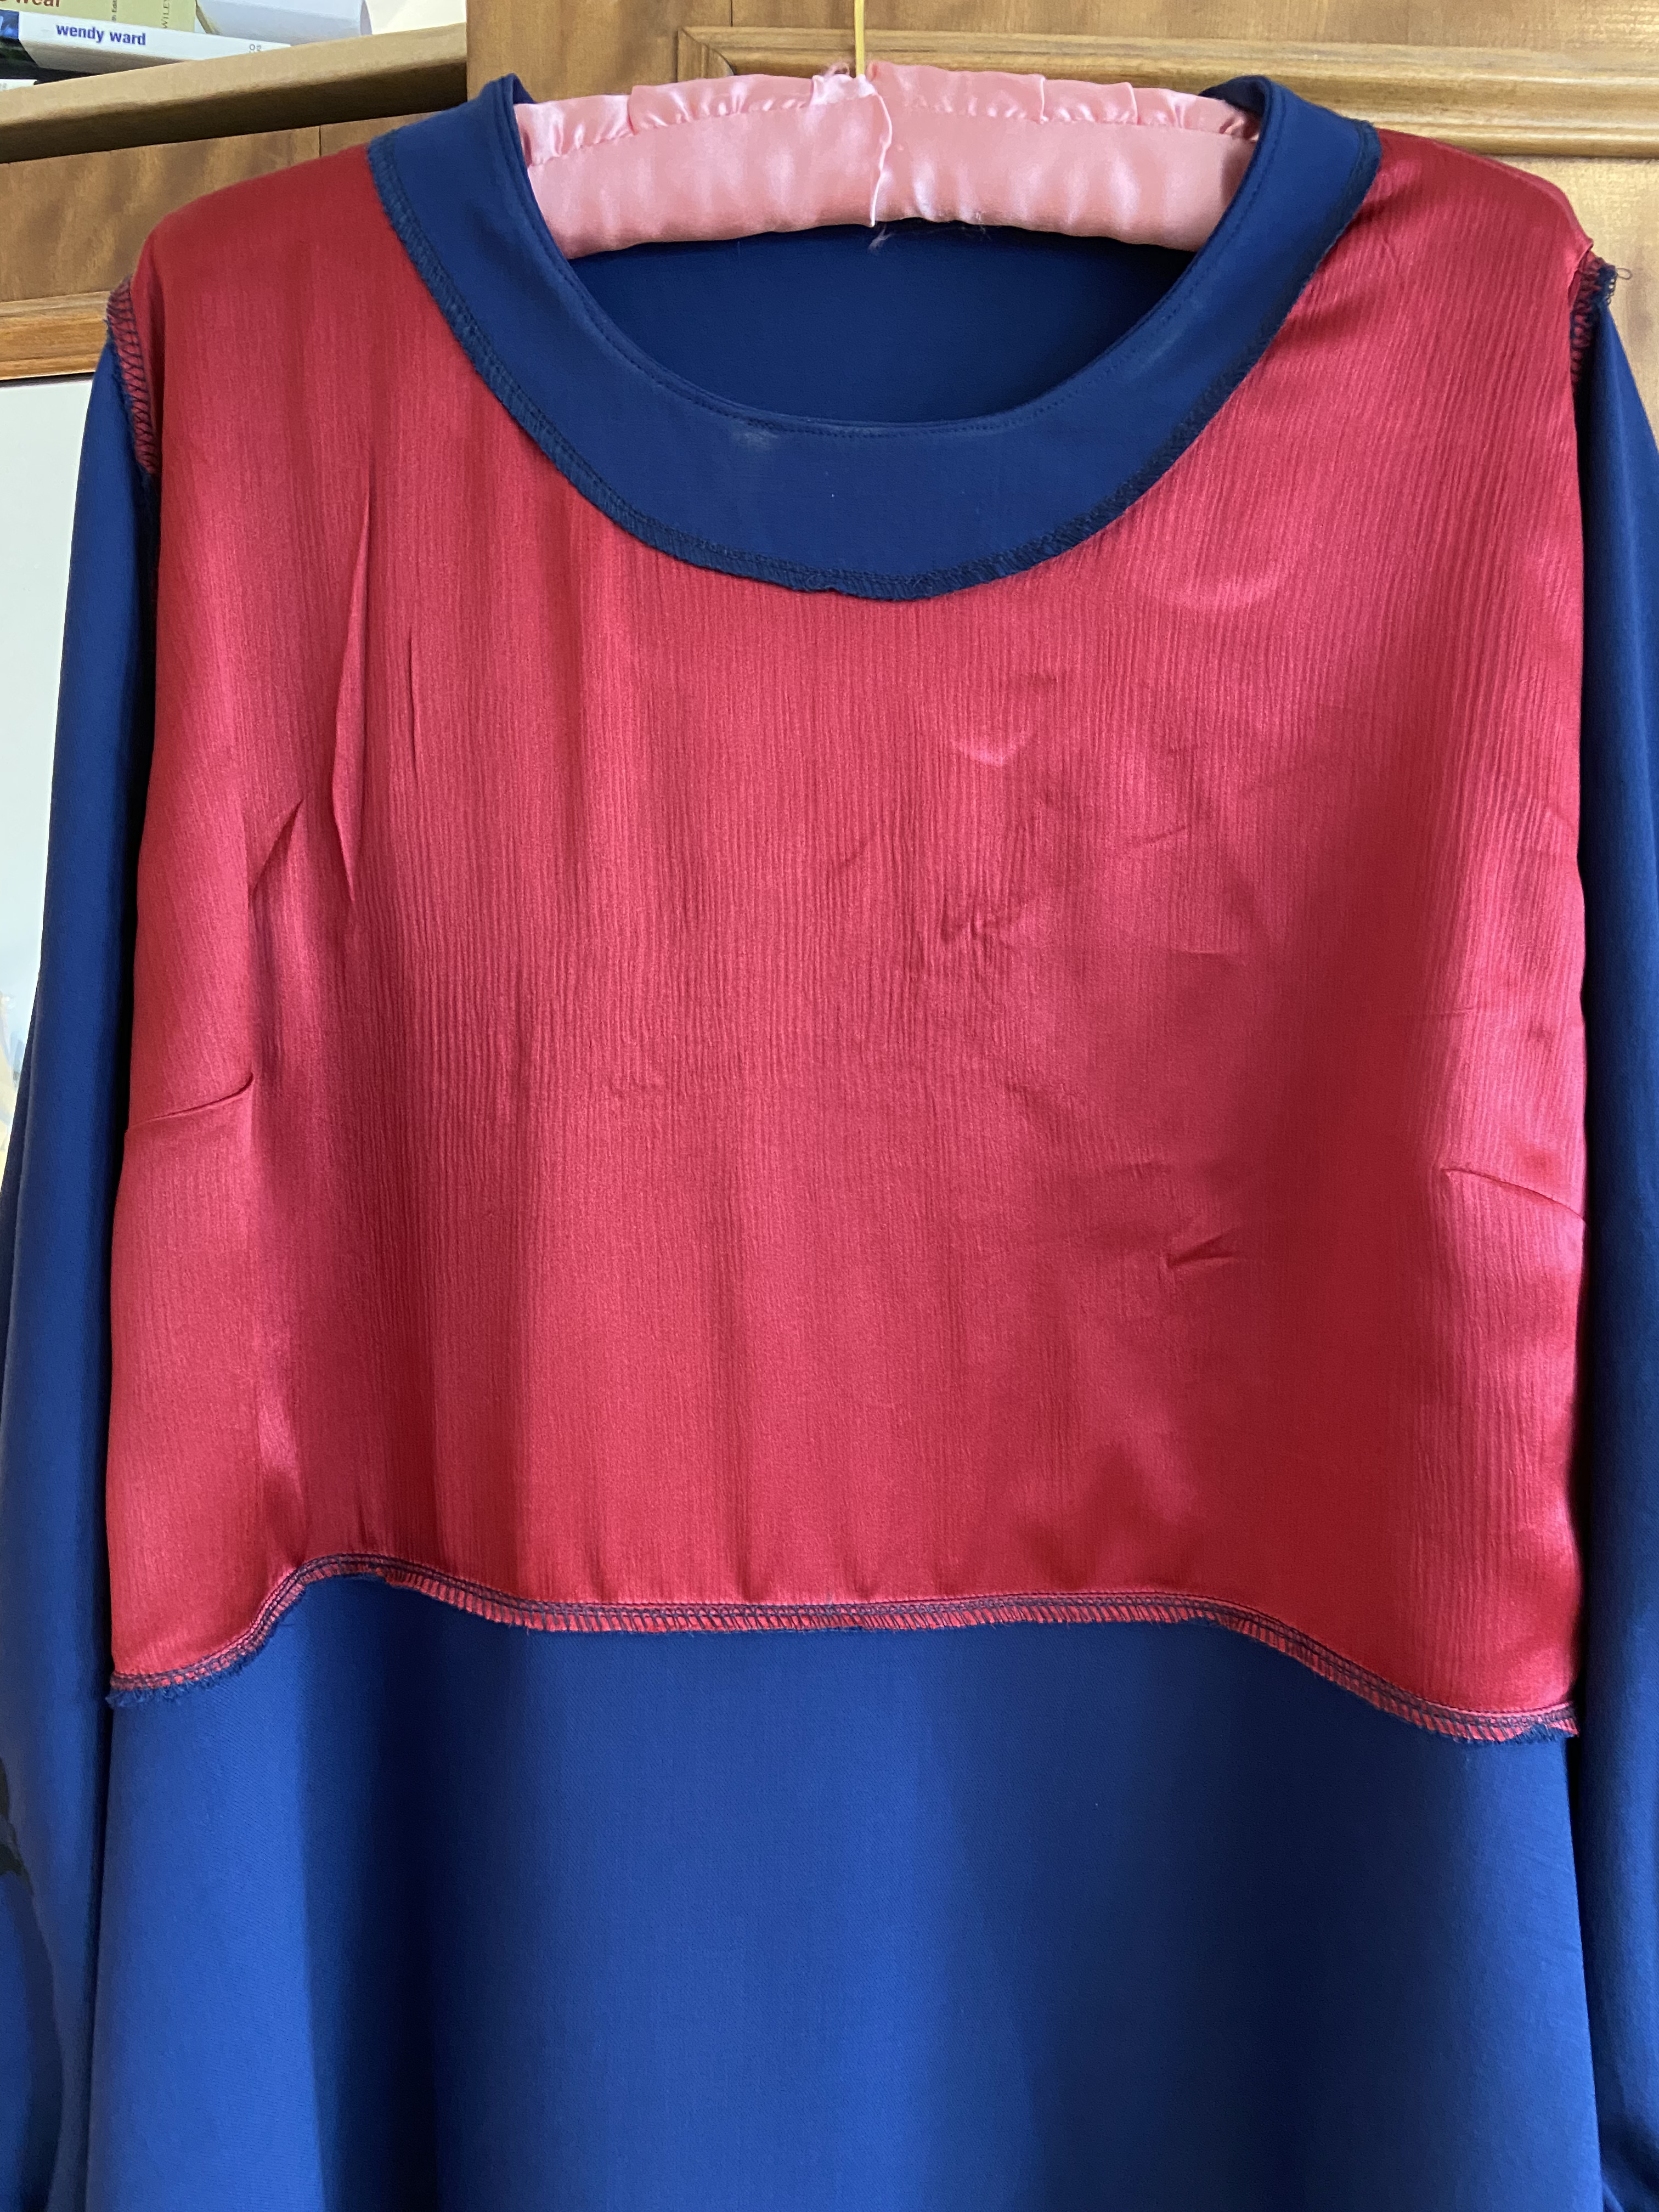
Because the main fabric has a slight stretch, and the lining doesn’t, when sewing the side seams of the bodice lining I used a 1/4” seam allowance instead of 3/8”. This gave me a little wiggle room and seems to have worked fine.
I didn’t line the skirt because it is opaque and I find it a pain ironing a fully lined dress. Though I will wear a slip under it if it ends up sticking to my tights.
After I had done my adjustments, I could get the dress on over my head. So I cut the bodice pieces and the skirt on the fold omitting the zip.
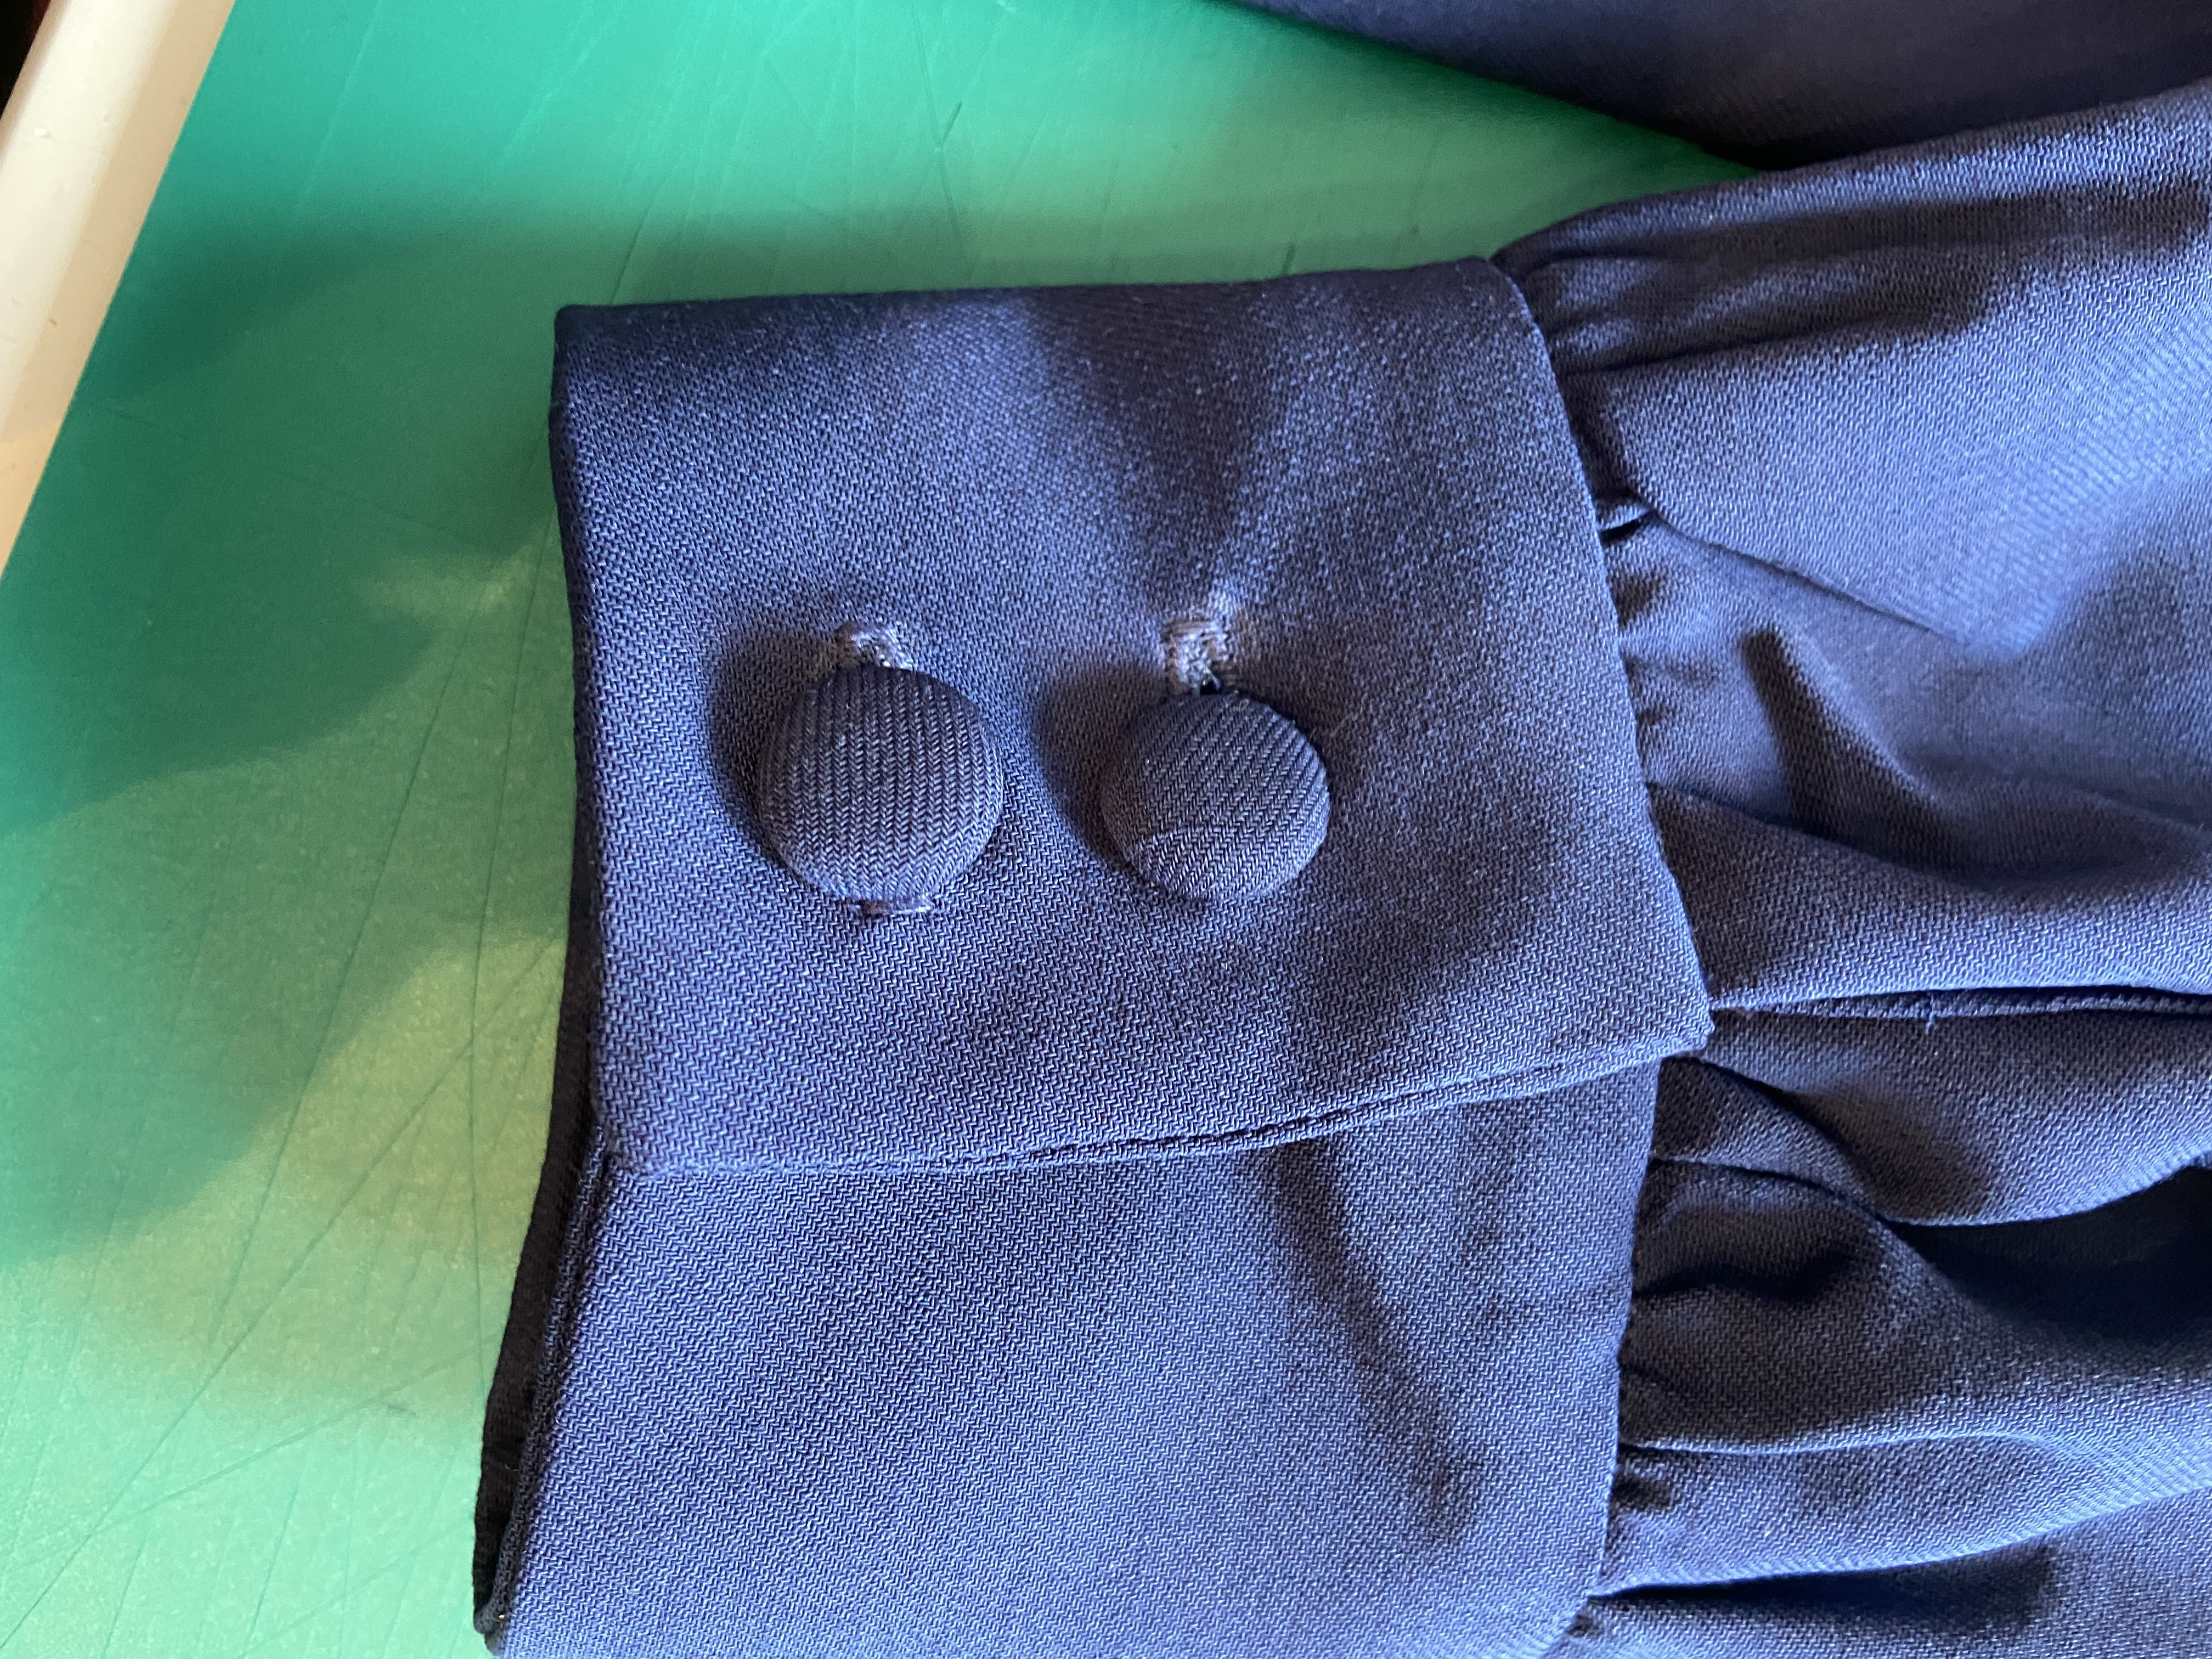
Sleeve plackets
For the sleeve plackets, I used the binding method I learnt on the Muna and Broad Tarawi shirt. The TAL instructions have you kind of fold it over twice and that didn’t appeal to me.
Instead of topstitching the cuff at the wrist, I stitched it in the ditch as I didn’t want machine stitching too obvious; and I did a blind hem on the skirt. To gather the sleeves at the cuffs I used swim elastic. I left a tail on the elastic, marked the length of the cuff; left another tail and marked it for the second cuff. I added the elastic to the sleeve on my serger, stretching the elastic as I went. This made this job really easy, I wouldn’t fancy gathering all that wool with thread.
I should have used dark interfacing on the wrists instead of the white, because some white threads are showing through on the buttonholes. Lesson learned!
Darts
Technically, the darts are too high on my final version but the shape is still good; and looking at other people’s versions their darts are quite high too. I think it’s because this dart starts lower and is at a more acute angle than usual. Also, it stops way before the centre of the bust.
I risked not doing a toile of the skirt but just holding it up to me. I graded it from XL at the waist to XXL at the hem. I was worried I would have a swayback, but no! I love the finished version of this dress as it fits me without being anyway clingy.
Changes I made:
• Forward shoulder
• Narrow shoulder
• Reduce armscye dept by bringing bodice in 1” at side seams (total of 4”); and raising shoulder seams .5”
• Raised back neckline
• Lowered front neckline
It’s hard to say with all the changes but I’d say the final bodice is nearer to XL than XXL.
Interestingly, I didn’t need a full bust adjustment.
My measurements are: HB40; B46-47; W40-41; H50-51.
This pattern goes up to 3XL – a ‘seat’ size of 54.7”

Your dress is gorgeous, and the color is absolutely smashing on you. (And with your boots – !!!)
A hint for the white of interfacing showing through the buttonhole stitches: I bought a set of indelible markers (Sharpie brand in the USA) and apply to the inside of the buttonhole lips, matching the color to the buttonhole thread. Works a treat.
LikeLiked by 1 person
Thank you!
LikeLike
Thank you for the great tip. I must do that.
LikeLike