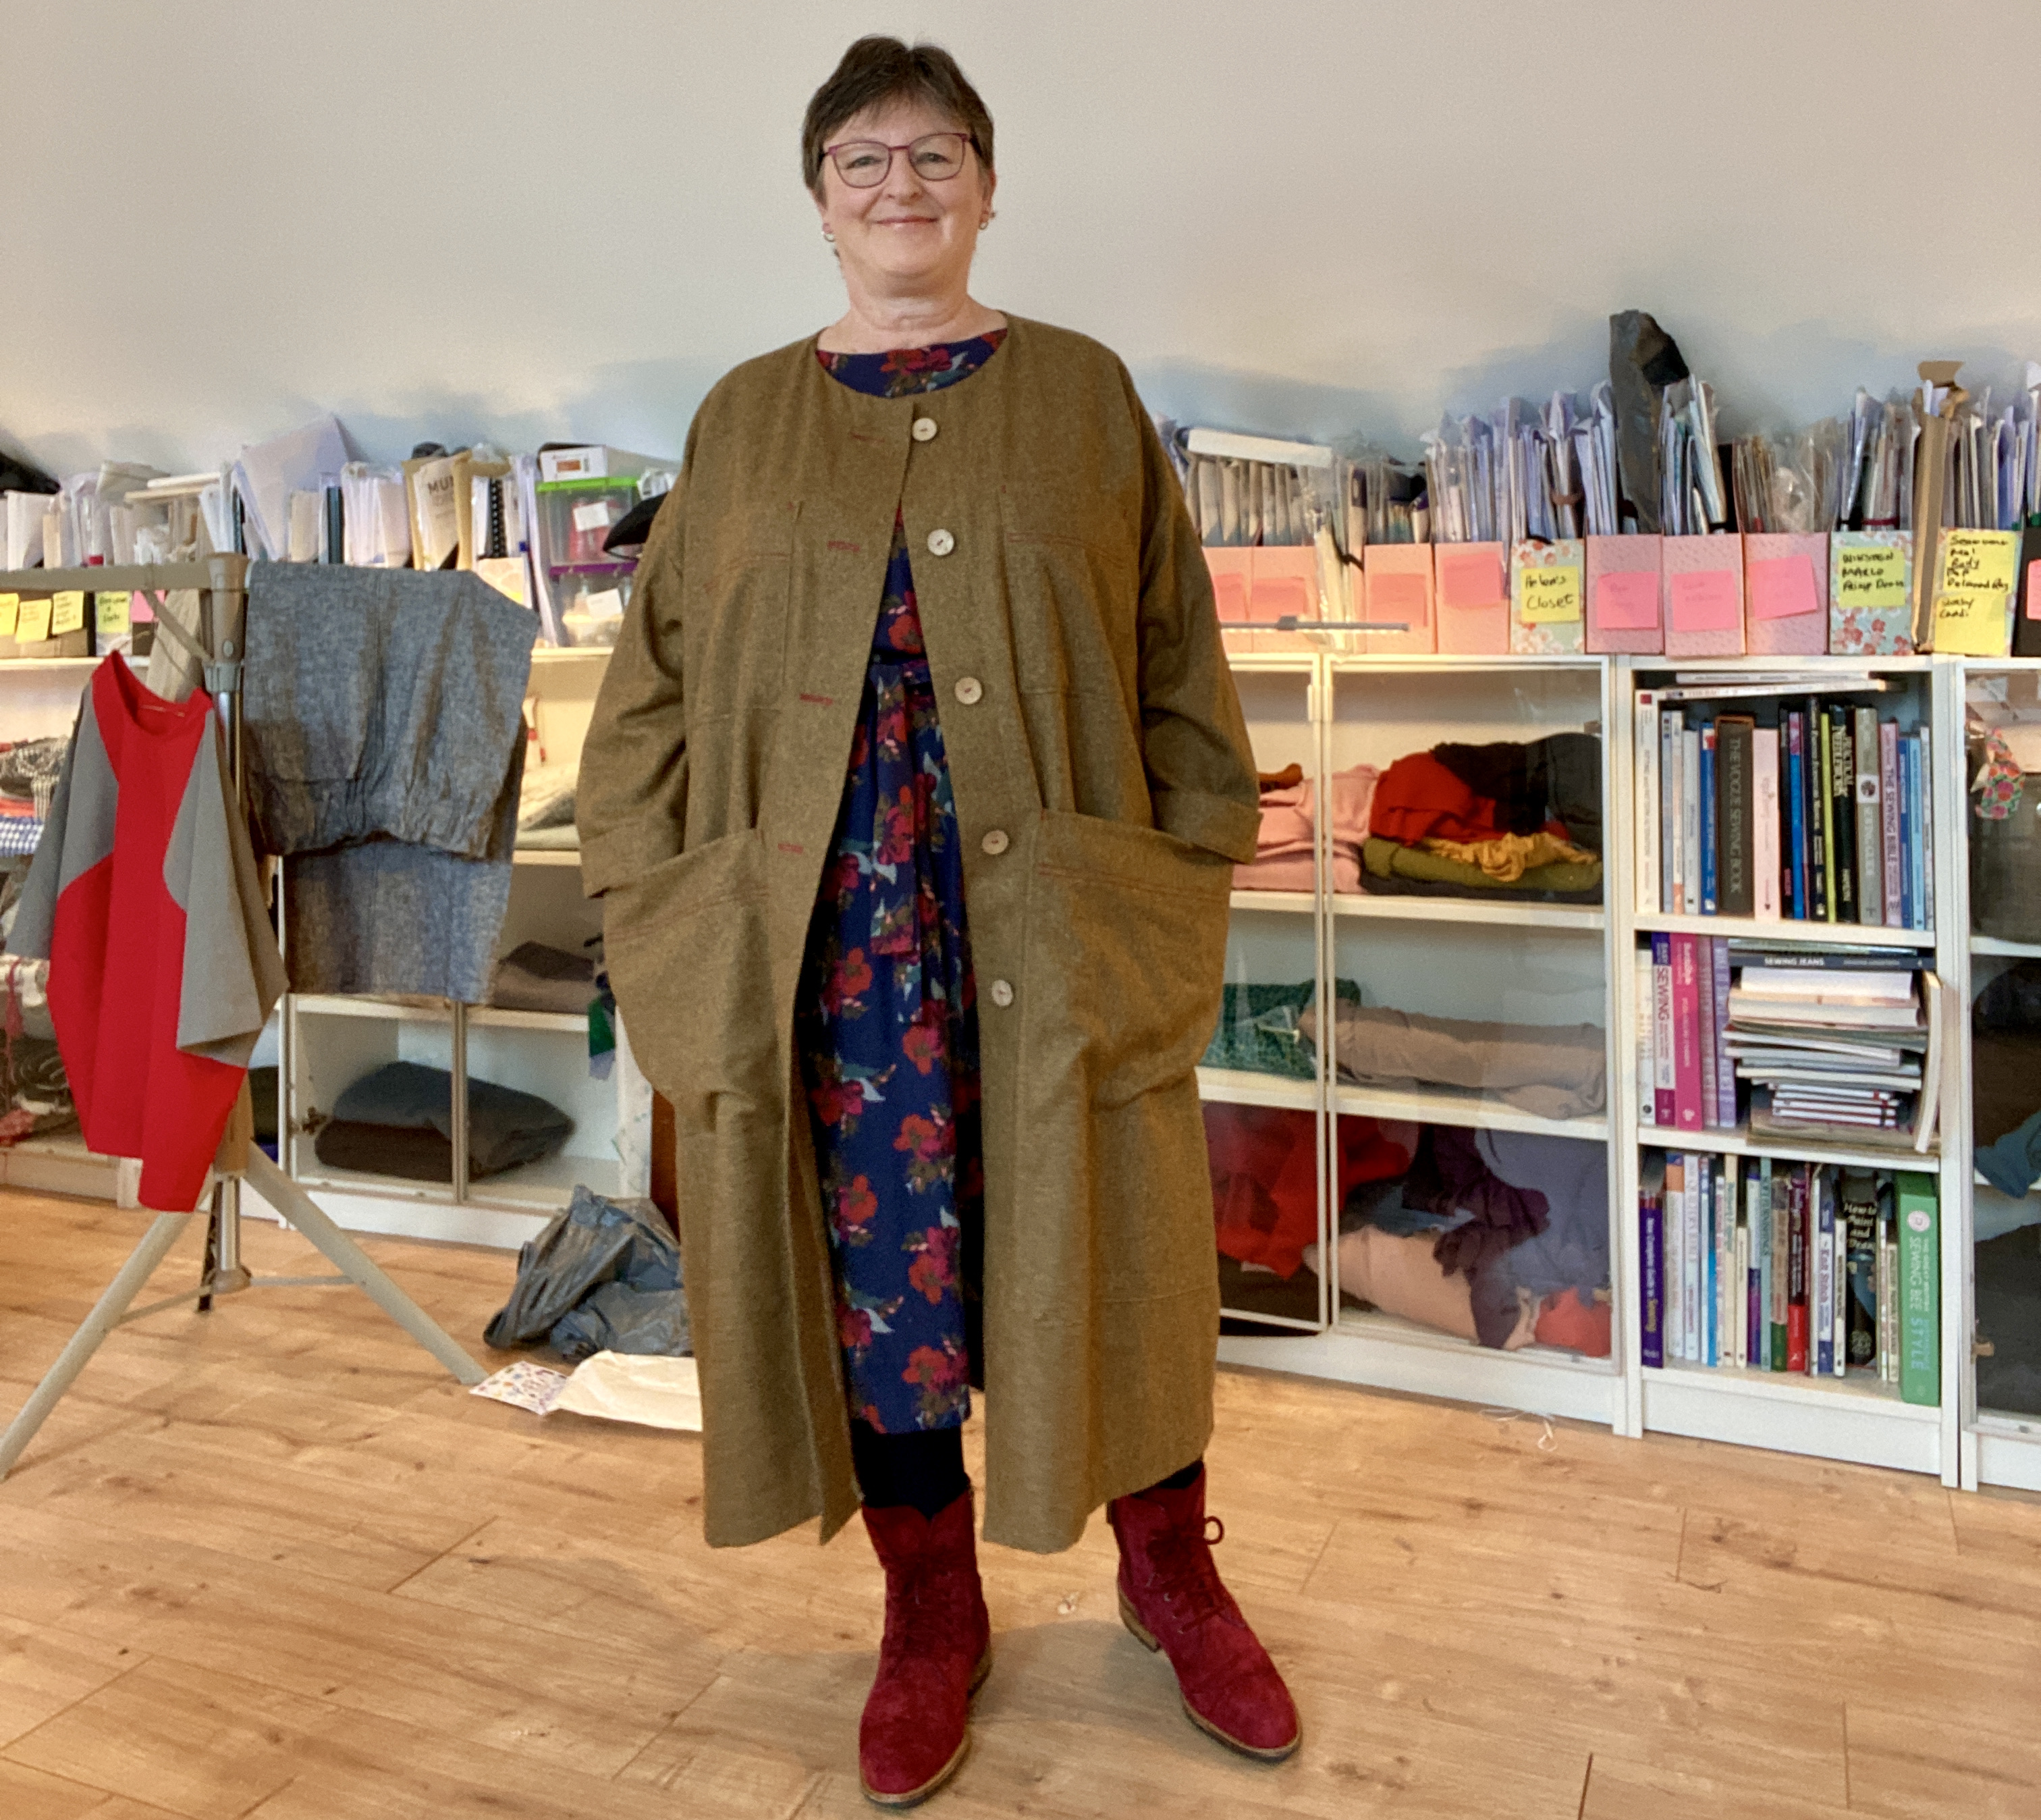
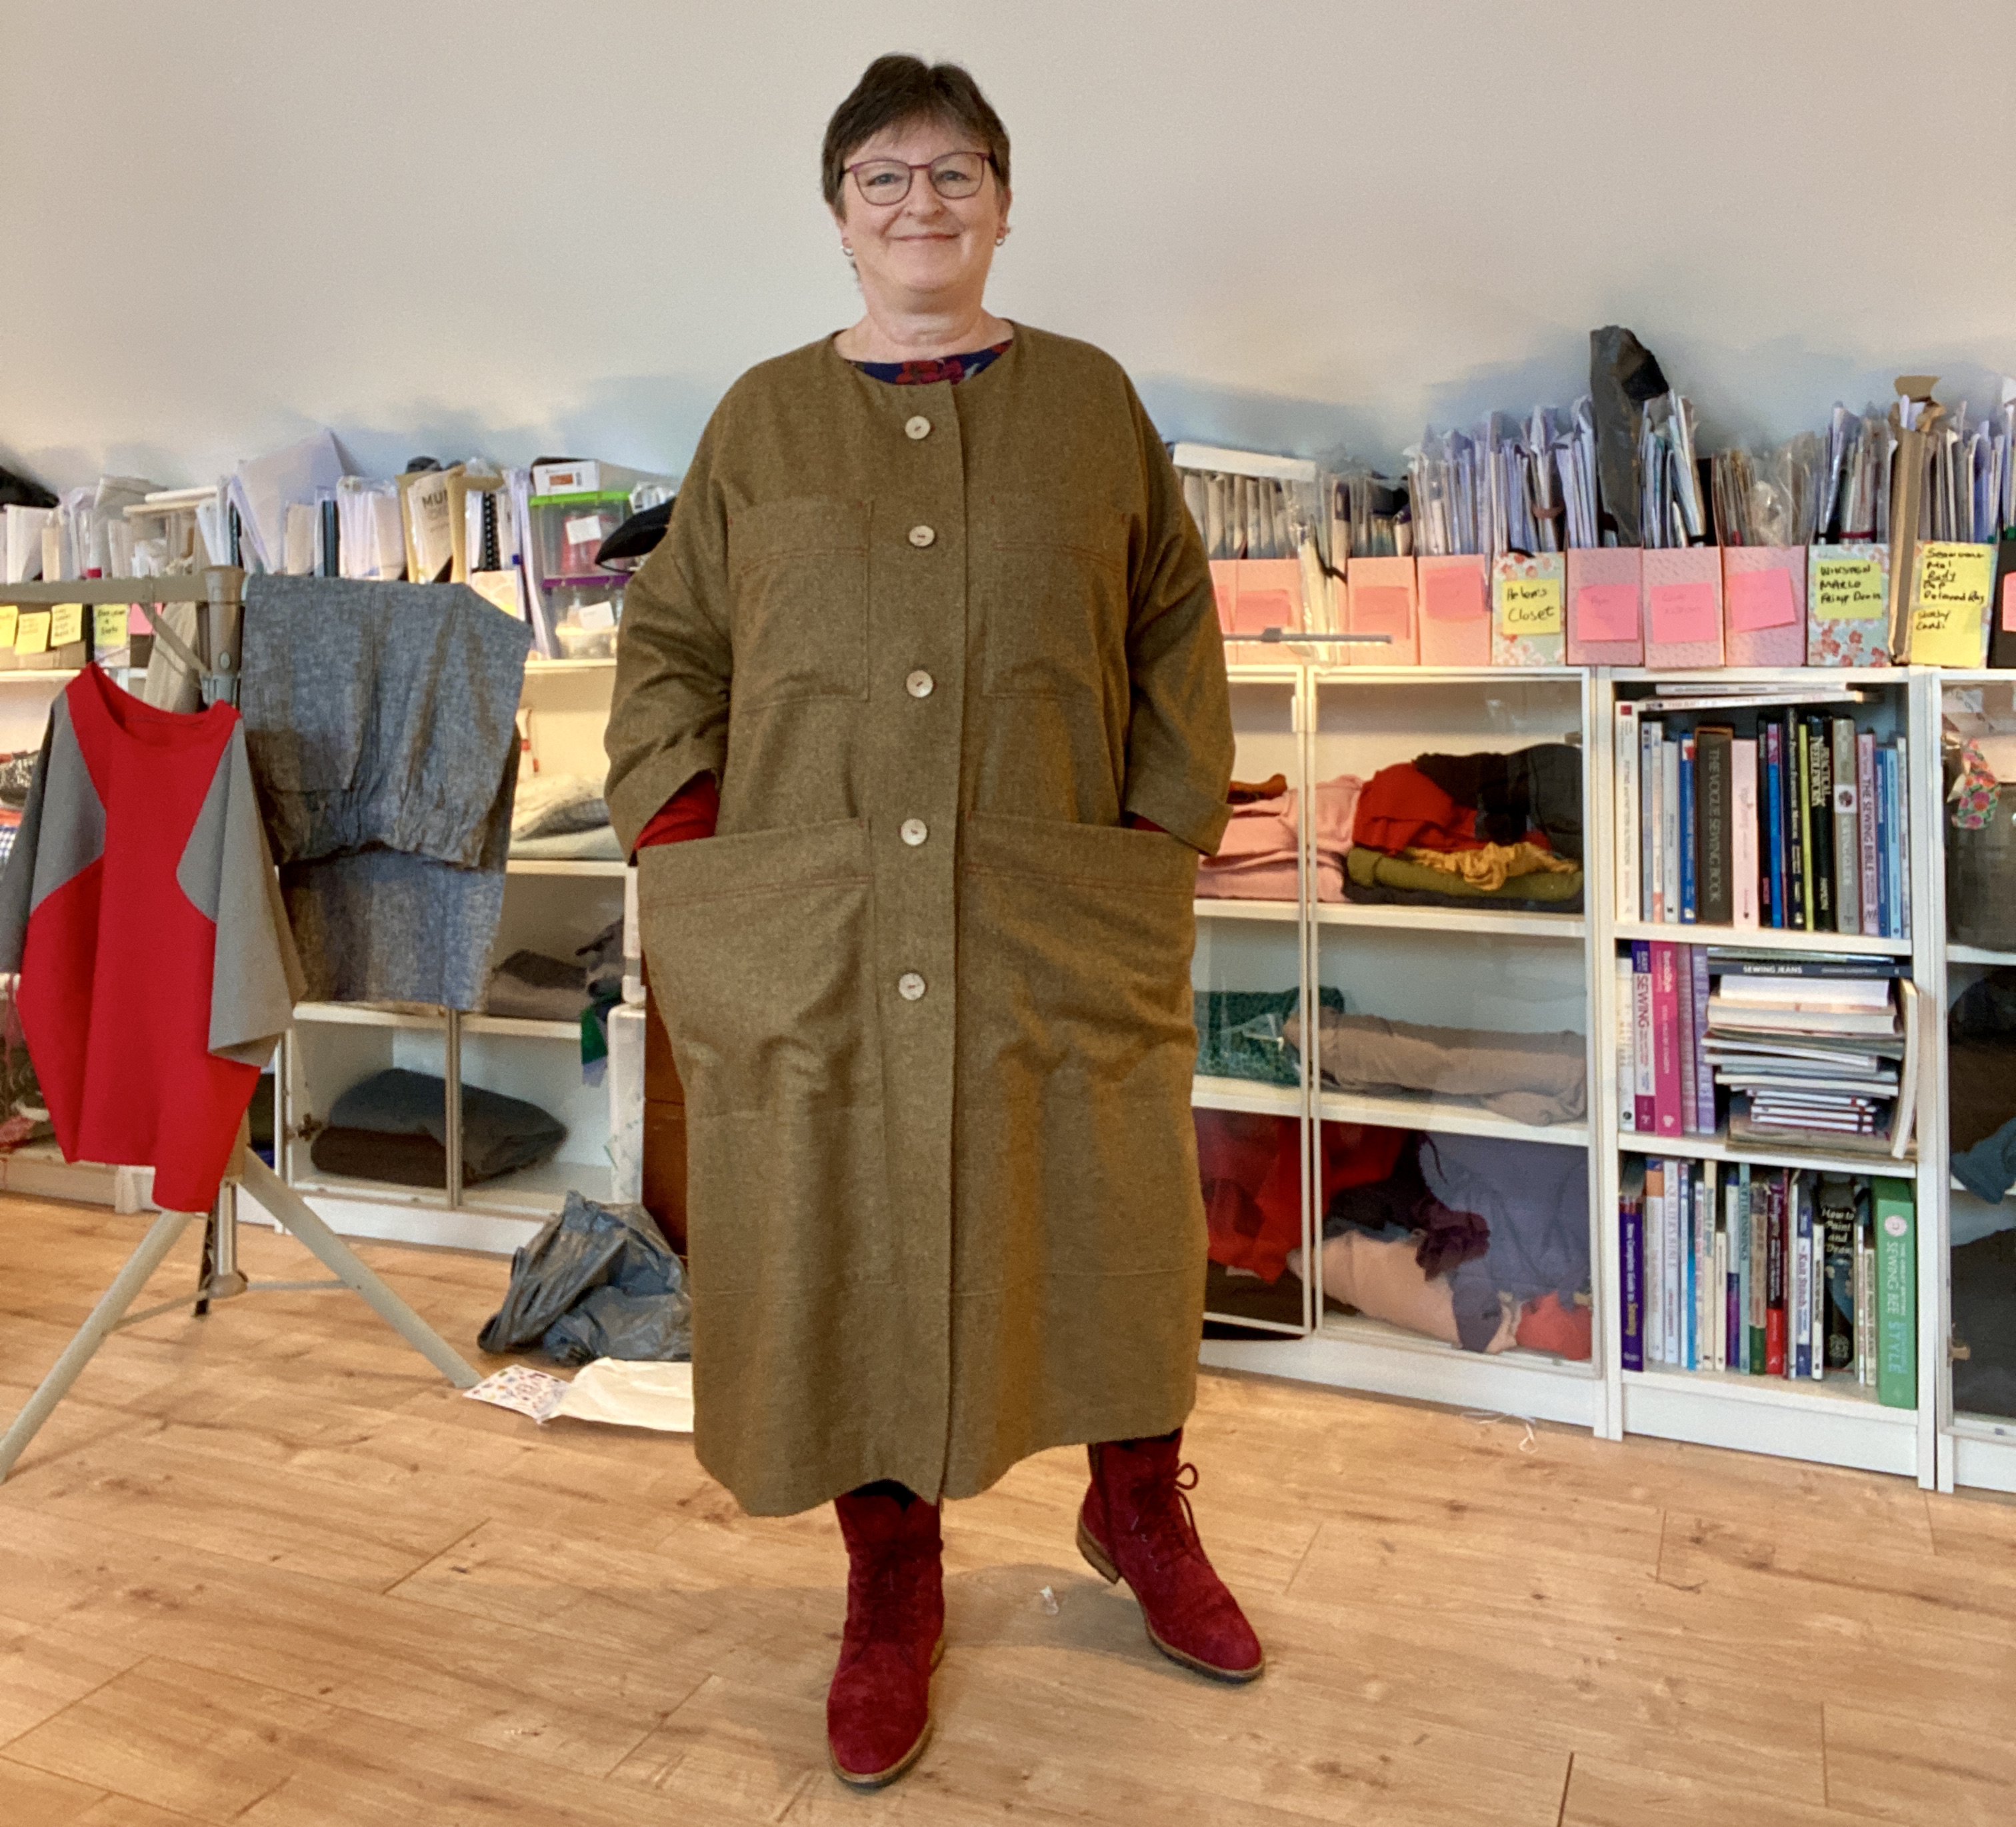
I’m really pleased with this wool Lab Coat from The Assembly Line. It’s made in this beautiful soft wool kindly gifted to me by Minerva and will be perfect for autumn and spring. It’s really wearable, I can add layers and it’s cosy. It’s just the right length to go over a lot of my dresses and is really comfy on.
https://www.minerva.com/mp/1230357/lady-mcelroy-donegal-tweed-coating-fabric-brown
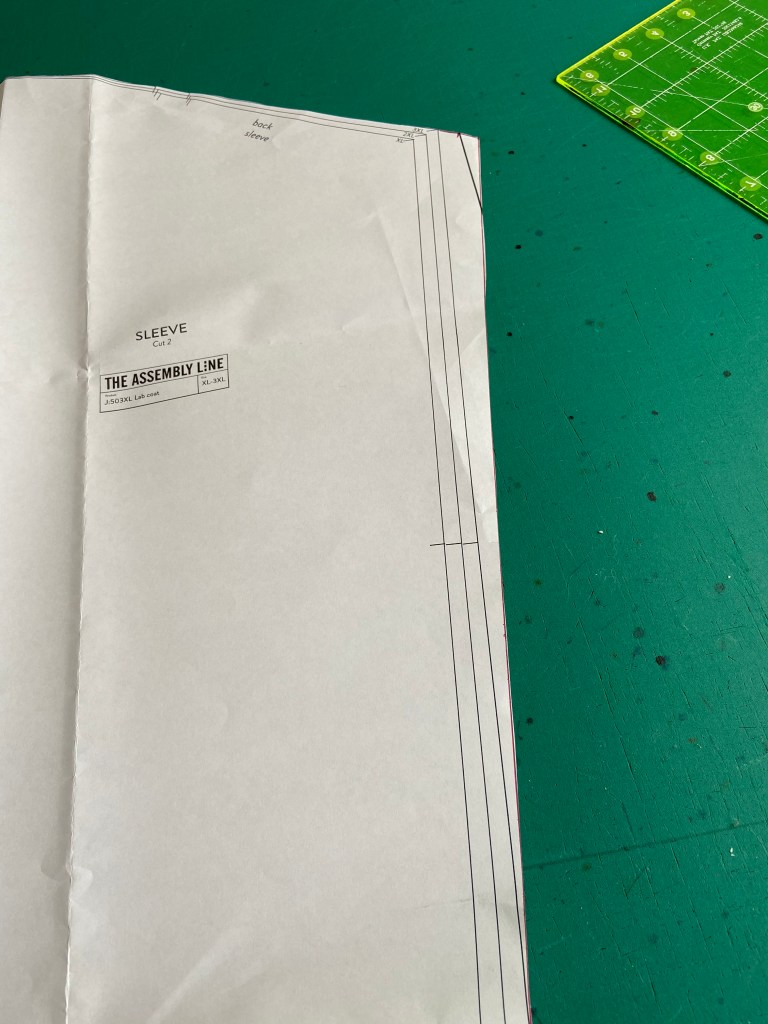
I made very few changes to the pattern. I made size 2XL but I increased the size of the sleeves as I wanted to be able to easily fit clothes underneath.
https://theassemblylineshop.com/products/lab-coat-sewing-pattern
Changes to sleeve width
At the top of the sleeve I added 1” to the 3XL size – this made sleeves 1 1/4” wider on other sides or a total increase to the 2XL of 2.5”. I then measured the sleeve against the armscye, taking account of seam allowances. I lowered where the side seams start to accommodate the larger sleeve. Previously on the armscye I’ve gone out to the larger size, but I find that can give a bit of a bubble below the armhole. And since these armscye are fairly straight it was easy enough to lower them.
And that was the only change!
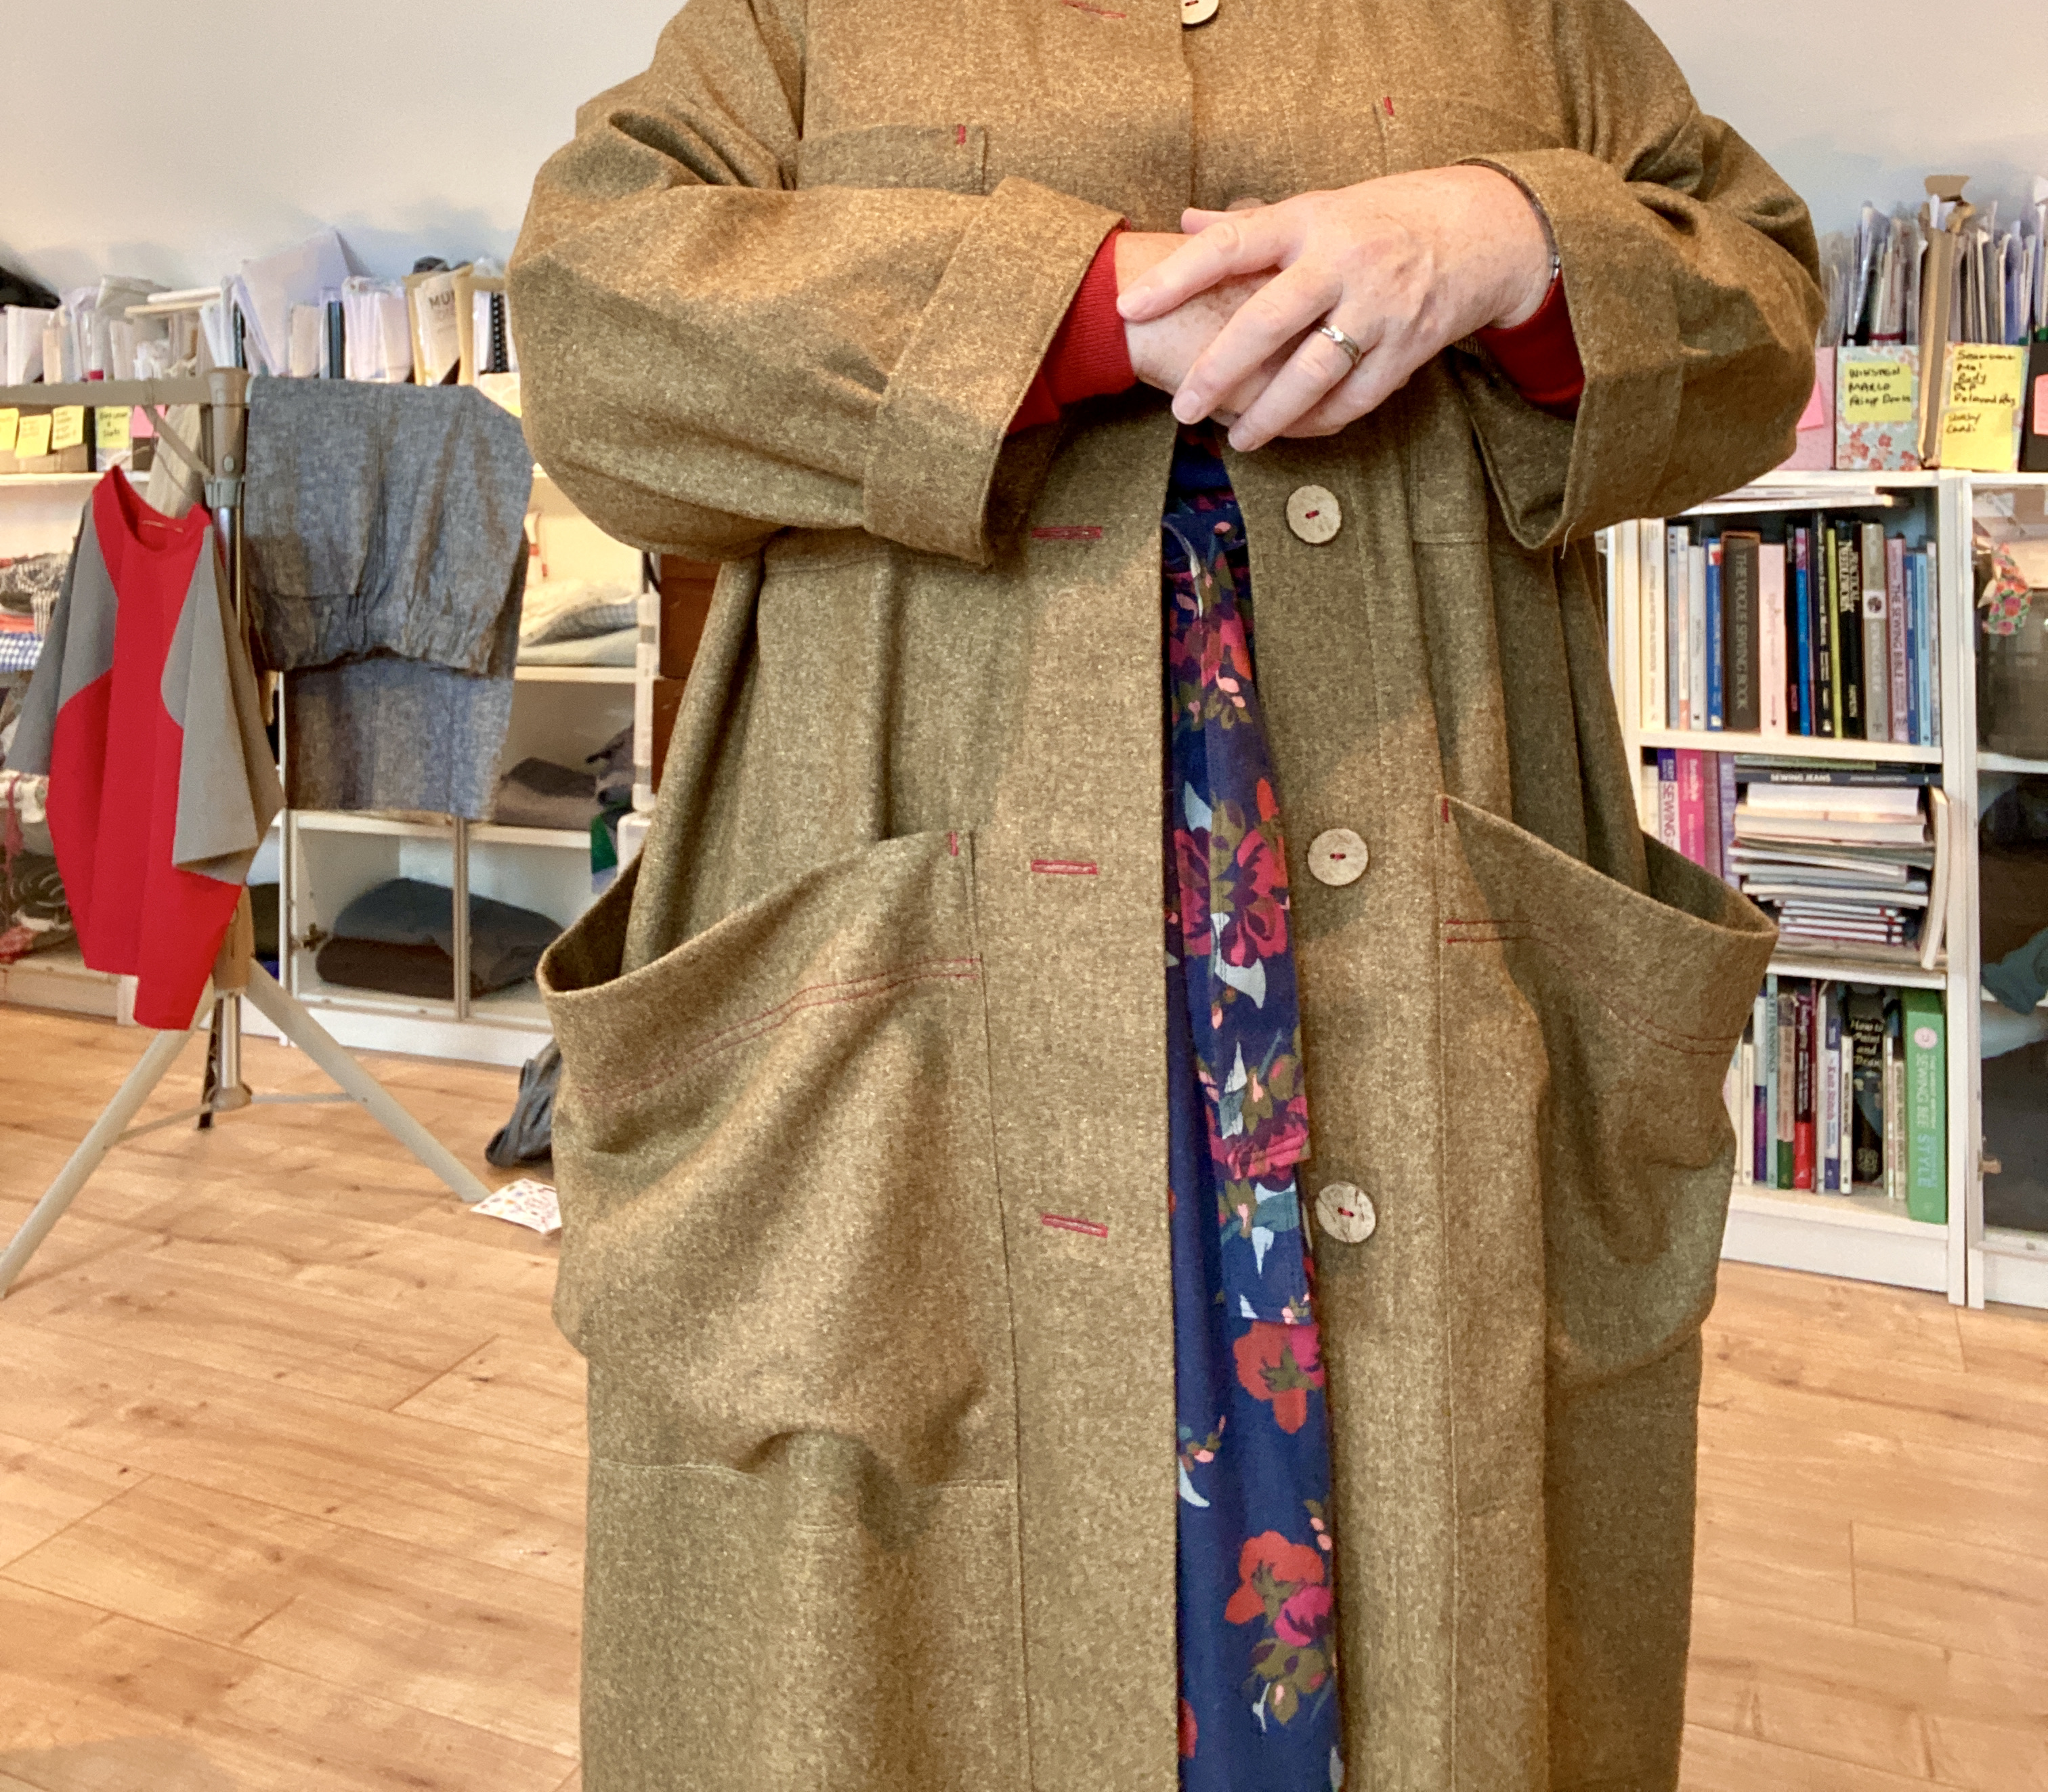
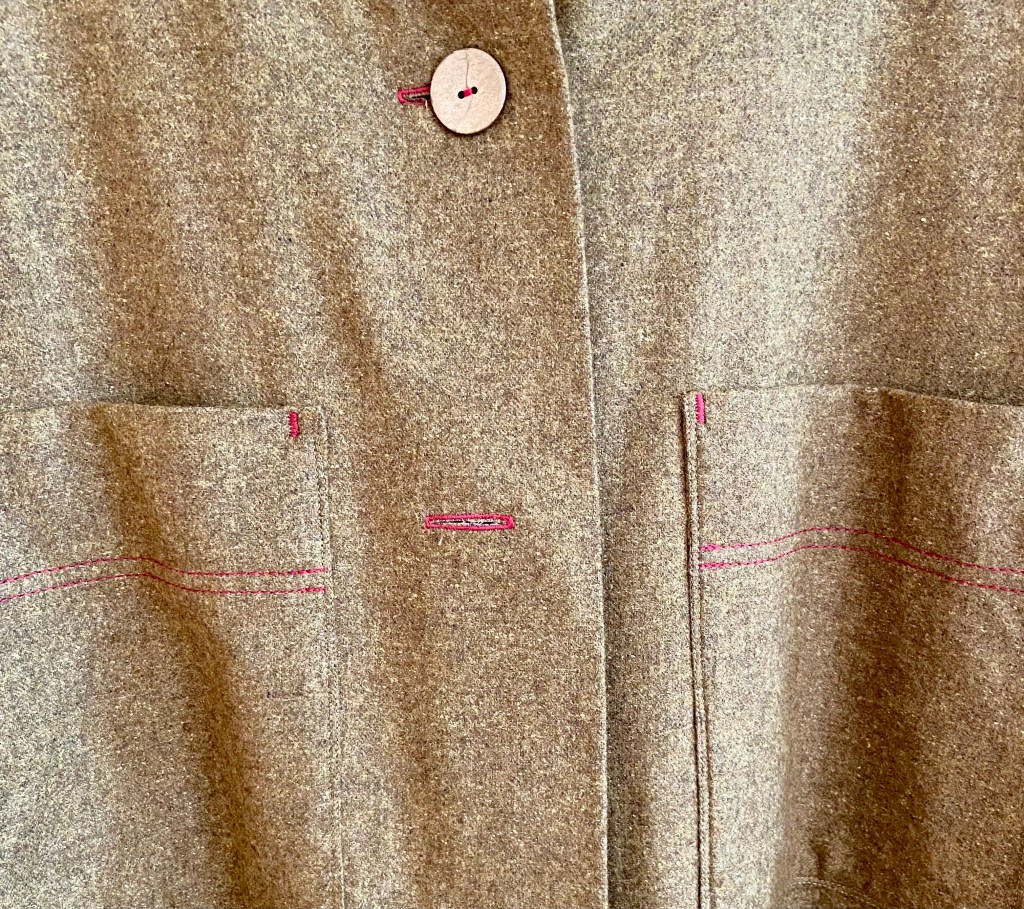
Be prepared for voluminous pockets
The finished pockets have surprised me. The large lower ones bag out a lot because of the really soft wool – less so when the buttons are closed. For the time being I’m just going to treat that as a style option! But I may sew a vertical line to divide it; or add snap fasteners or buttons. If I make this again, I might add zips to the top of these pockets.
Most of instructions good, but some head scratching
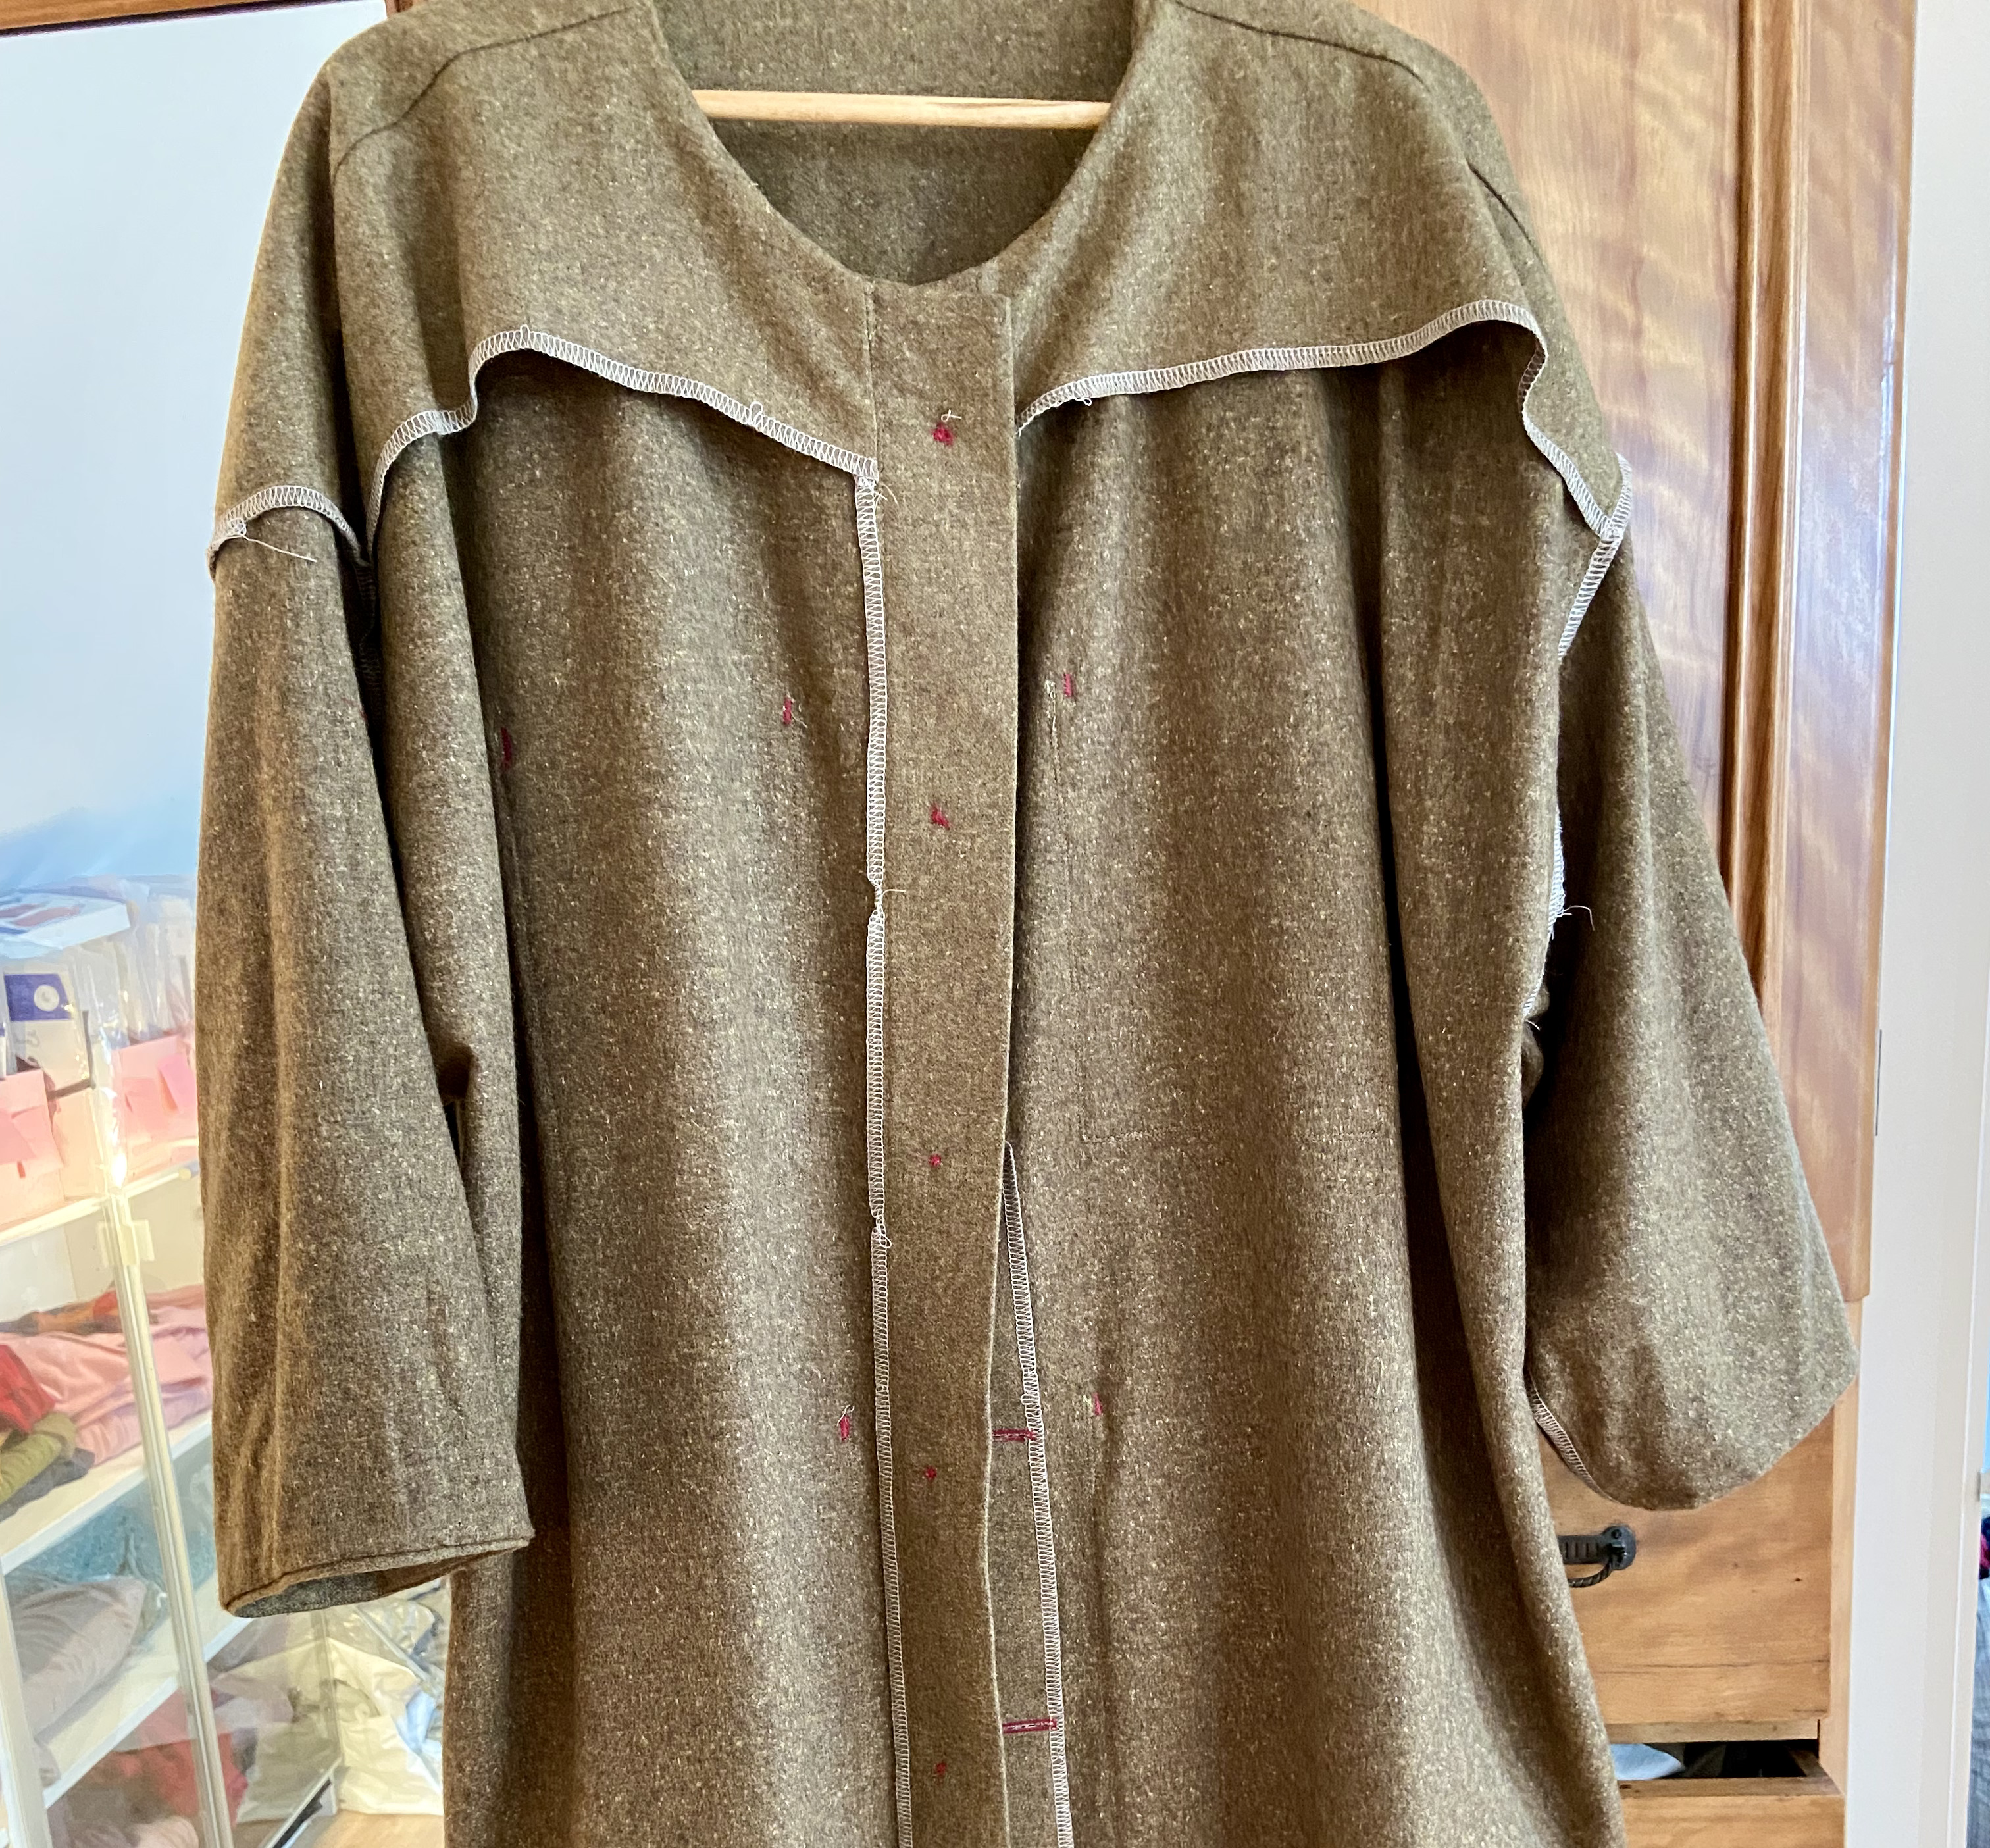
This pattern is well drafted but a couple of times the instructions had me scratching my head. I chose not to use the hidden button placket but to have the buttons on view. I thought it would be nice to break up the expanse of plain fabric and I like the result. The instructions have you at an early stage iron the placket in the position it will finally be in (wrong sides together). But then when sewing the placket you need to reverse this and the pattern says to twist and turn – this had me totally confused. ‘Twist?’. What it means is unfold the ironed placket, and fold it so right sides are together. The illustrations just made me more confused.
The order things are sewn in is different to what I’m used to. And I couldn’t visualise when I could use Hong Kong binding or when things would be turned under later. So I just serged as instructed. If I were to sew this again I would use Hong Kong binding or else line the coat.
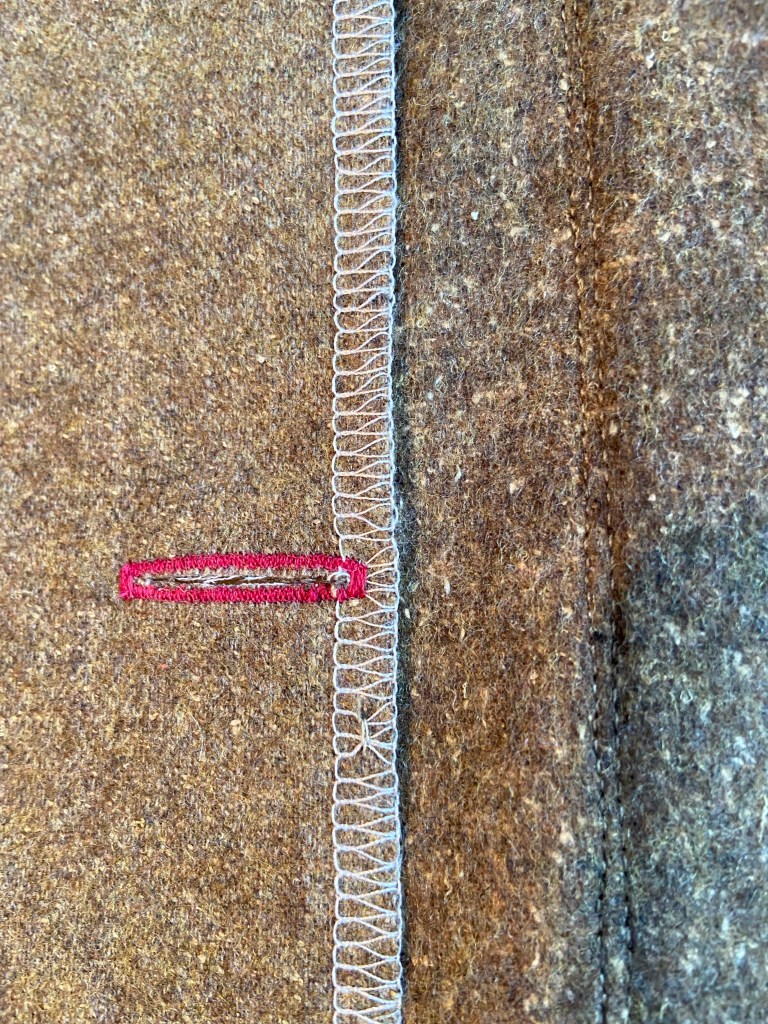
Red highlights
I used red thread for bartacks, buttons, buttonholes and some of the top-stitching.
Button placket not quite what I expected
I didn’t top-stitch the inner edge of the button placket with the buttonholes, because even though I measured very carefully the buttonholes ended up just beyond the placket on the inside. I hand sewed the placket to the coat below the buttonholes, and just let the buttonholes do the work above that.
The instructions don’t say to under stitch the neck yoke but I did this. I also basted the front yokes to the sleeves before sewing them on to stop them flapping around.
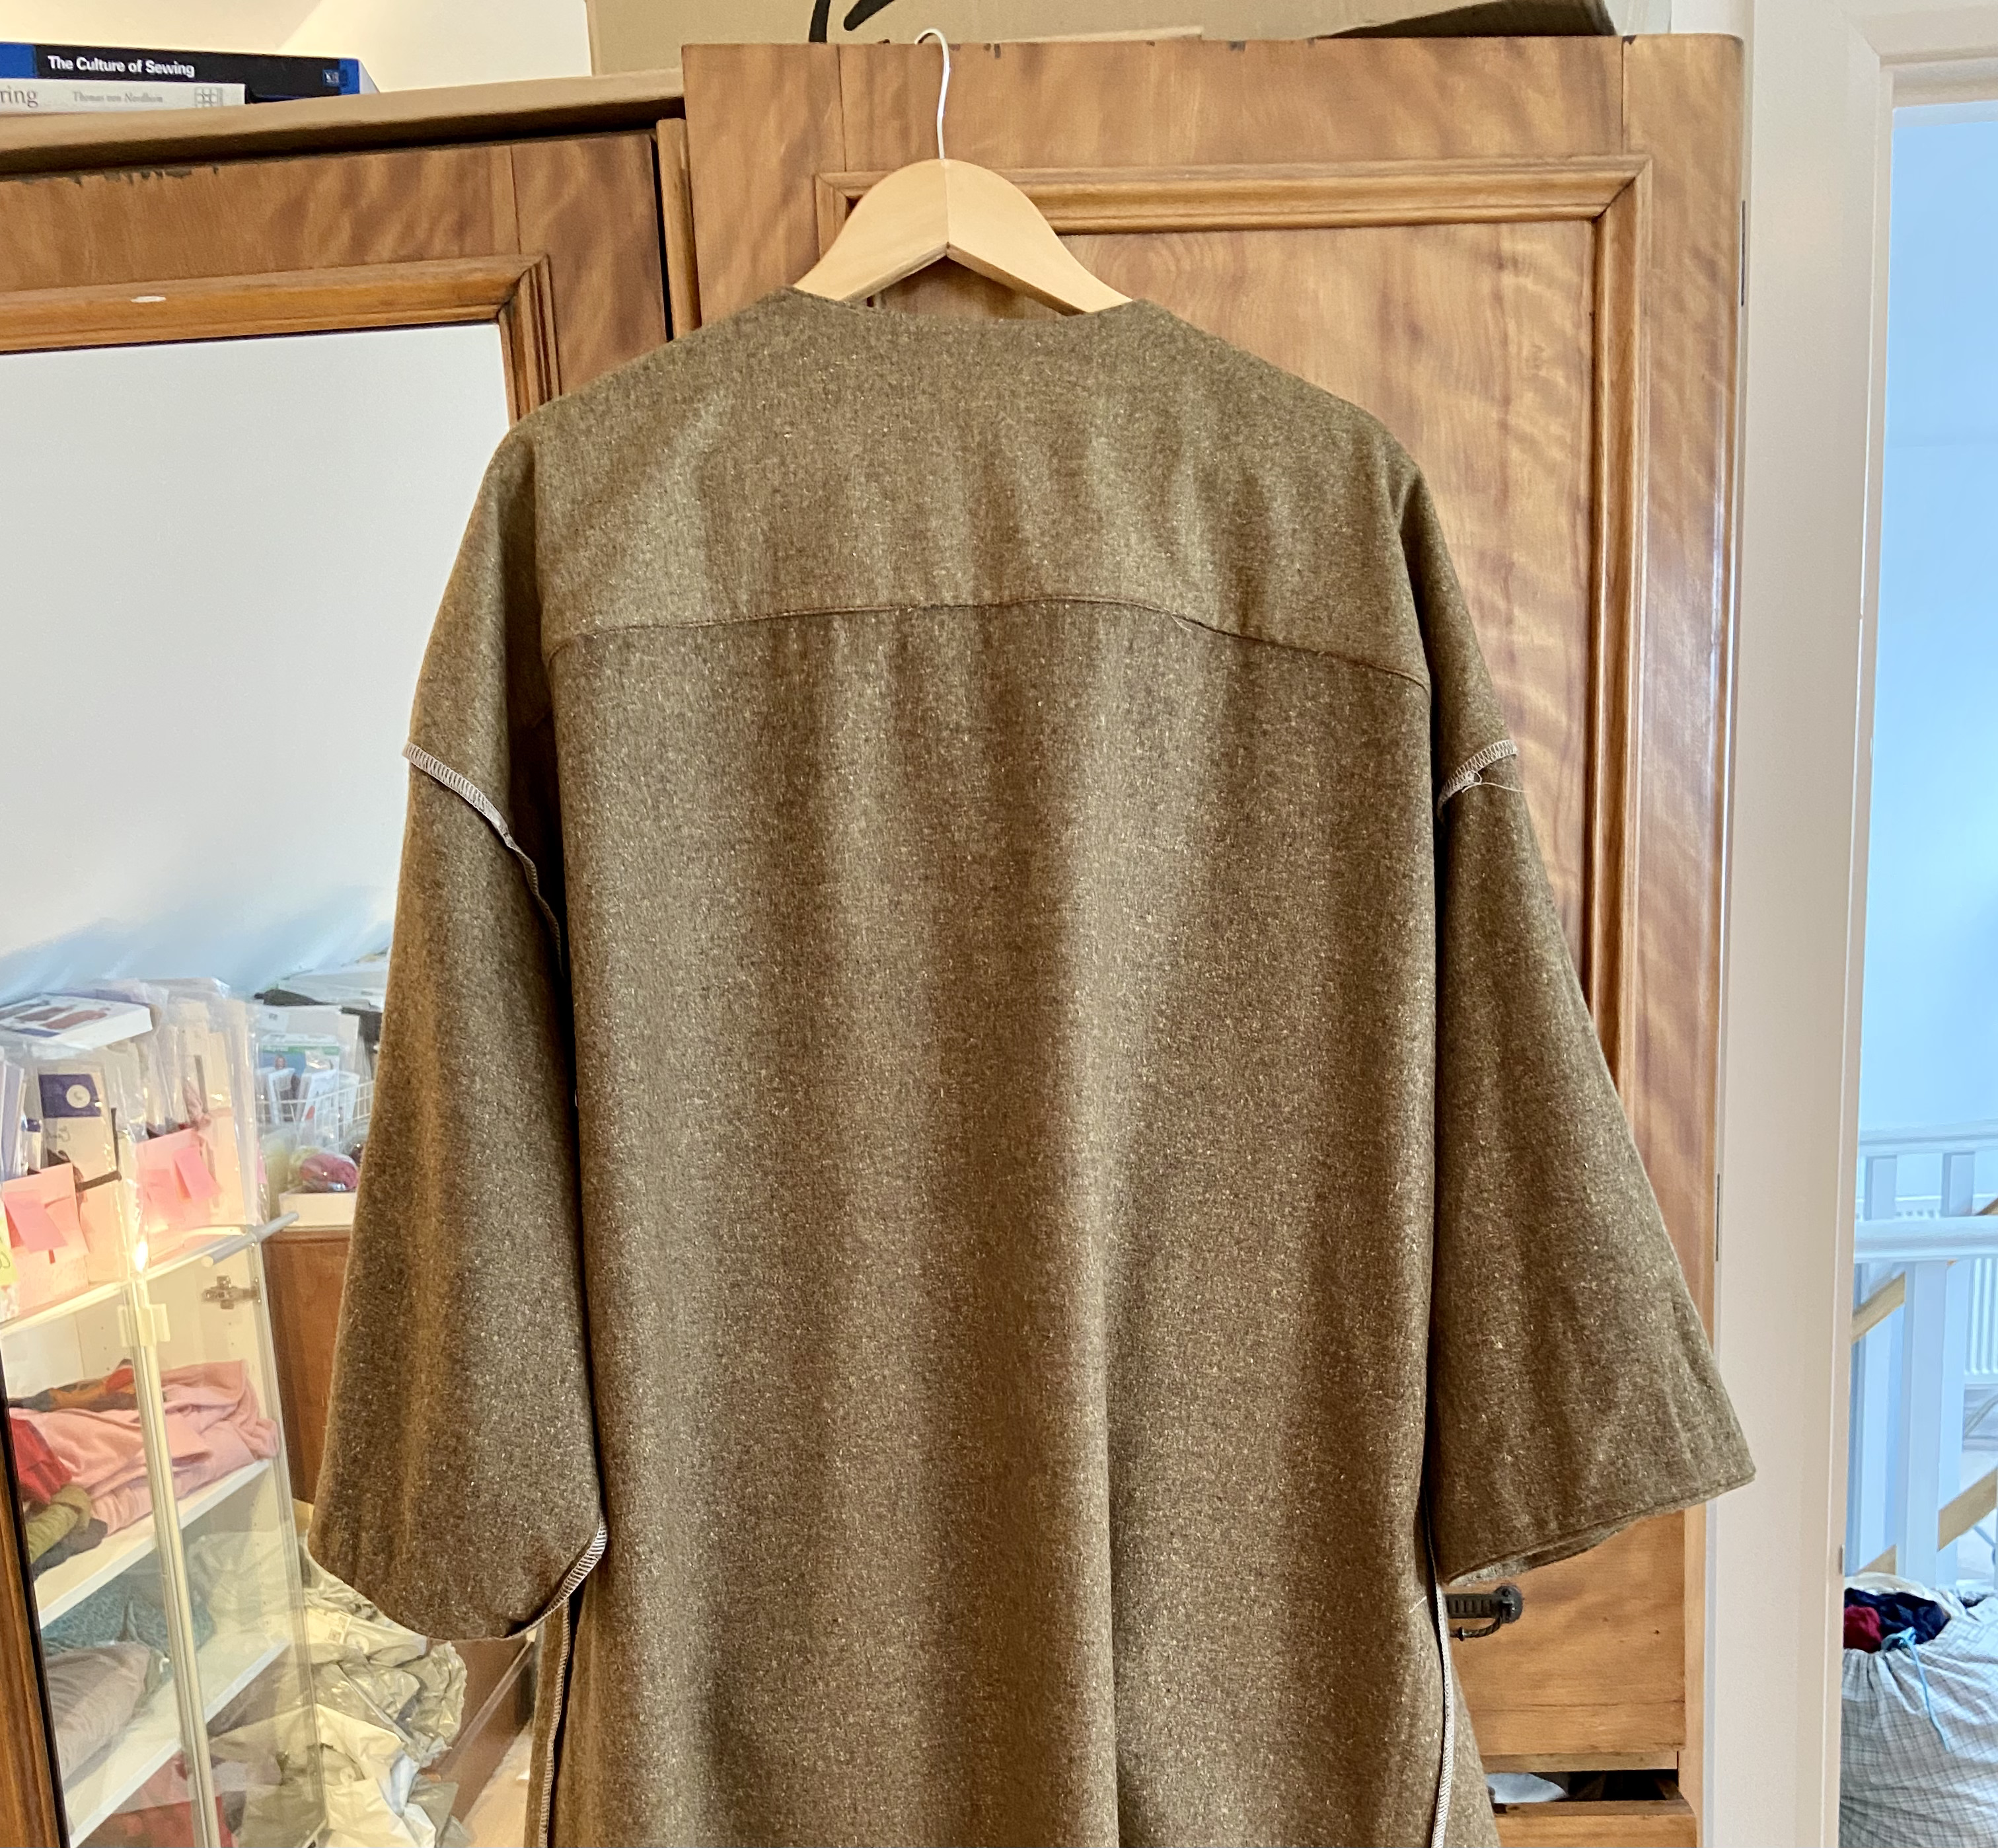
I guessed the sleeves would be a little long for me, but I didn’t shorten. Instead, I made a deep hem and turn them back as cuffs.
This coat goes up to bust 54”, waist 49”, hip 54.7”.
