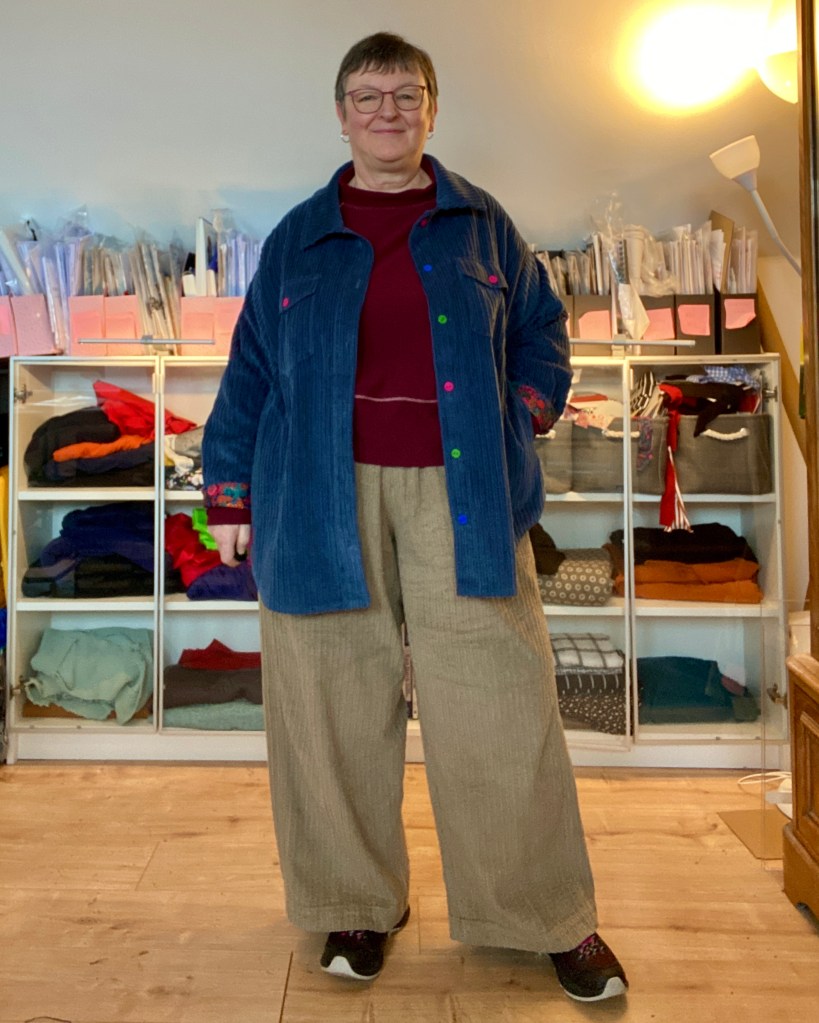
I’m really happy with this Shoalhaven Shacket from Muna and Broad – a mashup of three M&B patterns. This is my third version of the Shacket and while it’s a year or more since I made the last one, I could follow along easily with the instructions. The first time (2021) I had never made a collar or cuffs before and so assiduously followed Leila’s (one half of M&B) excellent free tutorials on YouTube.
Since then I have made several M&B Tarawi shirts for myself and other shirts for my husband. I promise, shirt-making does get easier as you go along! I highly recommend labelling everything as you cut out with masking tape. Especially the collar, which has a stand, stand lining, under collar and collar. It’s very easy to get mixed up otherwise. And the collar notches are vital too.

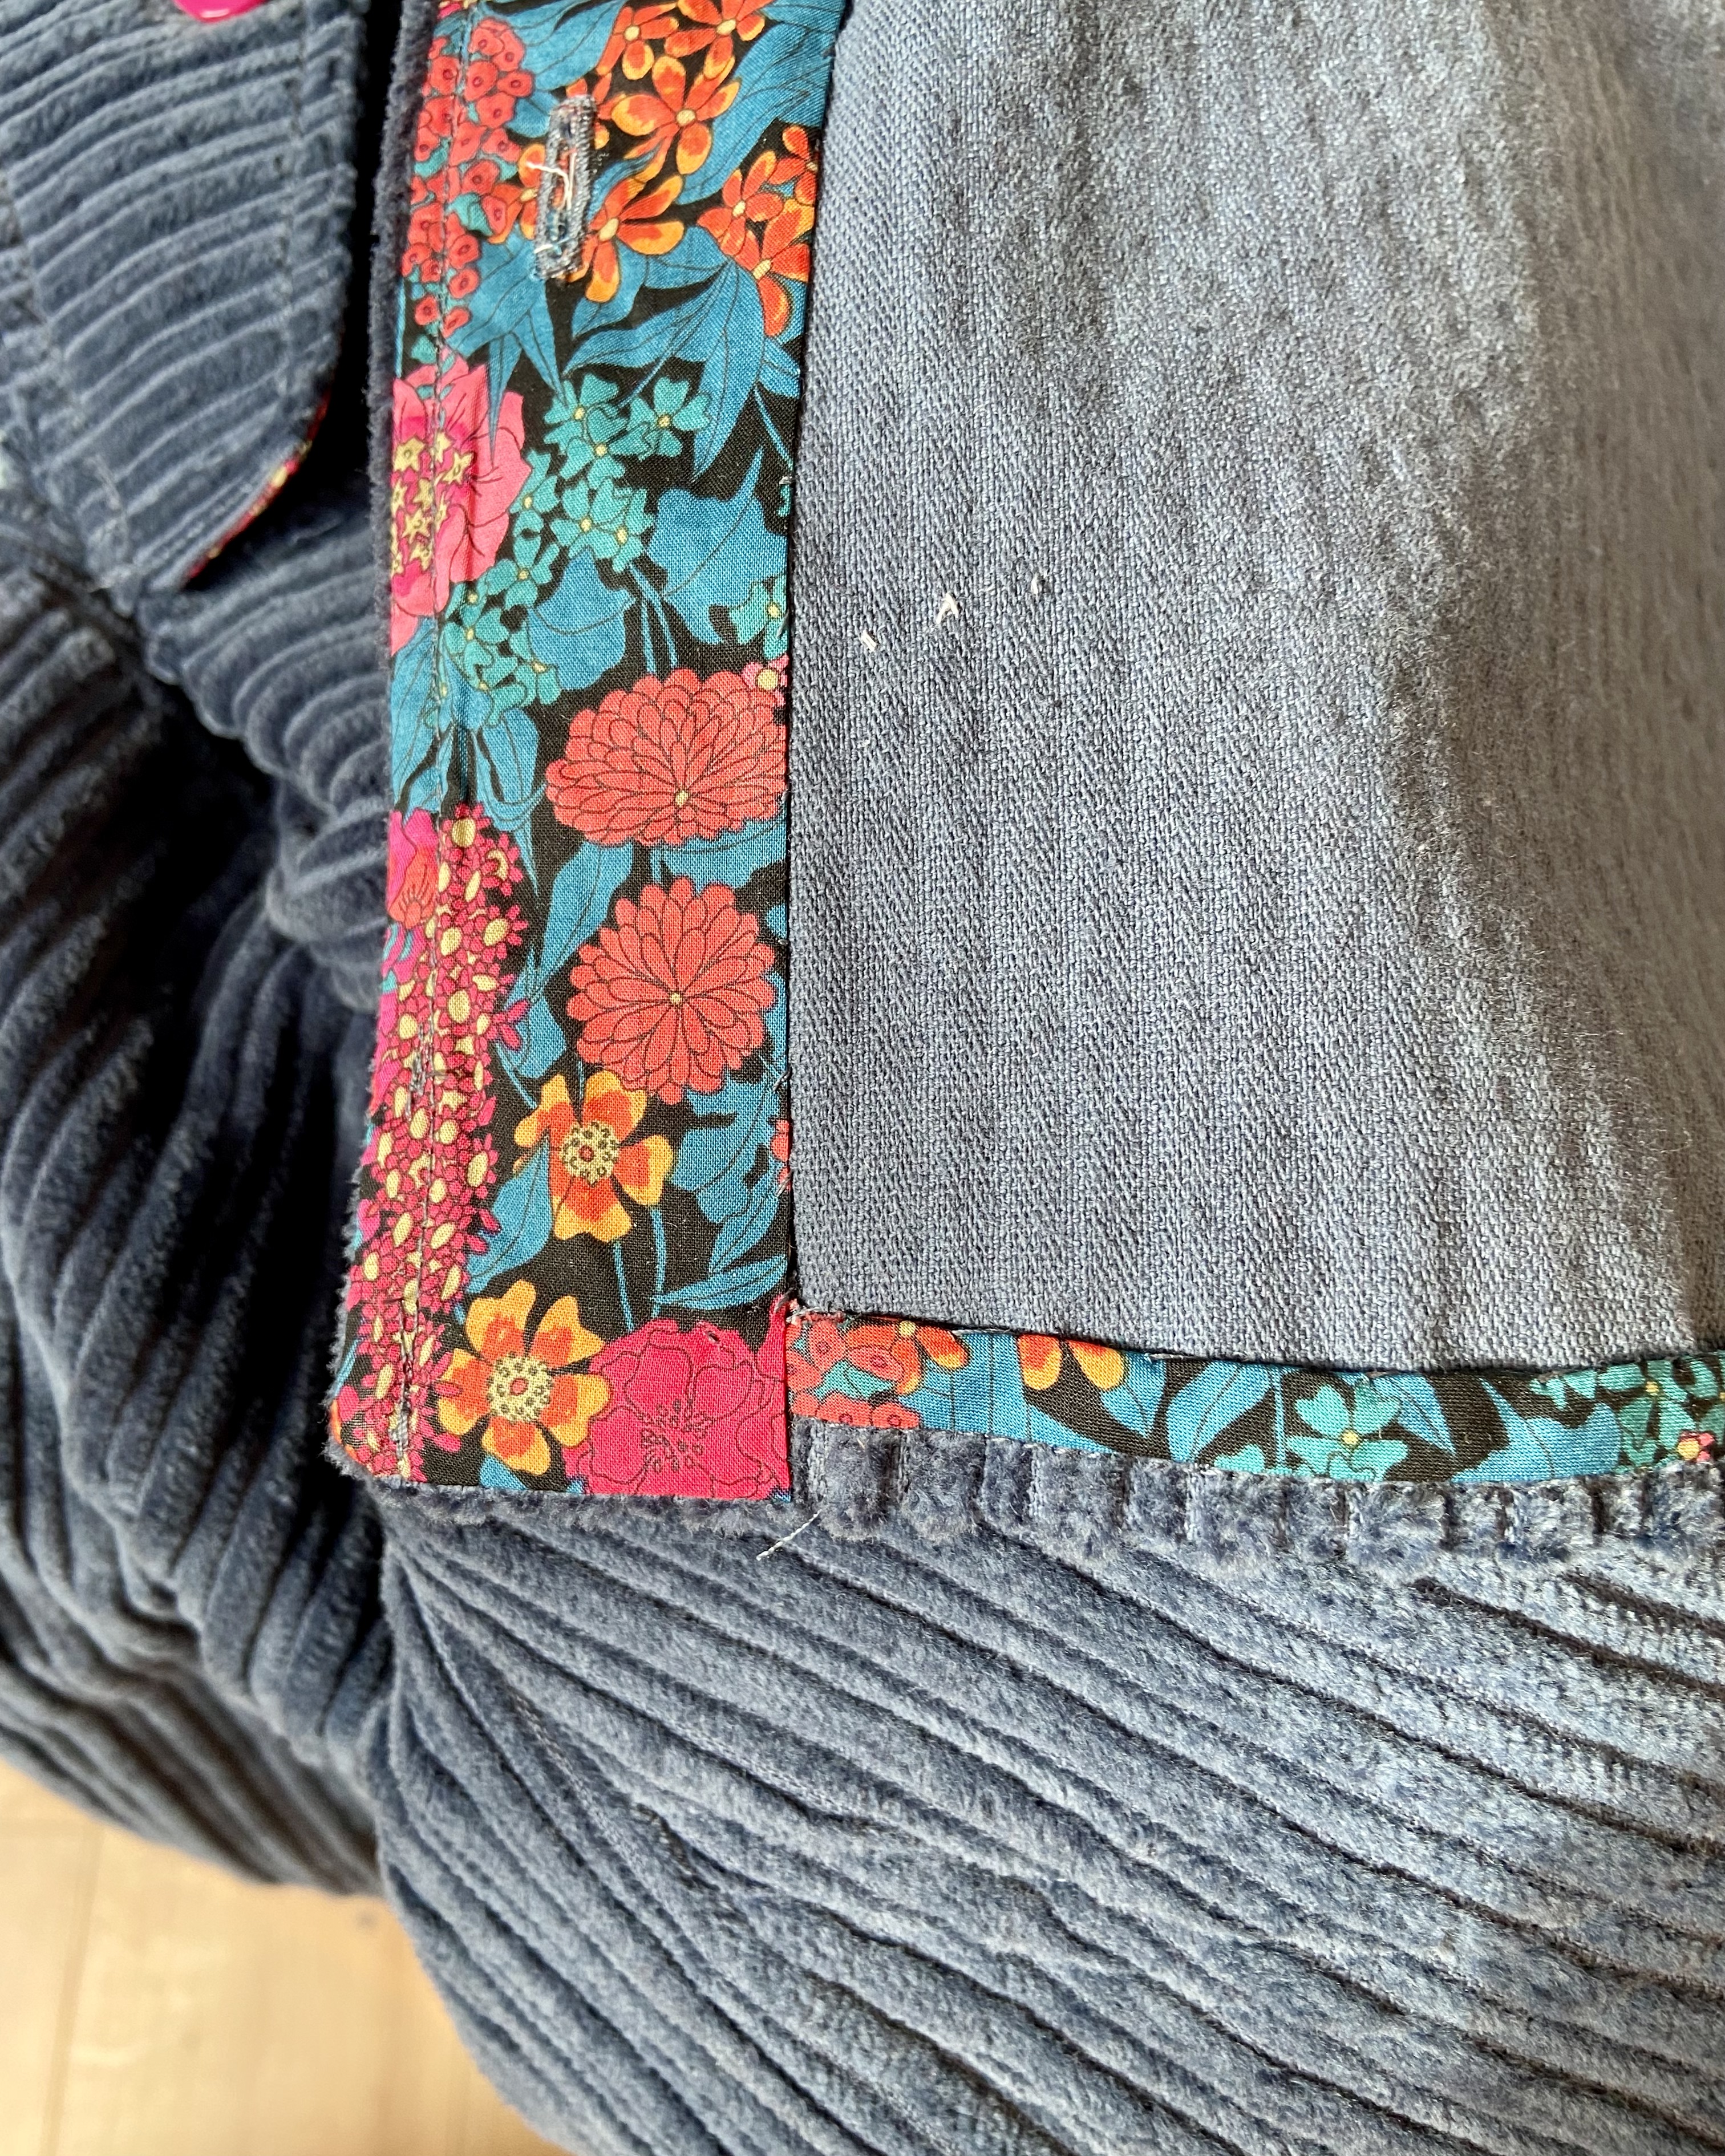
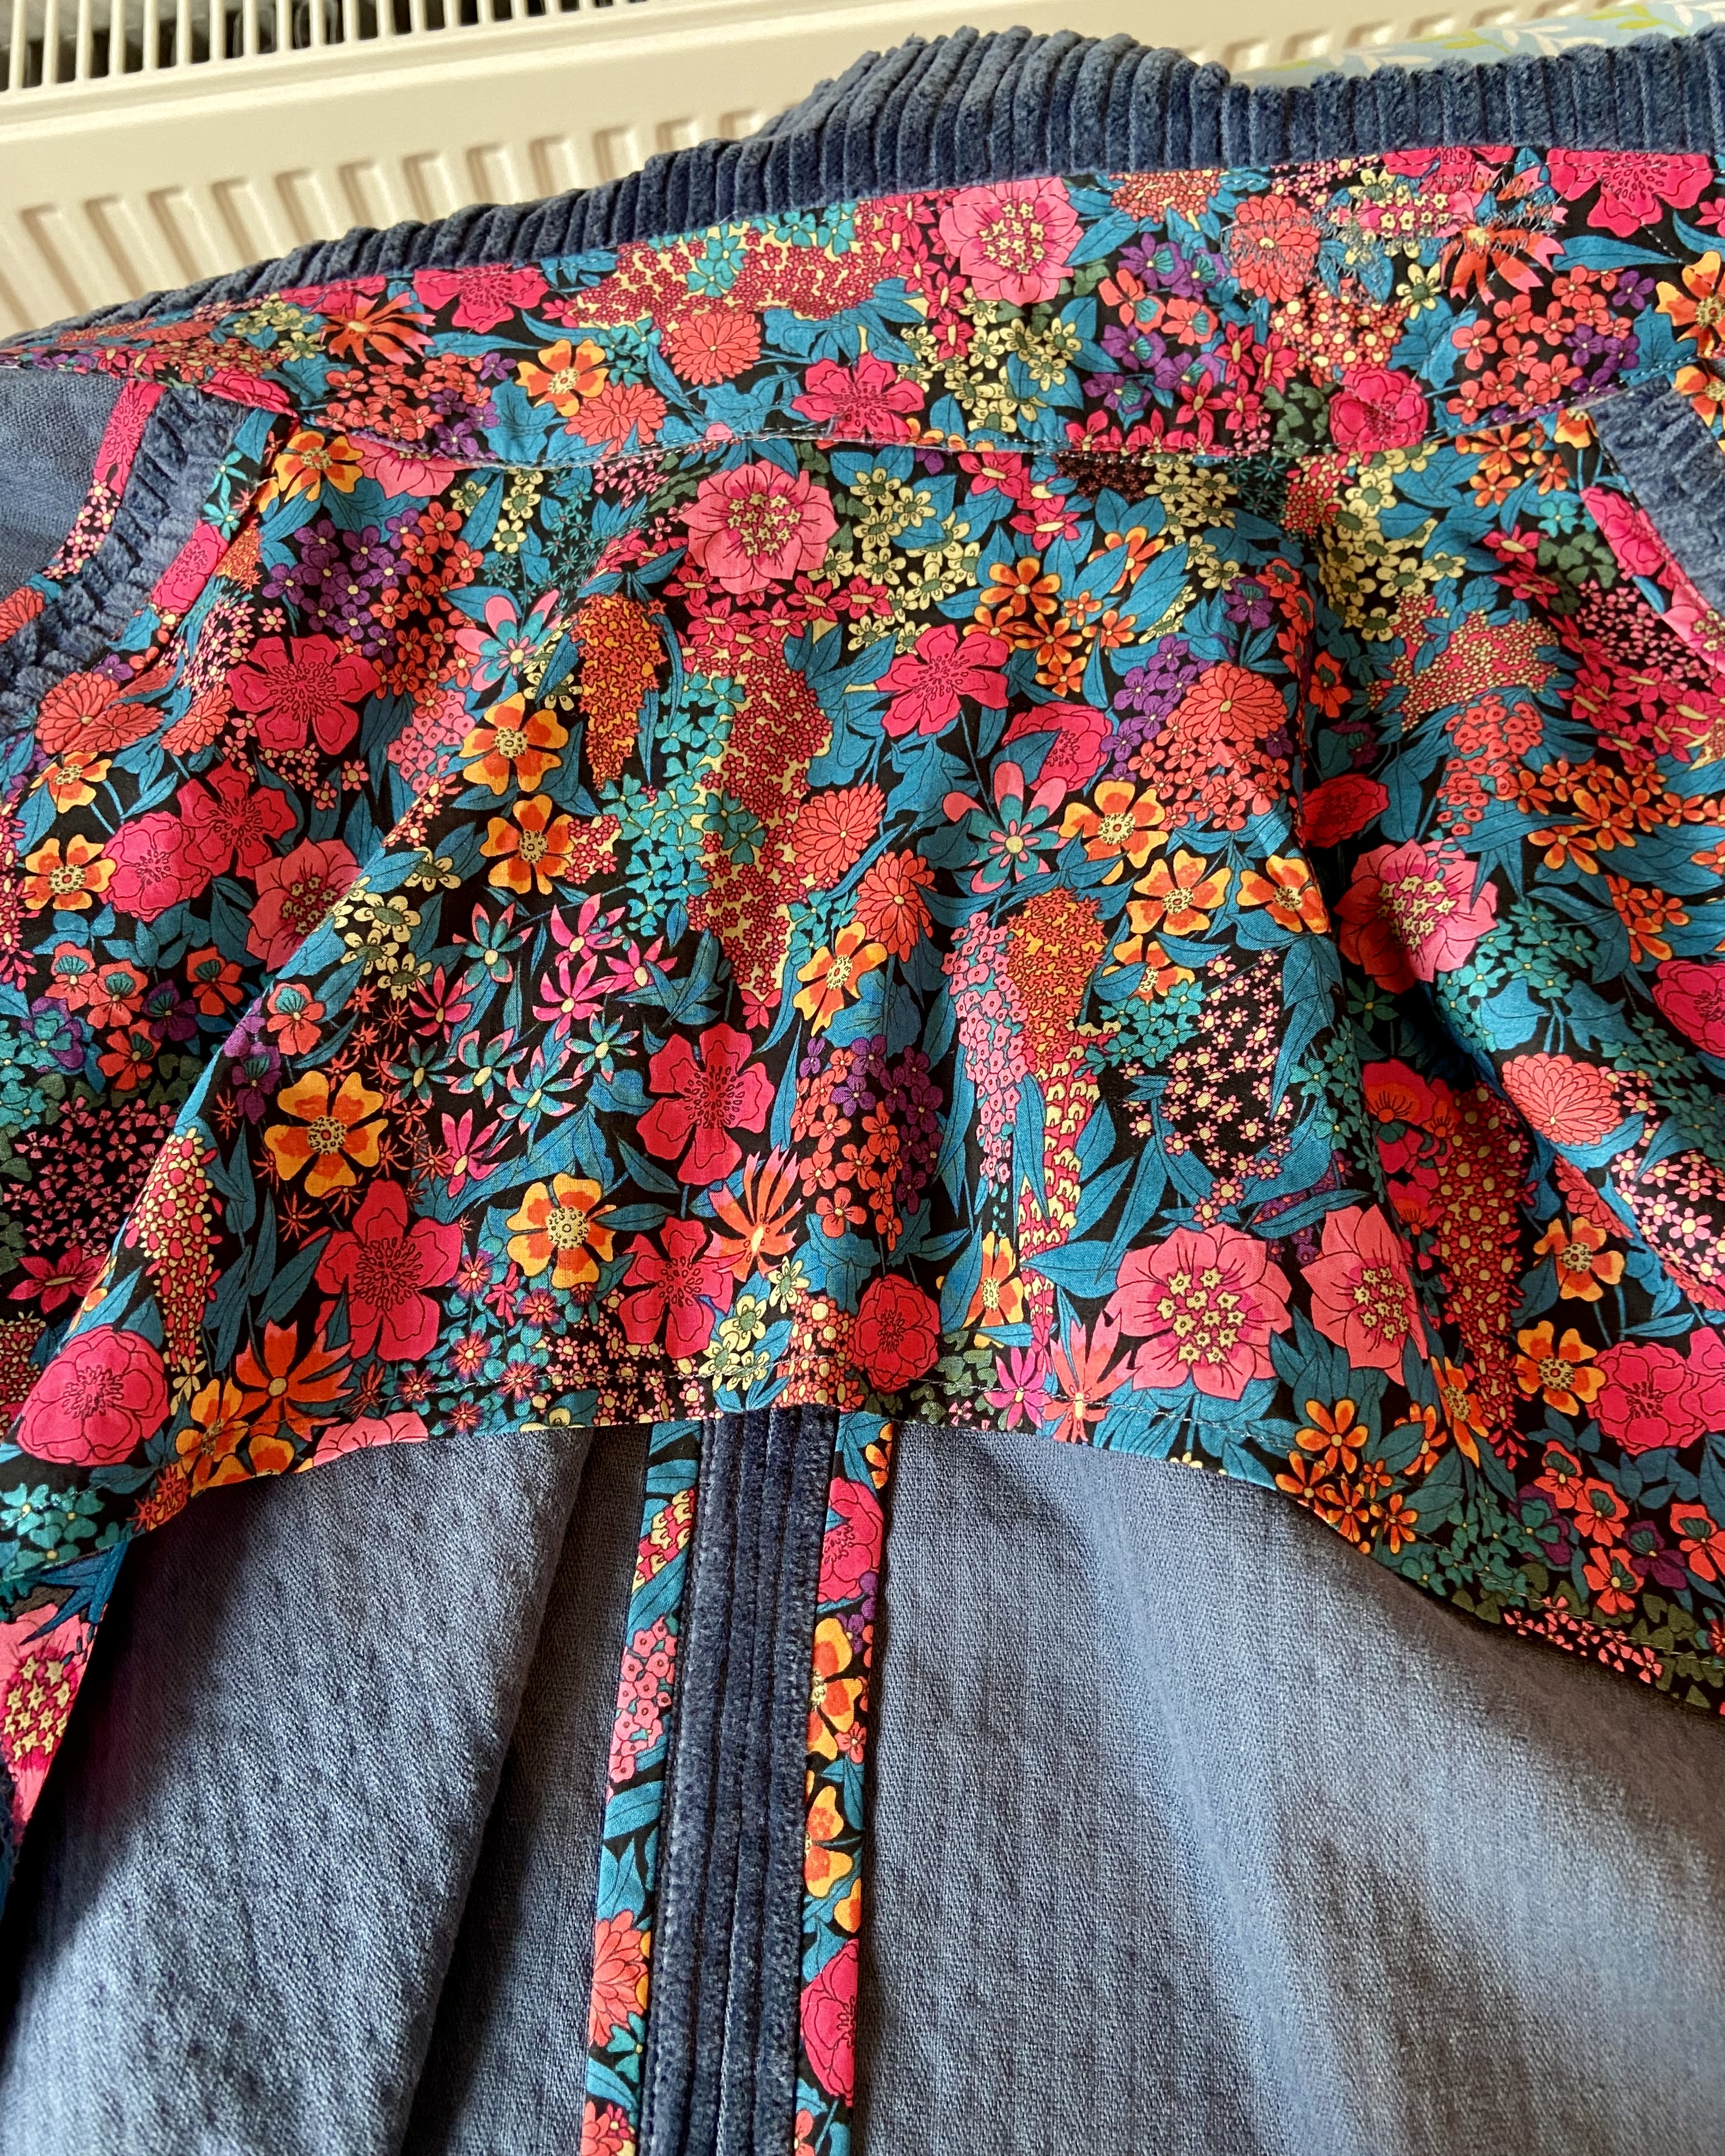
I had my collar beautifully made when I discovered I had cut a hole in the lining when grading and notching! I just patched it up with an interfaced scrap and the patterned fabric seems to hide the repair!
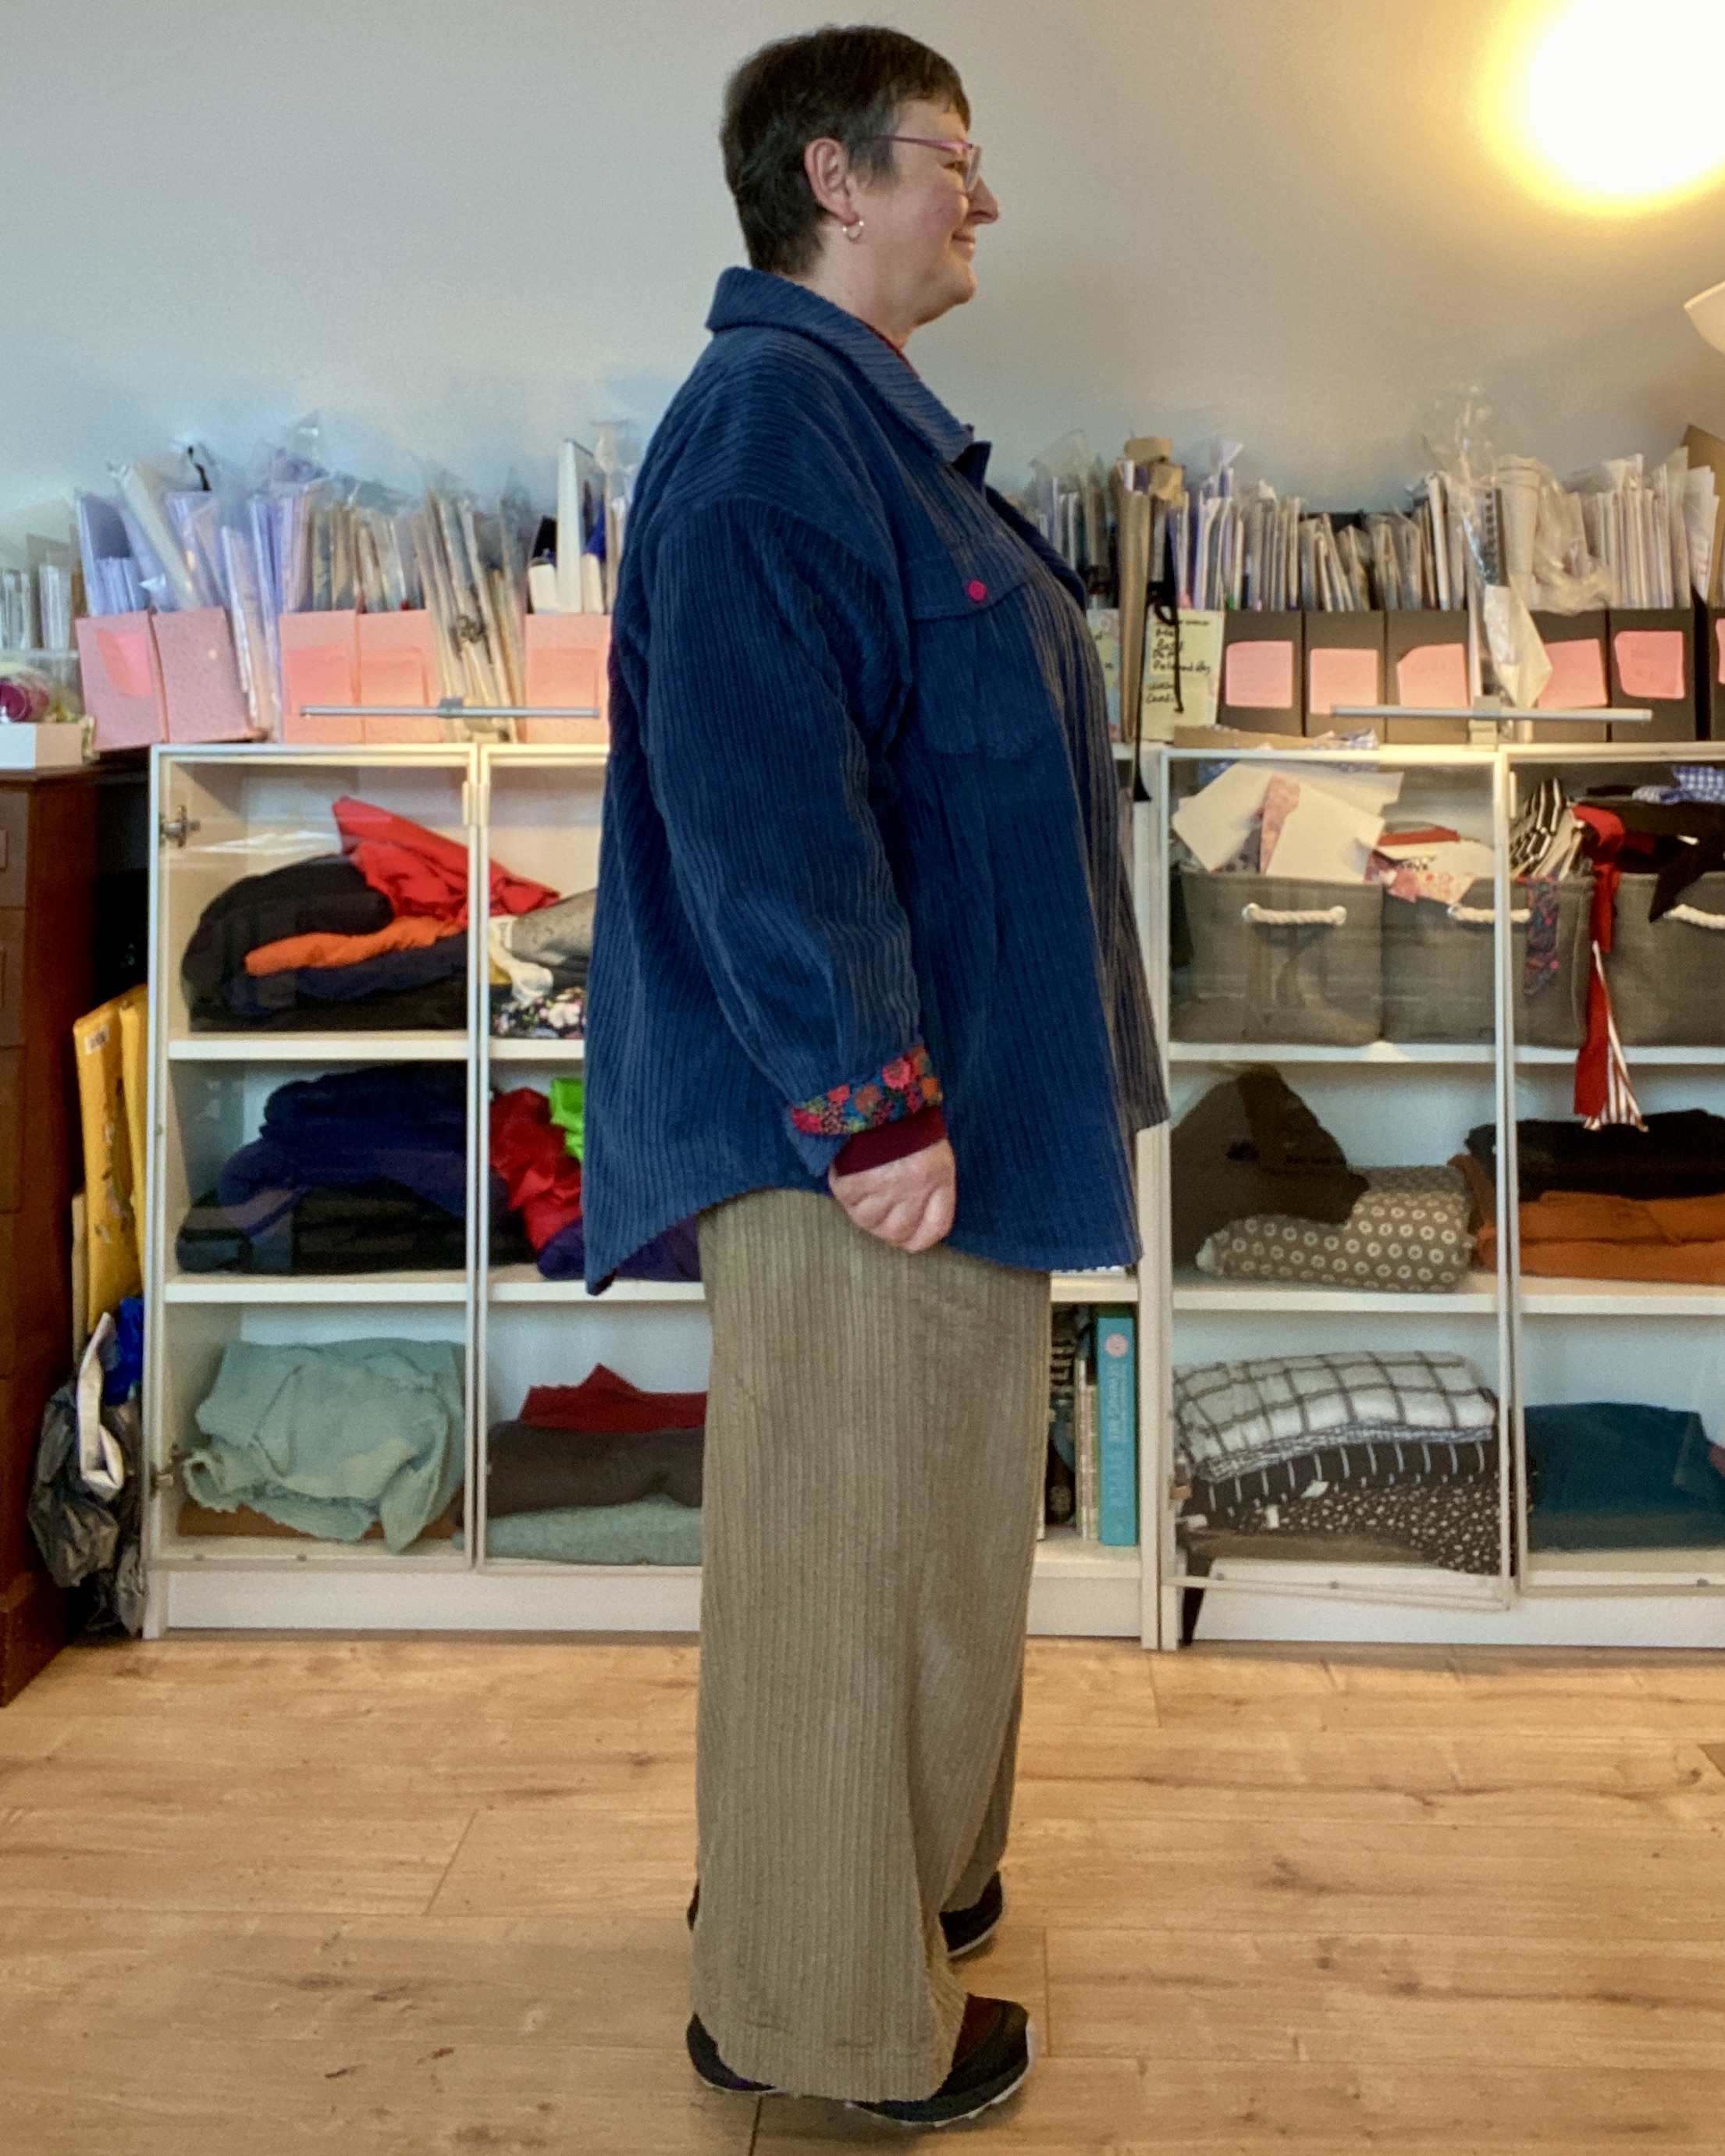
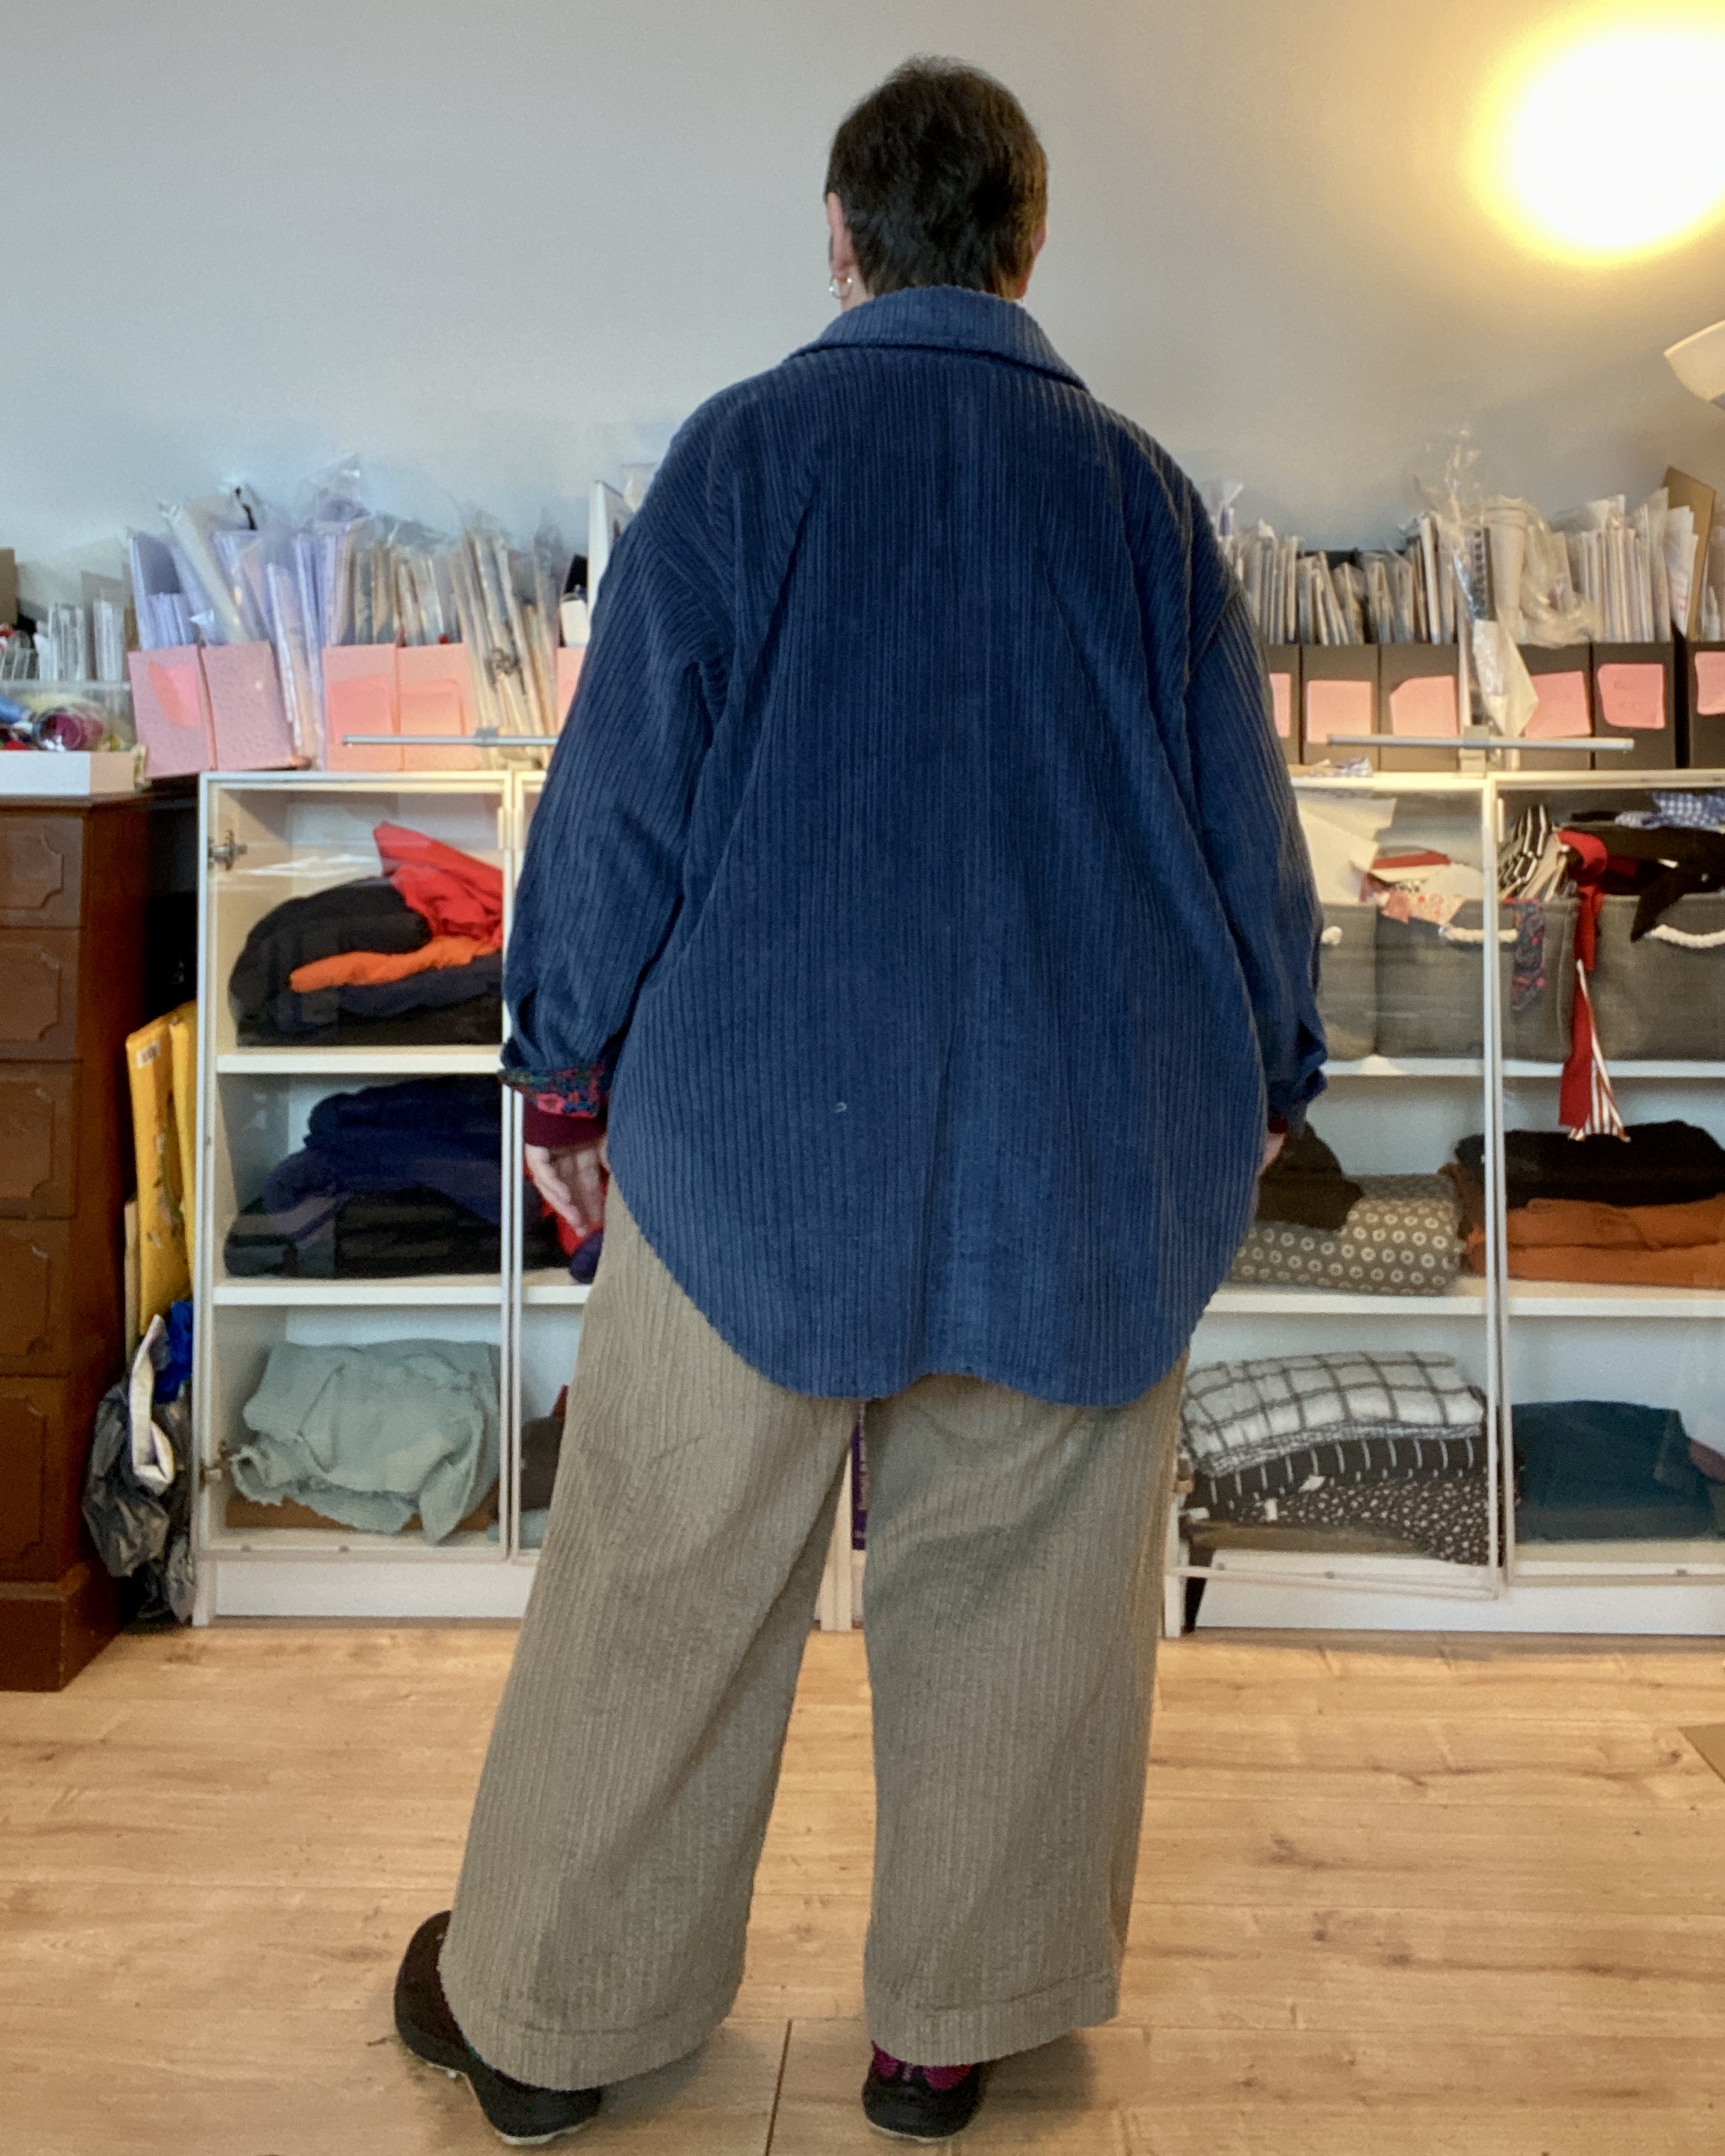
I shortened the Shacket 5.5 inches and used the shirttail shapes from the Tarawi. I added pockets based on the M&B Lobethal Shirt. The fabric in this shirt is 100% heavyish, but oh so soft, corduroy. That’s why I used the Shacket instead of the Tarawi. The Shacket pattern is designed for heavyish fabrics and the construction takes account of this by using lining in strategic places to reduce bulk. My lining fabric is Liberty Tana Lawn, left over from lining a recent coat. There are only tiny scraps left now.
I love using bias binding so I really enjoyed binding the seams on this shirt. I bound the centre-back seam allowances separately instead of together to get a flatter finish. And I never bind armsyce as they always feel lumpy to me. And with heavy fabric, I iron armscye seam allowance open instead of towards the sleeve. There are 5/8” seam allowance on the armscye so they stay nice and flat when pressed like this.
I didn’t iron the binding before use, for this project there is no need. (And anyway I never iron until application – see this blog it will change your bias-binding life! https://www.sewinglikemad.com/2013/08/sew-homemade-bias-tape-easy-way-and.html)
I redrafted the Lobethal pockets to match the curves on this pattern. They worked really well and were easy to install.
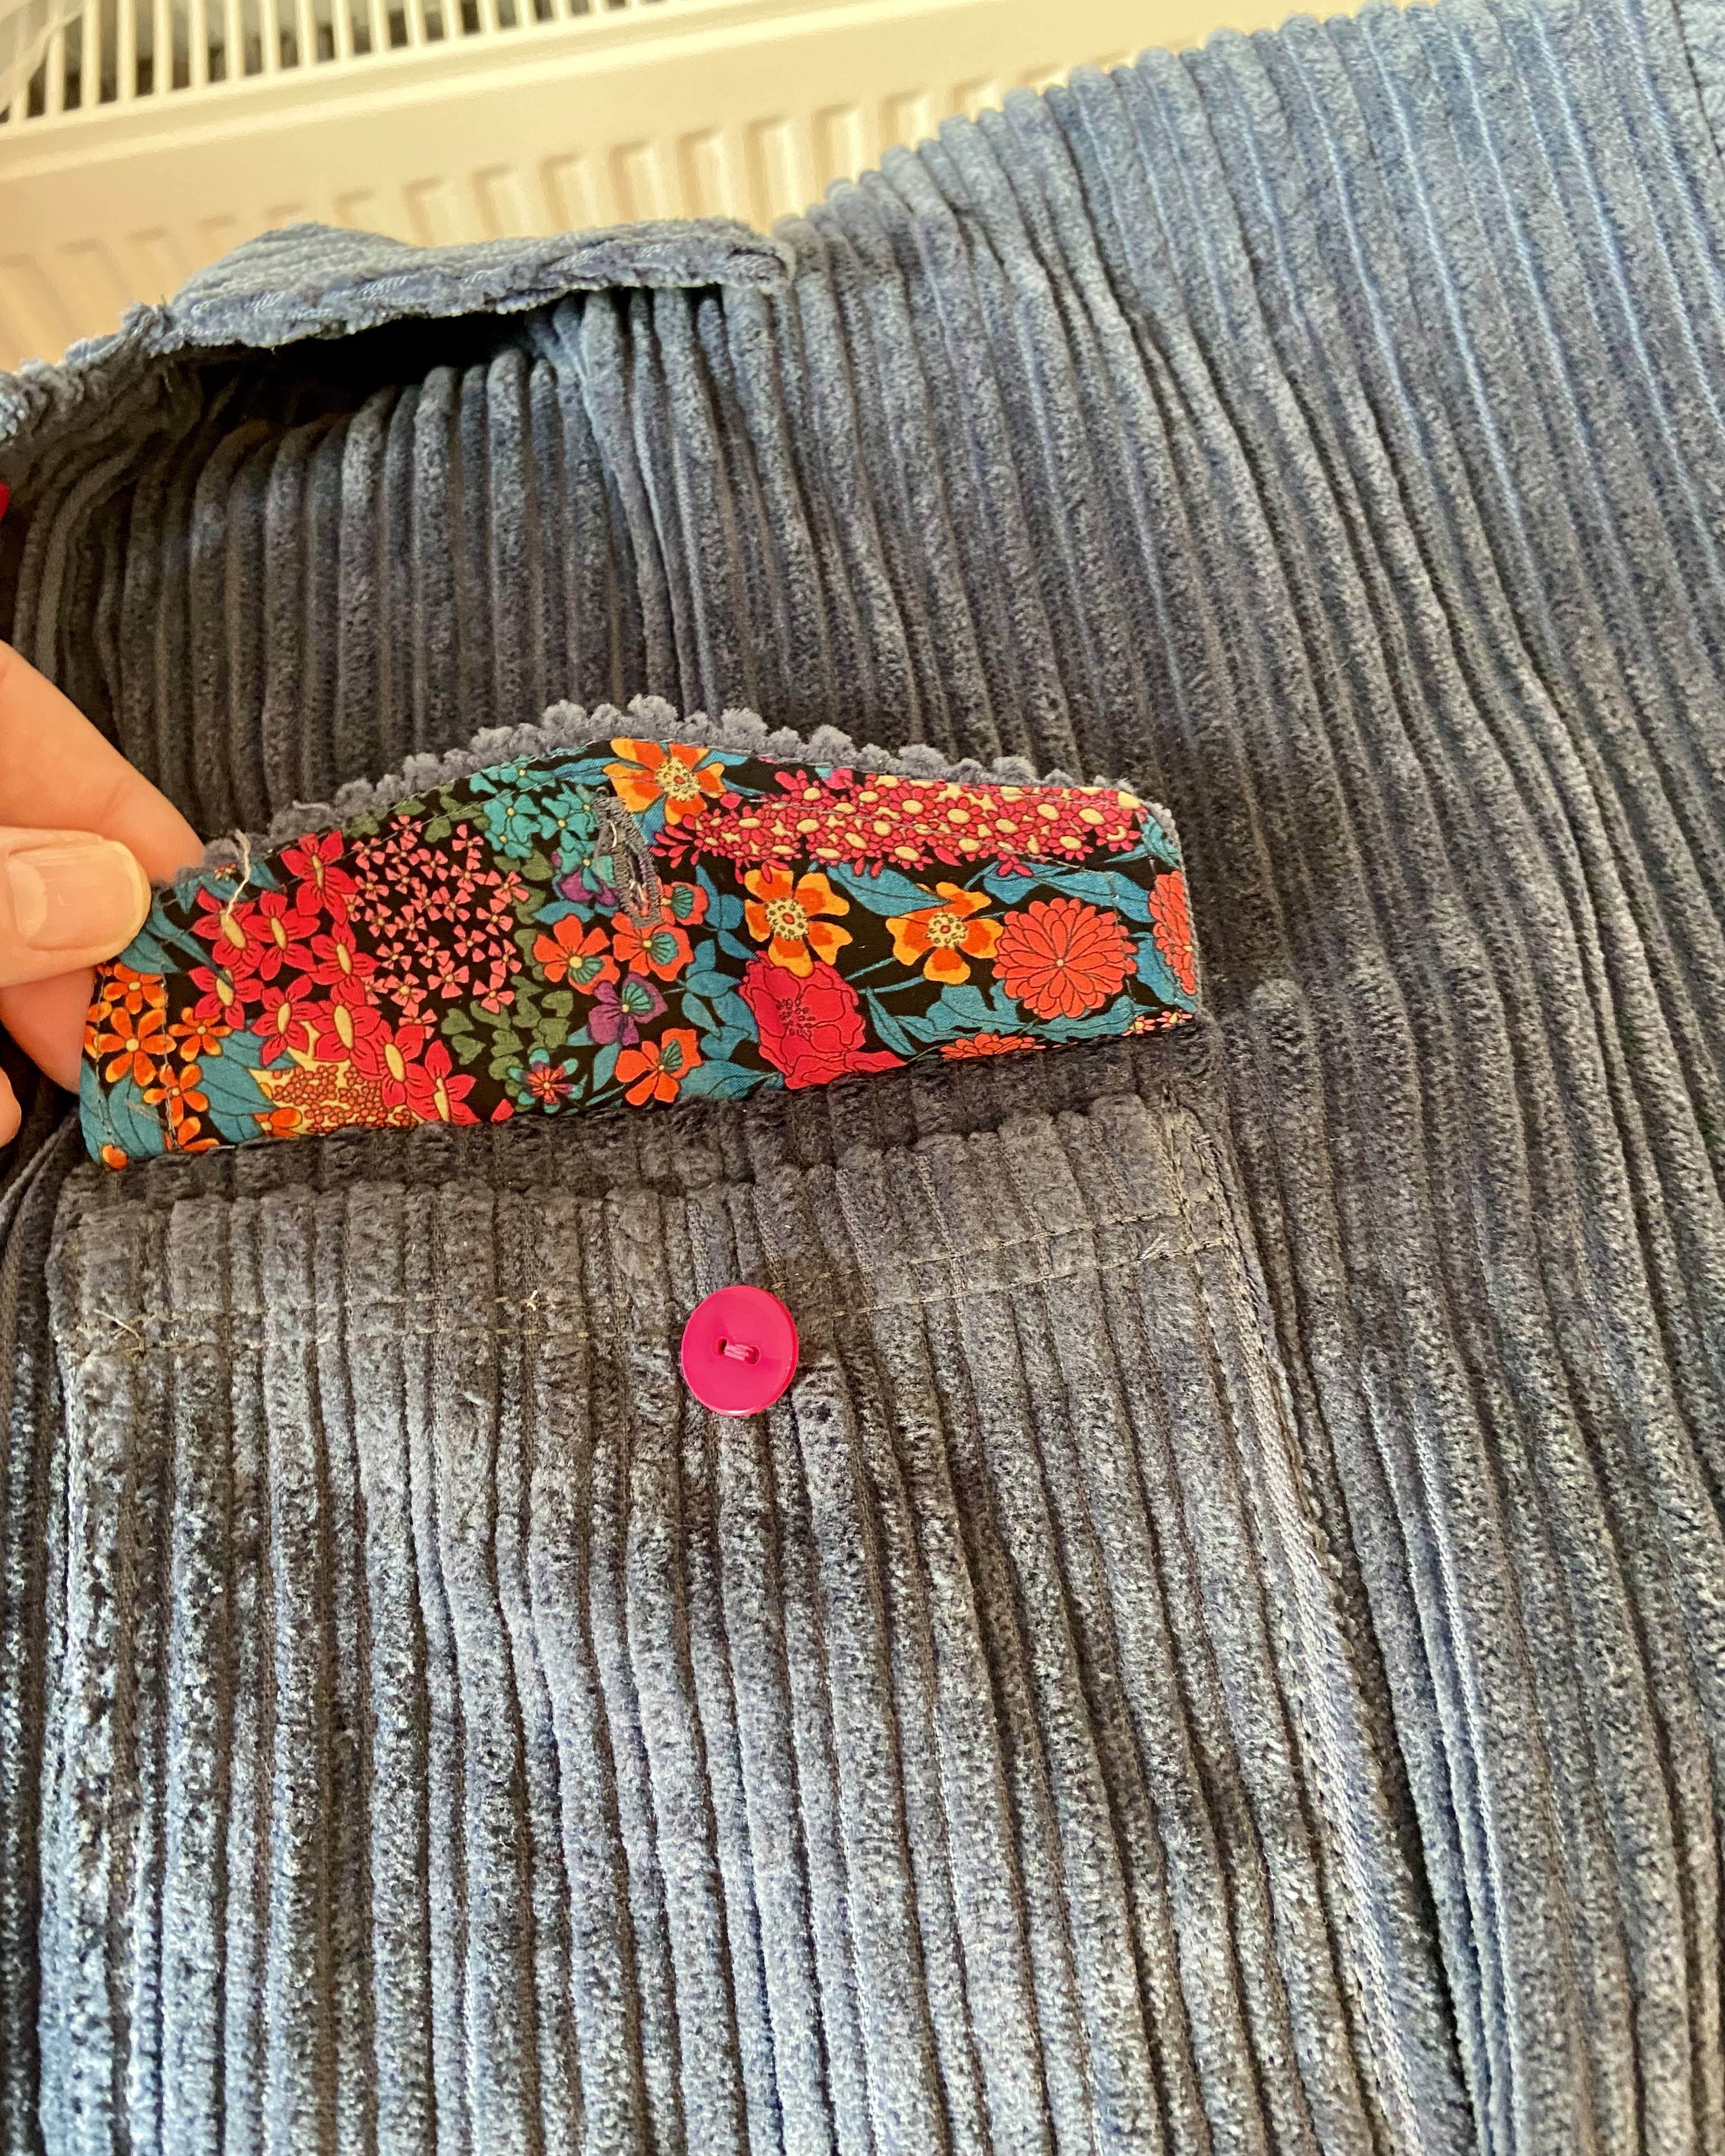

I used double-sided narrow sewing sticky tape to baste down the last bit of the collar (the bit that is ironed under 1/4”) and then machine sewed it down. This was really helpful. I did the same on the sleeve cuffs.
These sleeves are made from two separate pattern pieces and the cuffs are then just bound with bias binding before sewing the sleeve together. This is such an easy and clever way to do the plackets.
For the lined button placket, I sewed the second side down by hand.
On the main hem, I bound the edges before construction, then caught them under the front plackets. I did this by sewing the placket down the front as directed, but then I sewed across the front at right angles for the width of the placket, enclosing the hem. Then I turned it right side out.
I hand-stitched the final hem to the front.
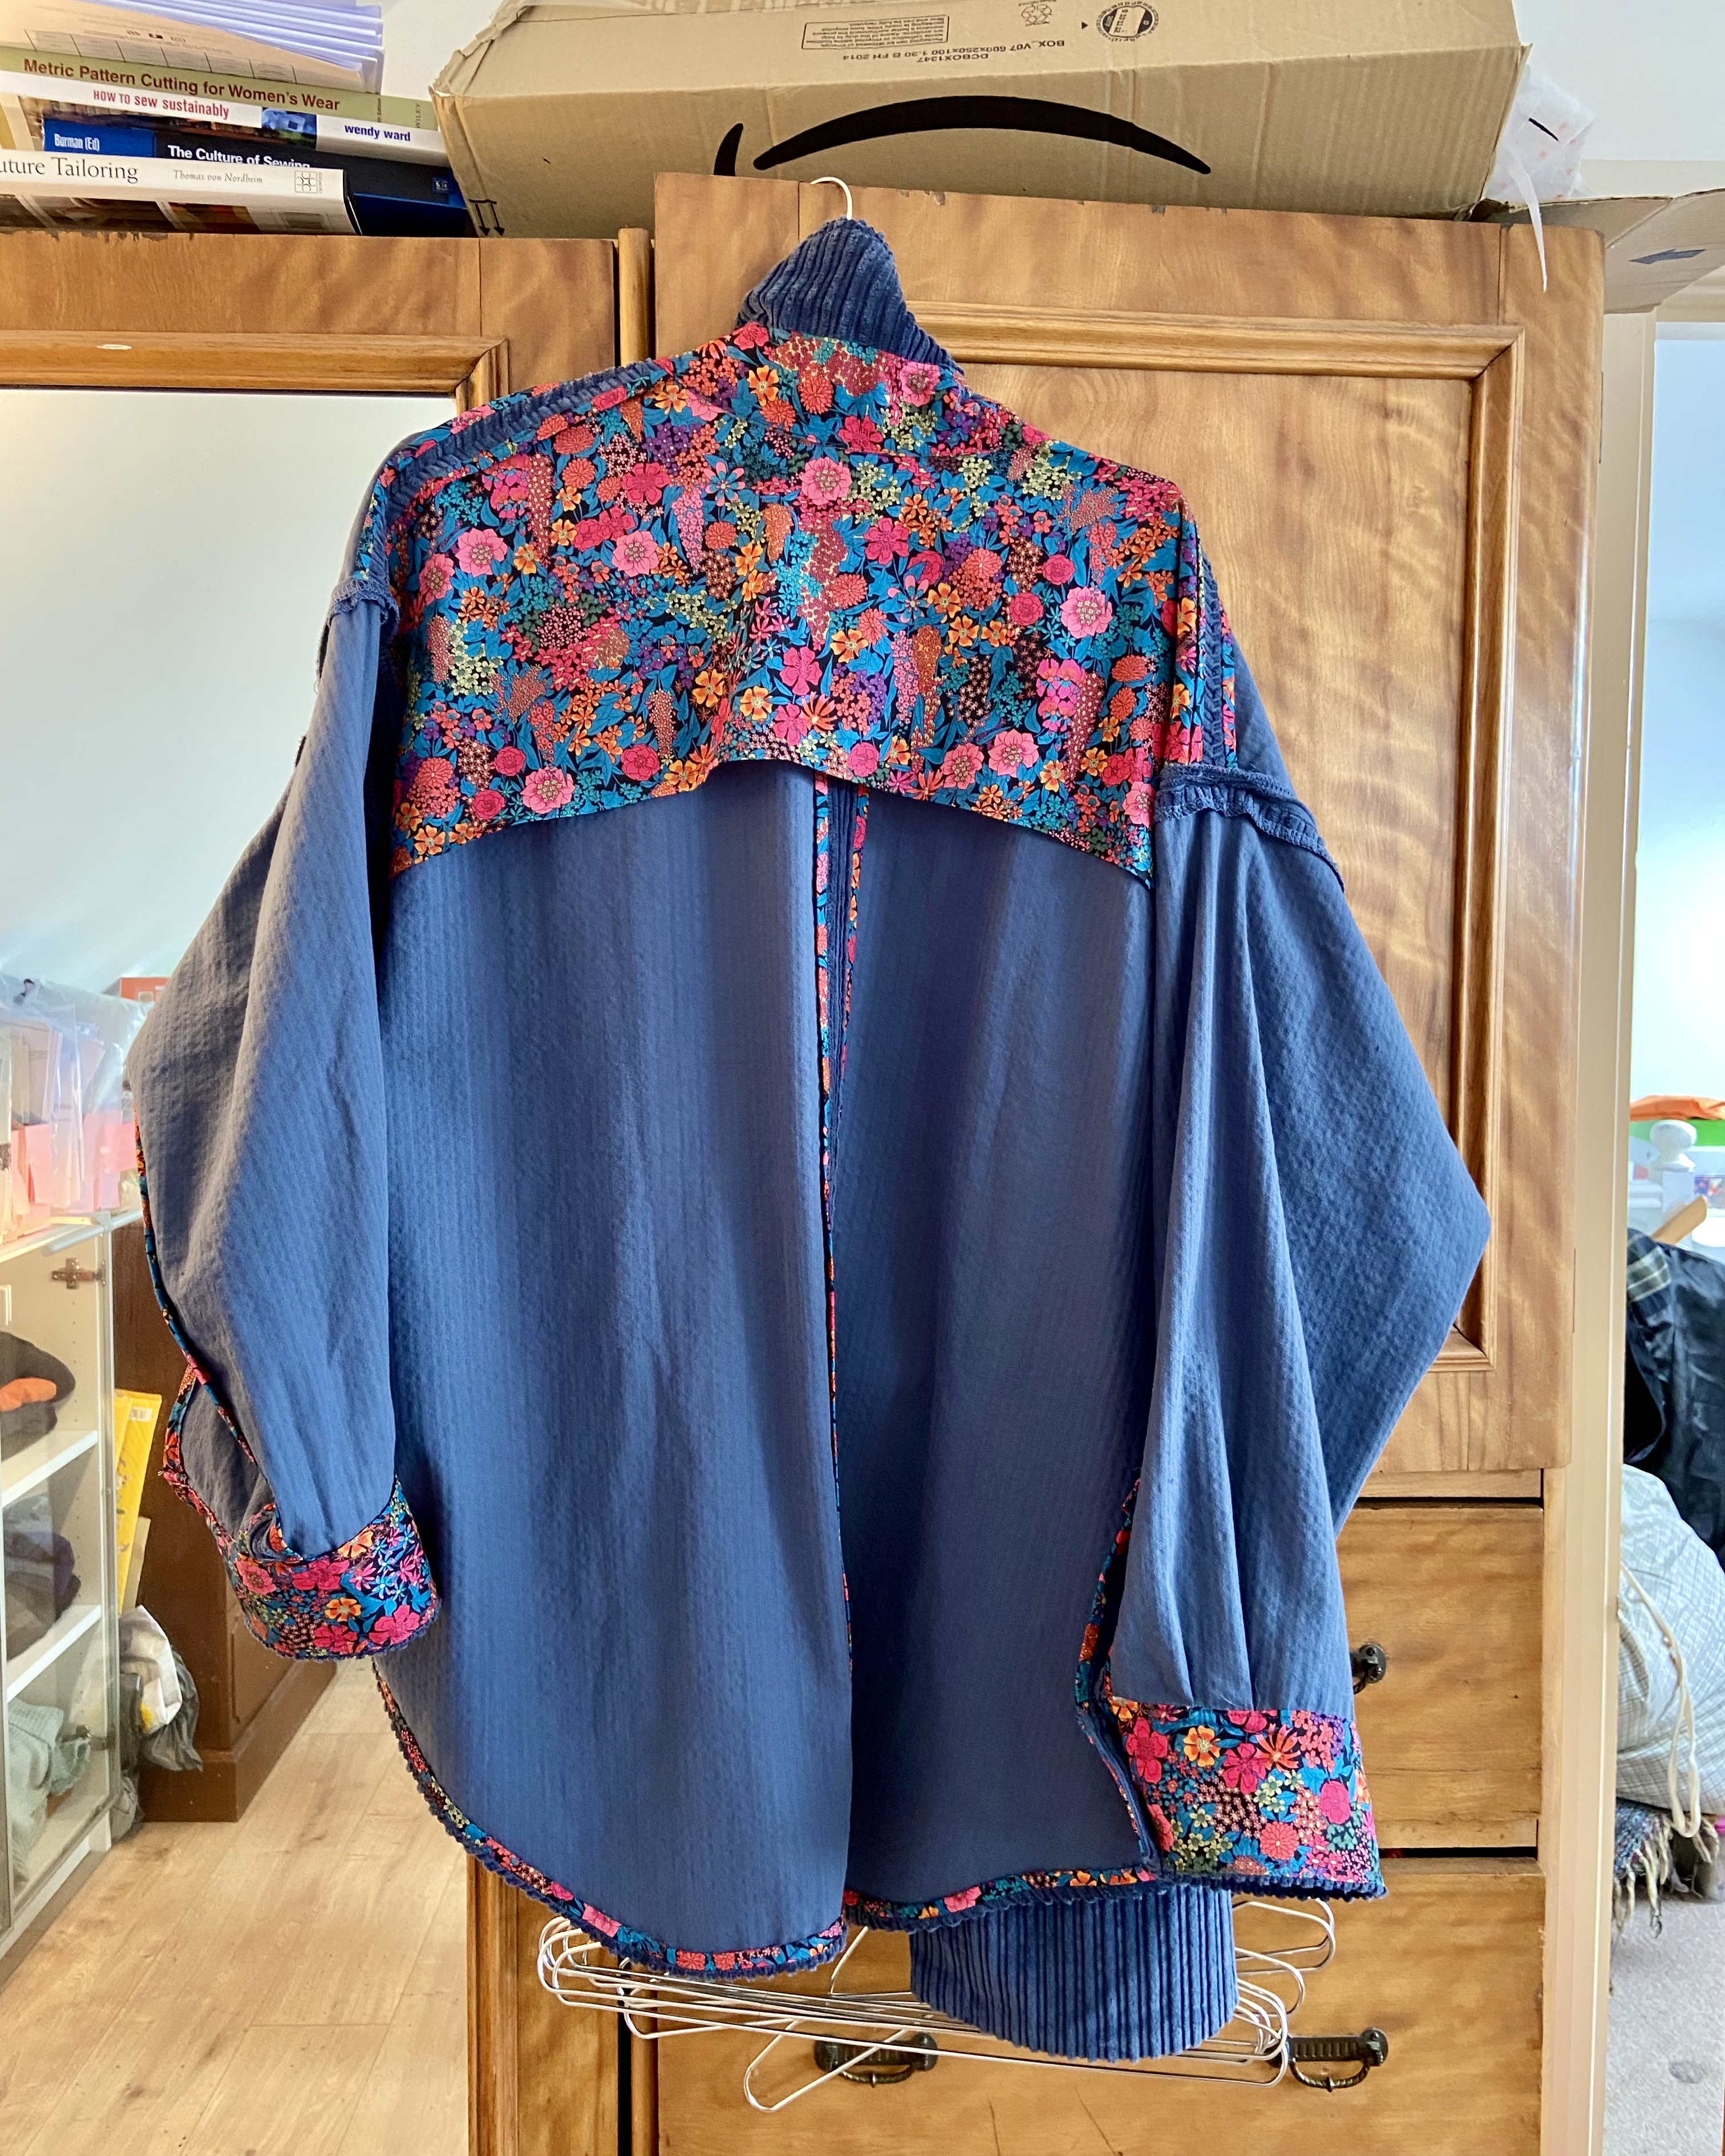

I did two rows of top-stitching where ever top-stitching was directed but you can’t really see it with the pile of the cord. I’m lucky to have my old sewing machine, the excellent Husqvarna Emerald 116. So whenever I’m going to do topstitching I set that up with the correct needle. I feed two strands of thread through the machine and needle instead of actual top-stitching thread. It makes it so much easier not to have to buy extra matching thread.
I made size D with no fit alterations at all. Love that!
I bought the lovely fabric from @BeyondThe.PinkDoor
I’m also wearing the Sew House Seven Free Range Slacks and their Toaster Sweater.
https://www.munaandbroad.com/products/shoalhaven-shacket-sewing-pattern-pdf
