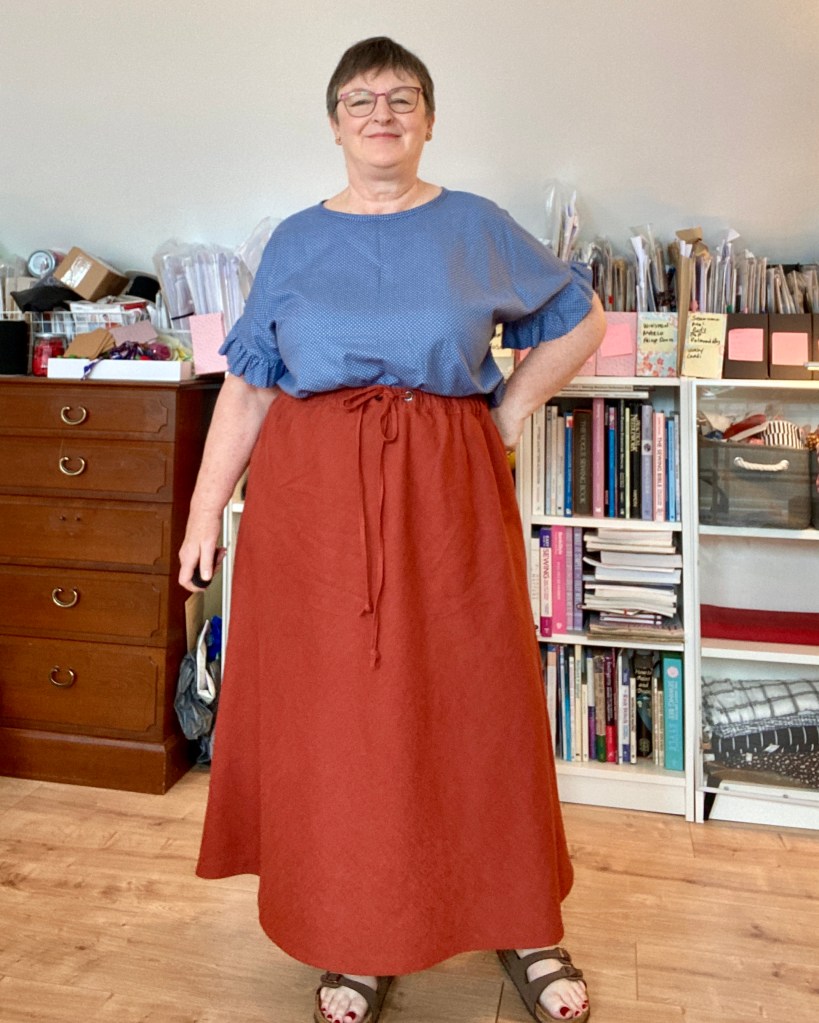
I saw this Clo Bias Skirt by Soften Studio on @_DiyDaisy and really liked it and I’d been wanting to make a bias skirt for a long time. I really love the finished skirt but there is a major caveat, it only goes up to 52.5” hip, which is a shame
On this pattern, this is size 24. I made size 22 but I may go up at the hips when I make another as maybe it is a smidgen tight around the bum. Or now that I think of it, I may just reduce the 5/8” seam allowance to 3/8” if I’m not using French seams.

I made some small changes to the construction. This linen is at least a medium weight and I thought the French seams suggested would be too bulky. So before sewing the side seams I overlocked/serged the edges in a matching thread – I do like to match my serger thread!
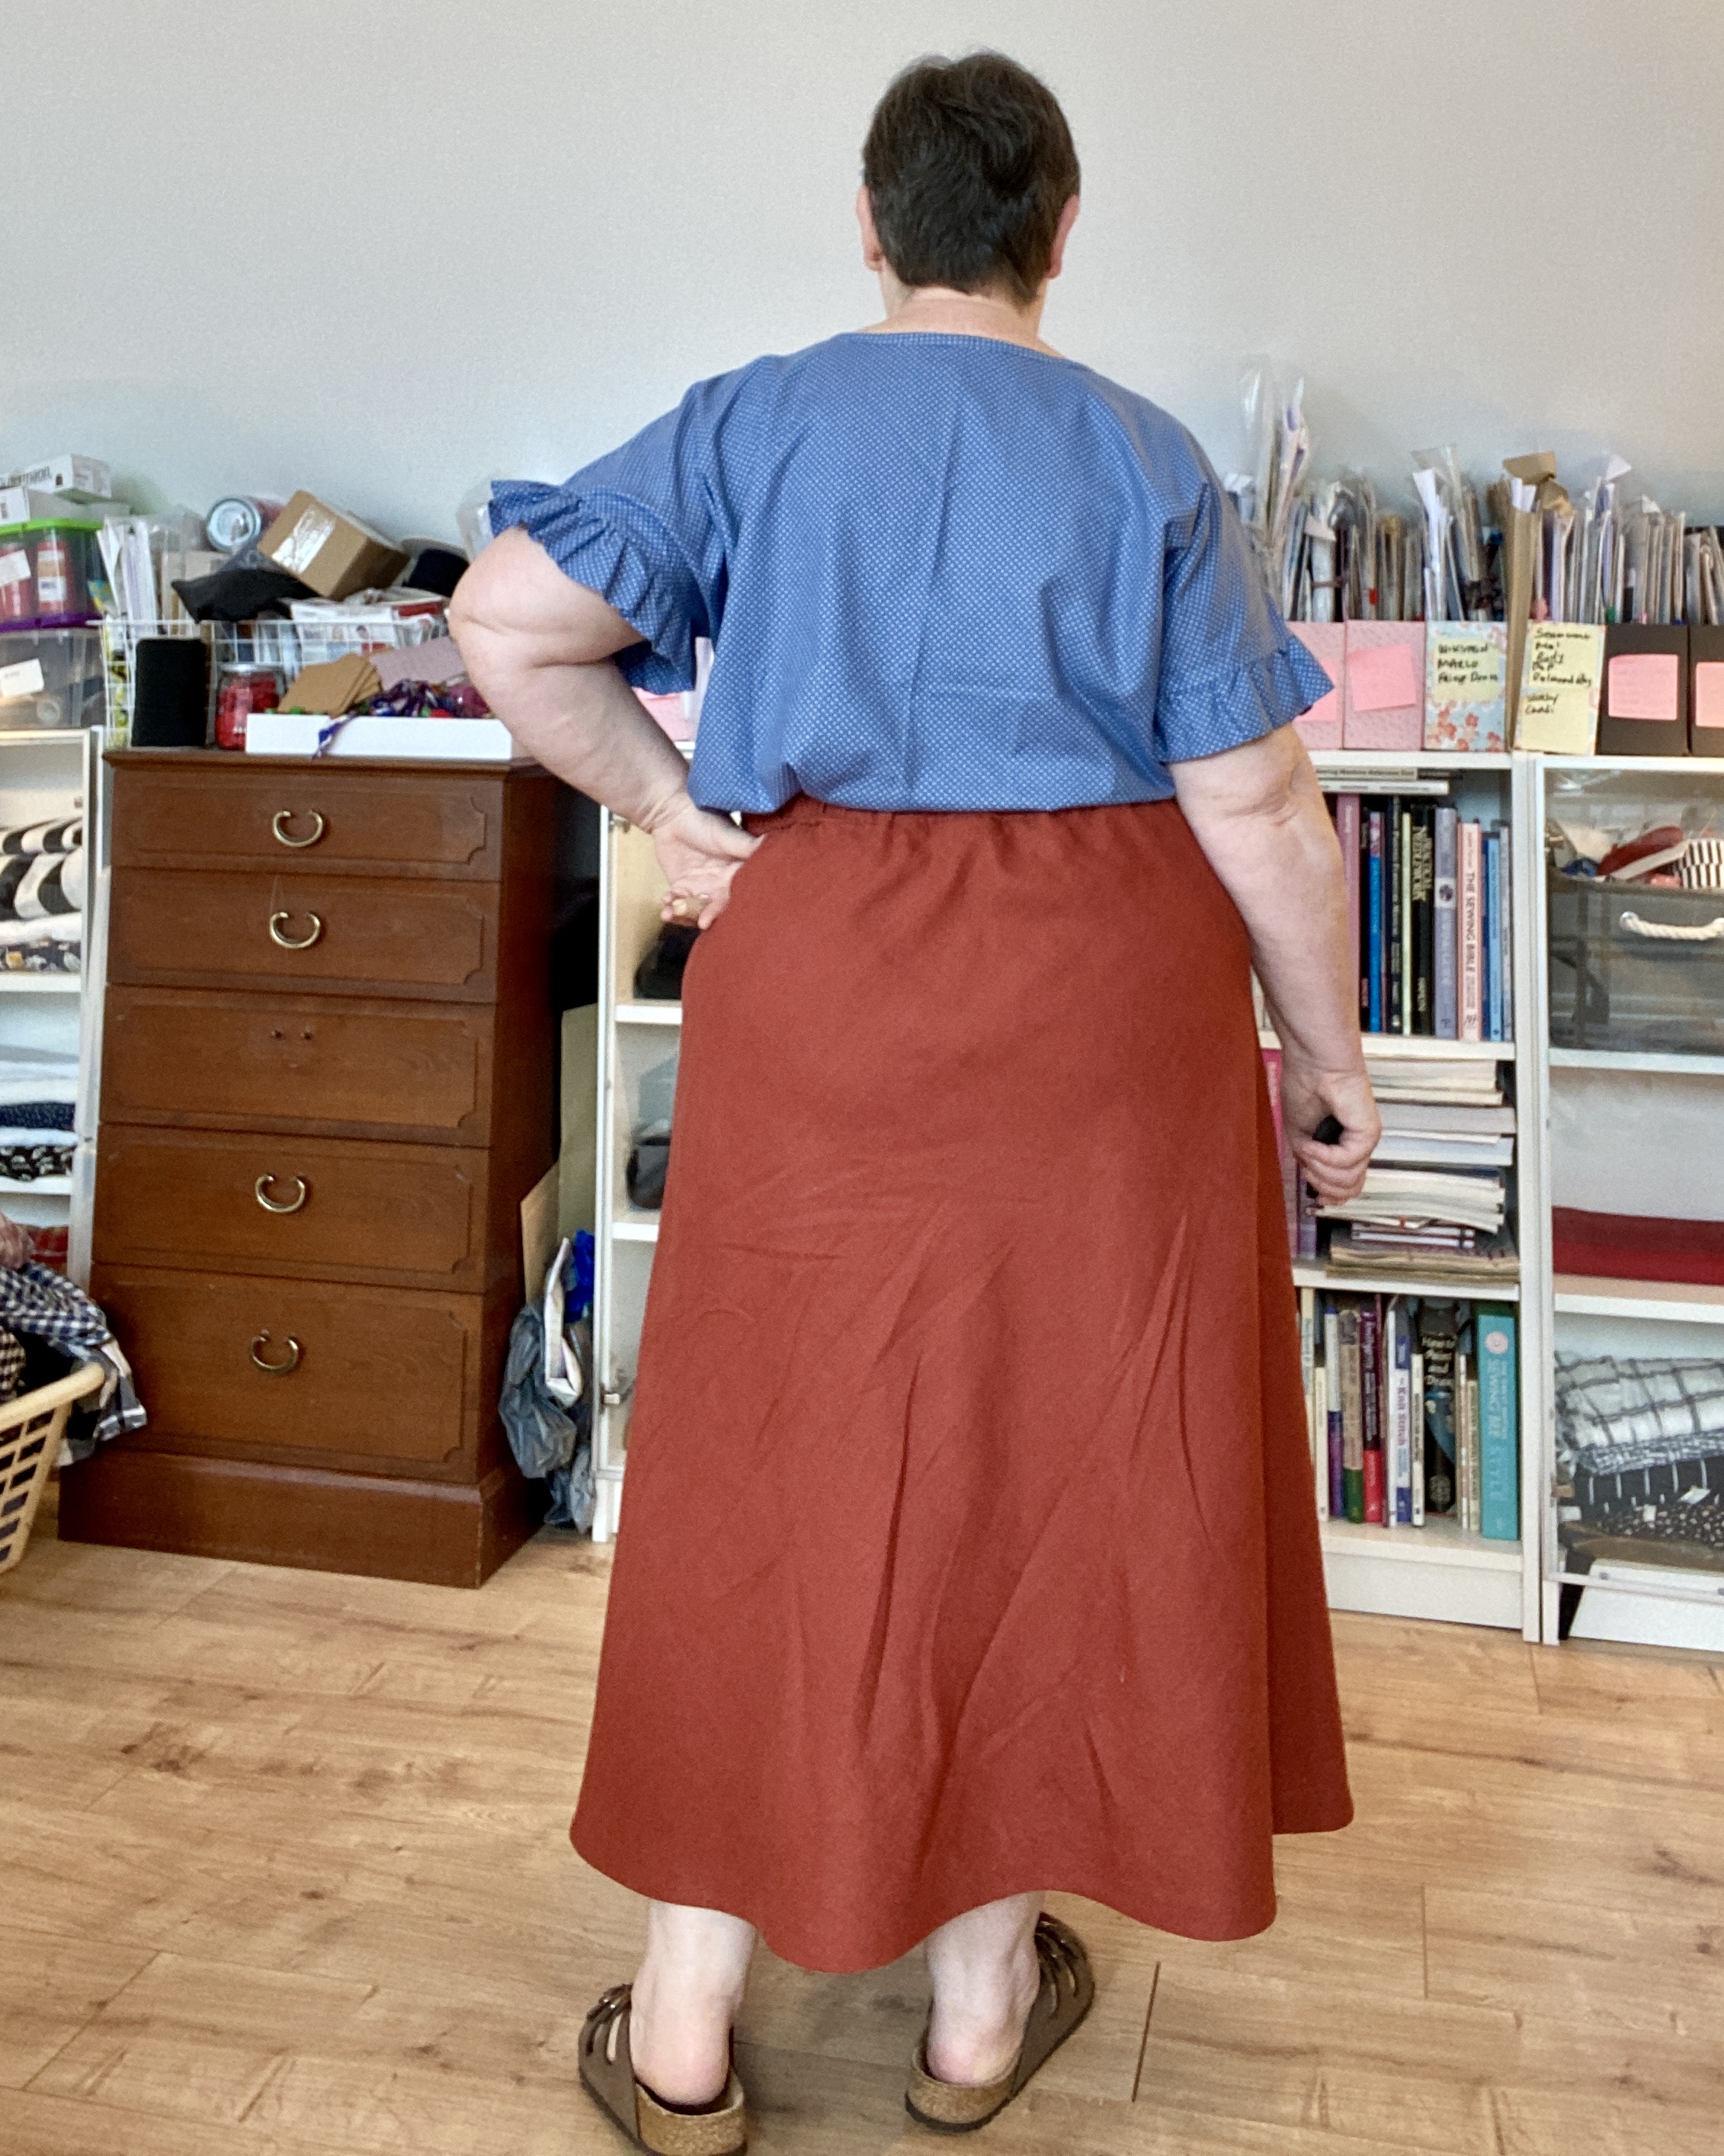
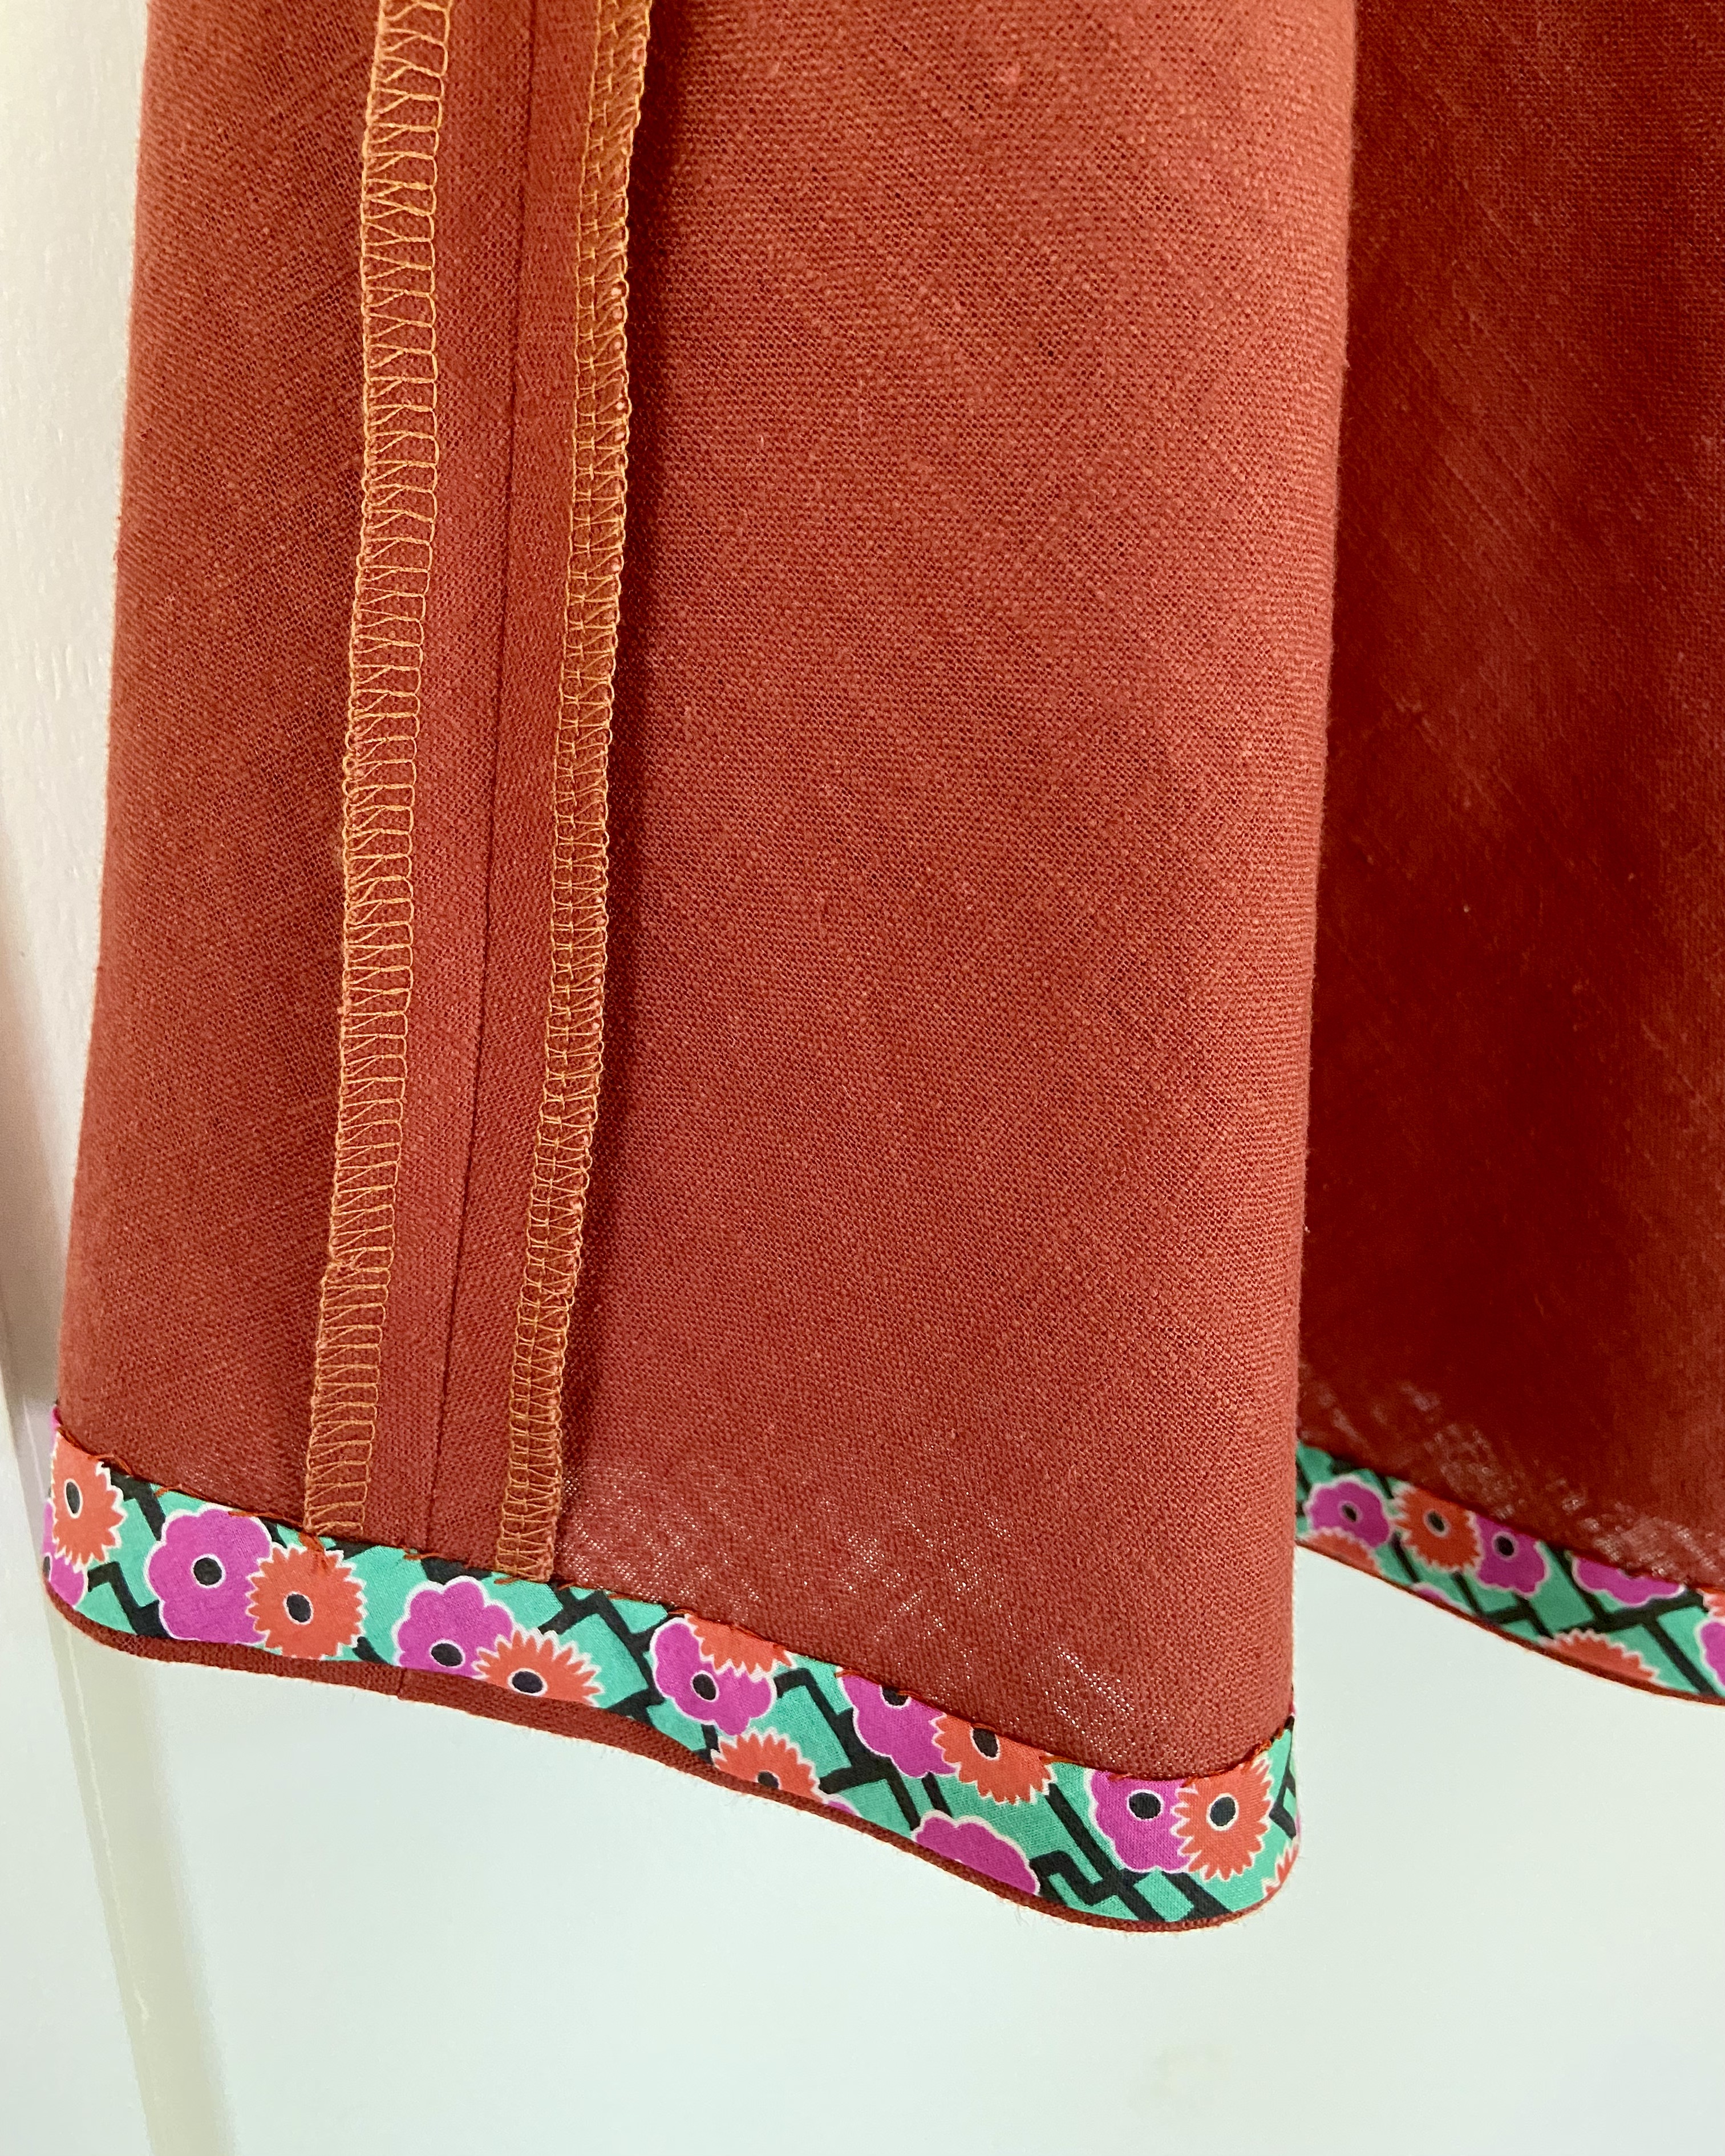
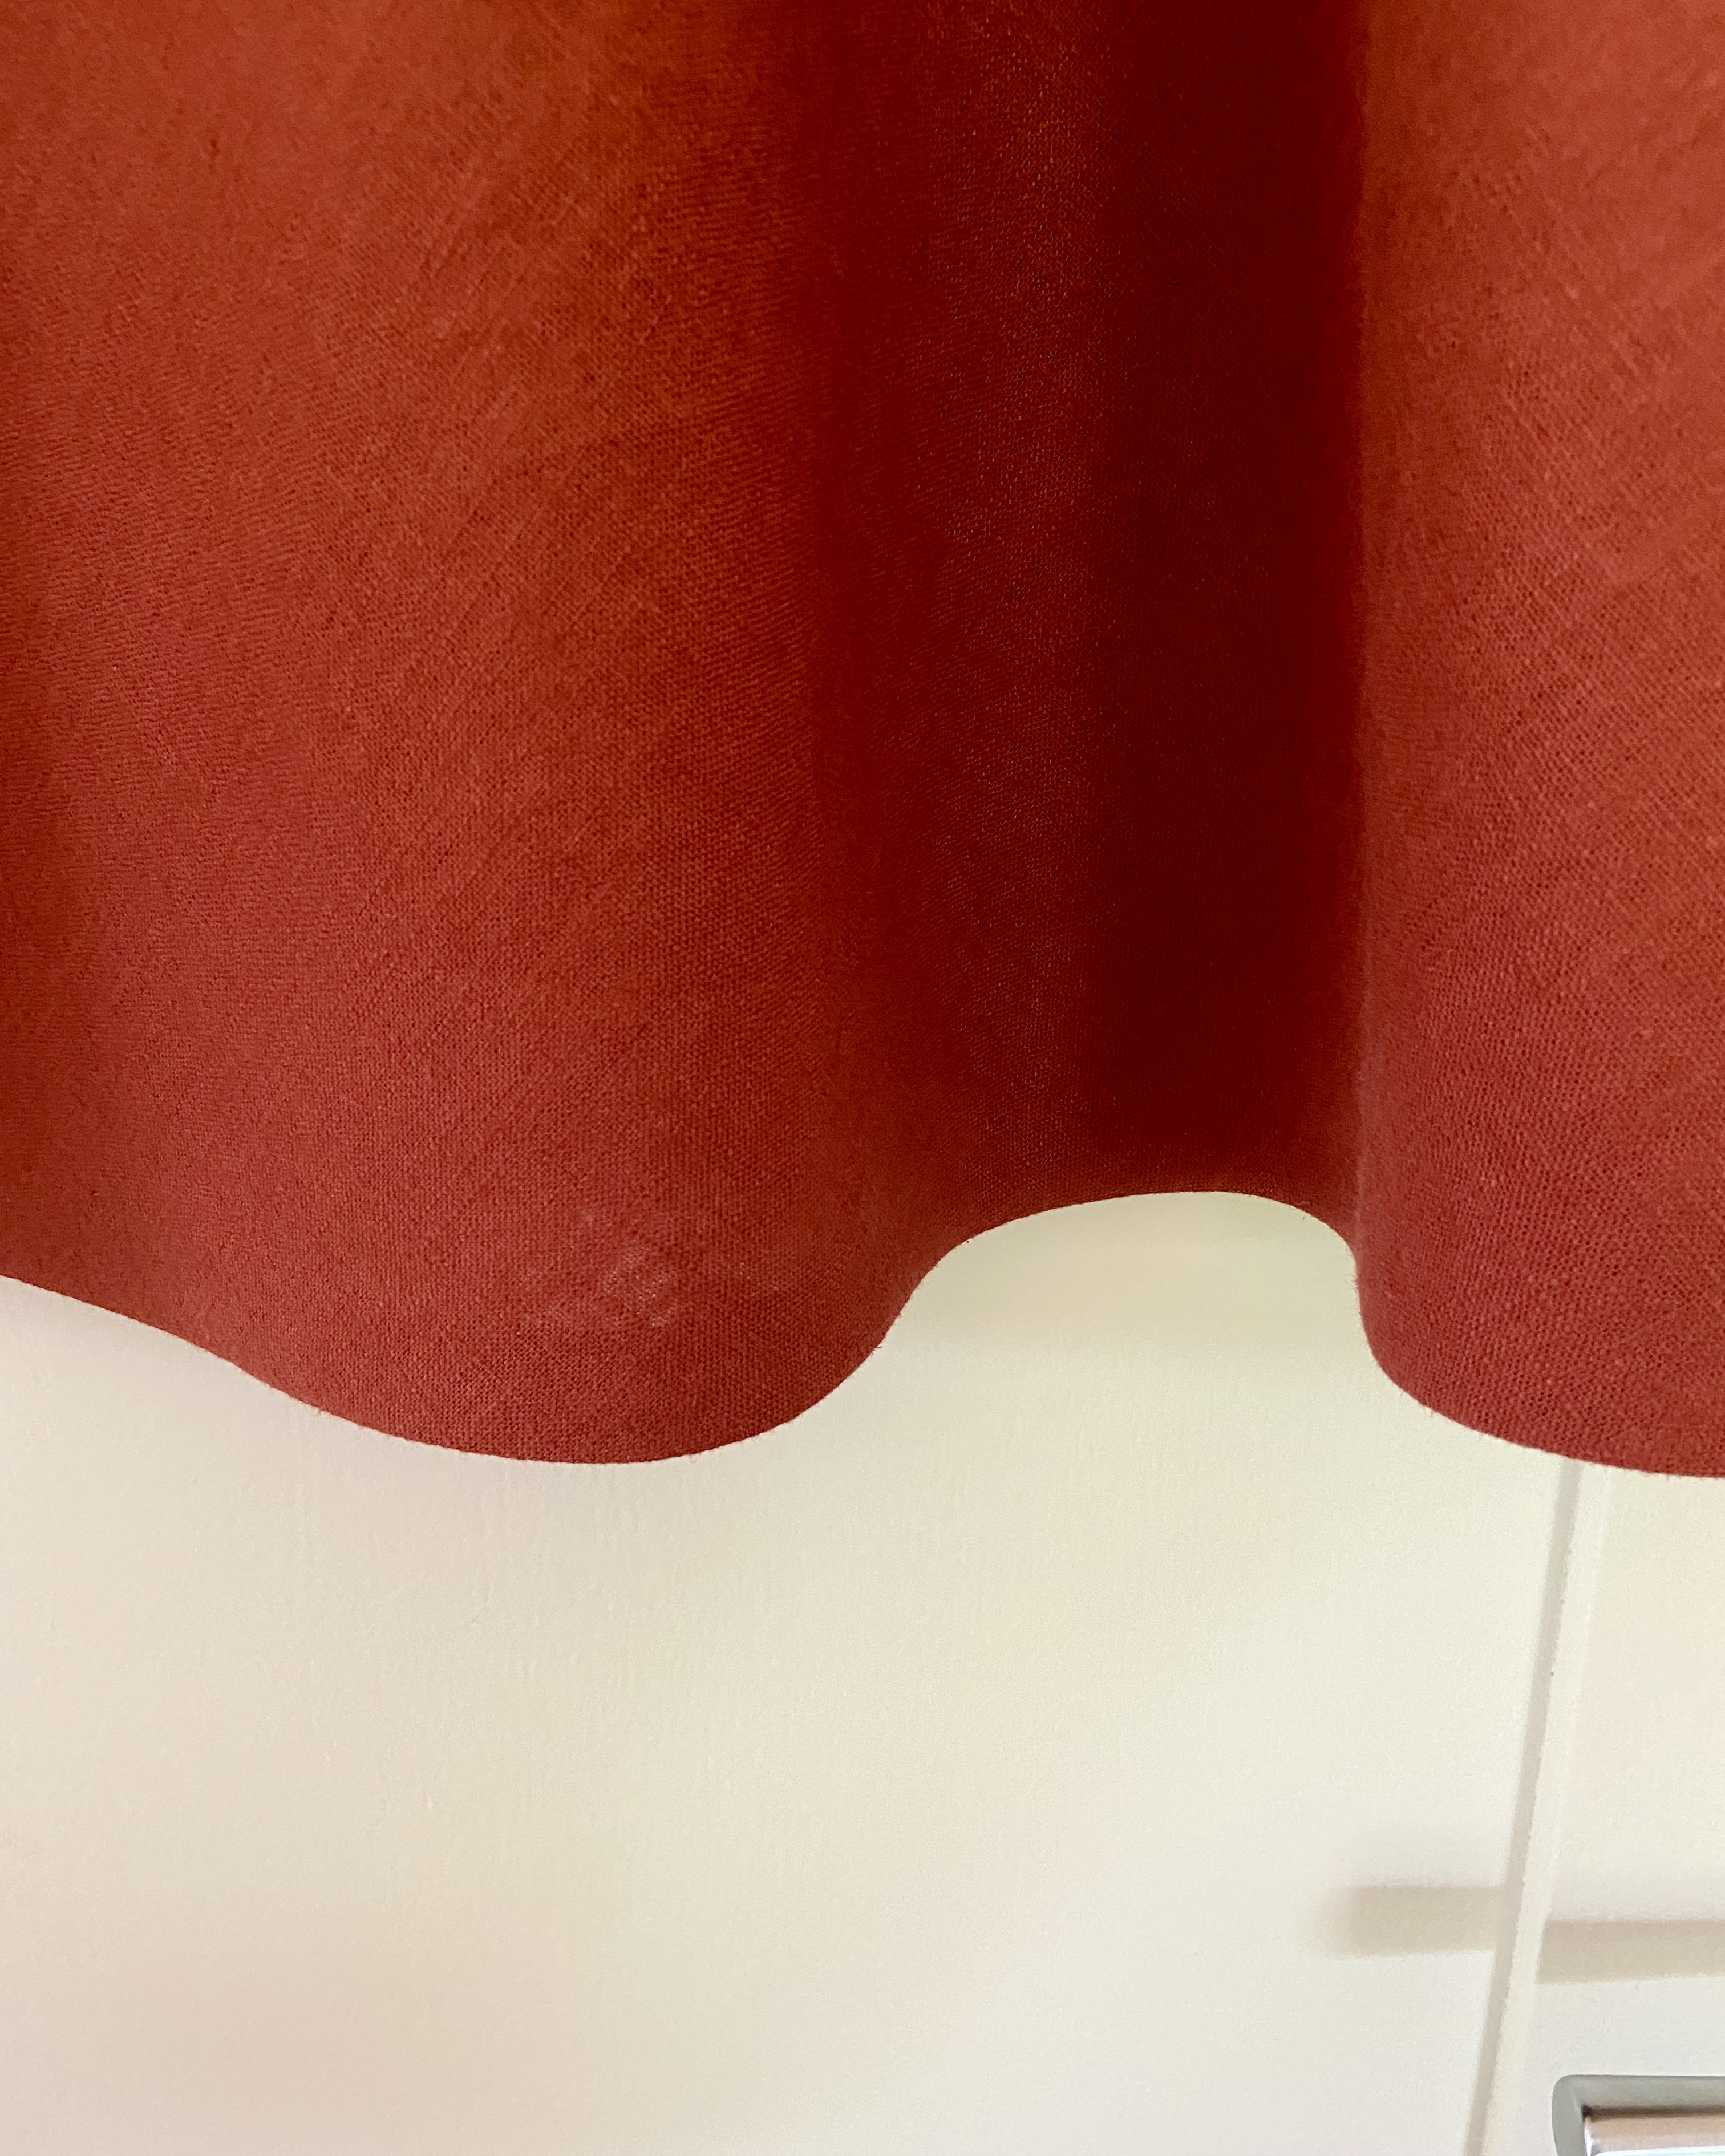
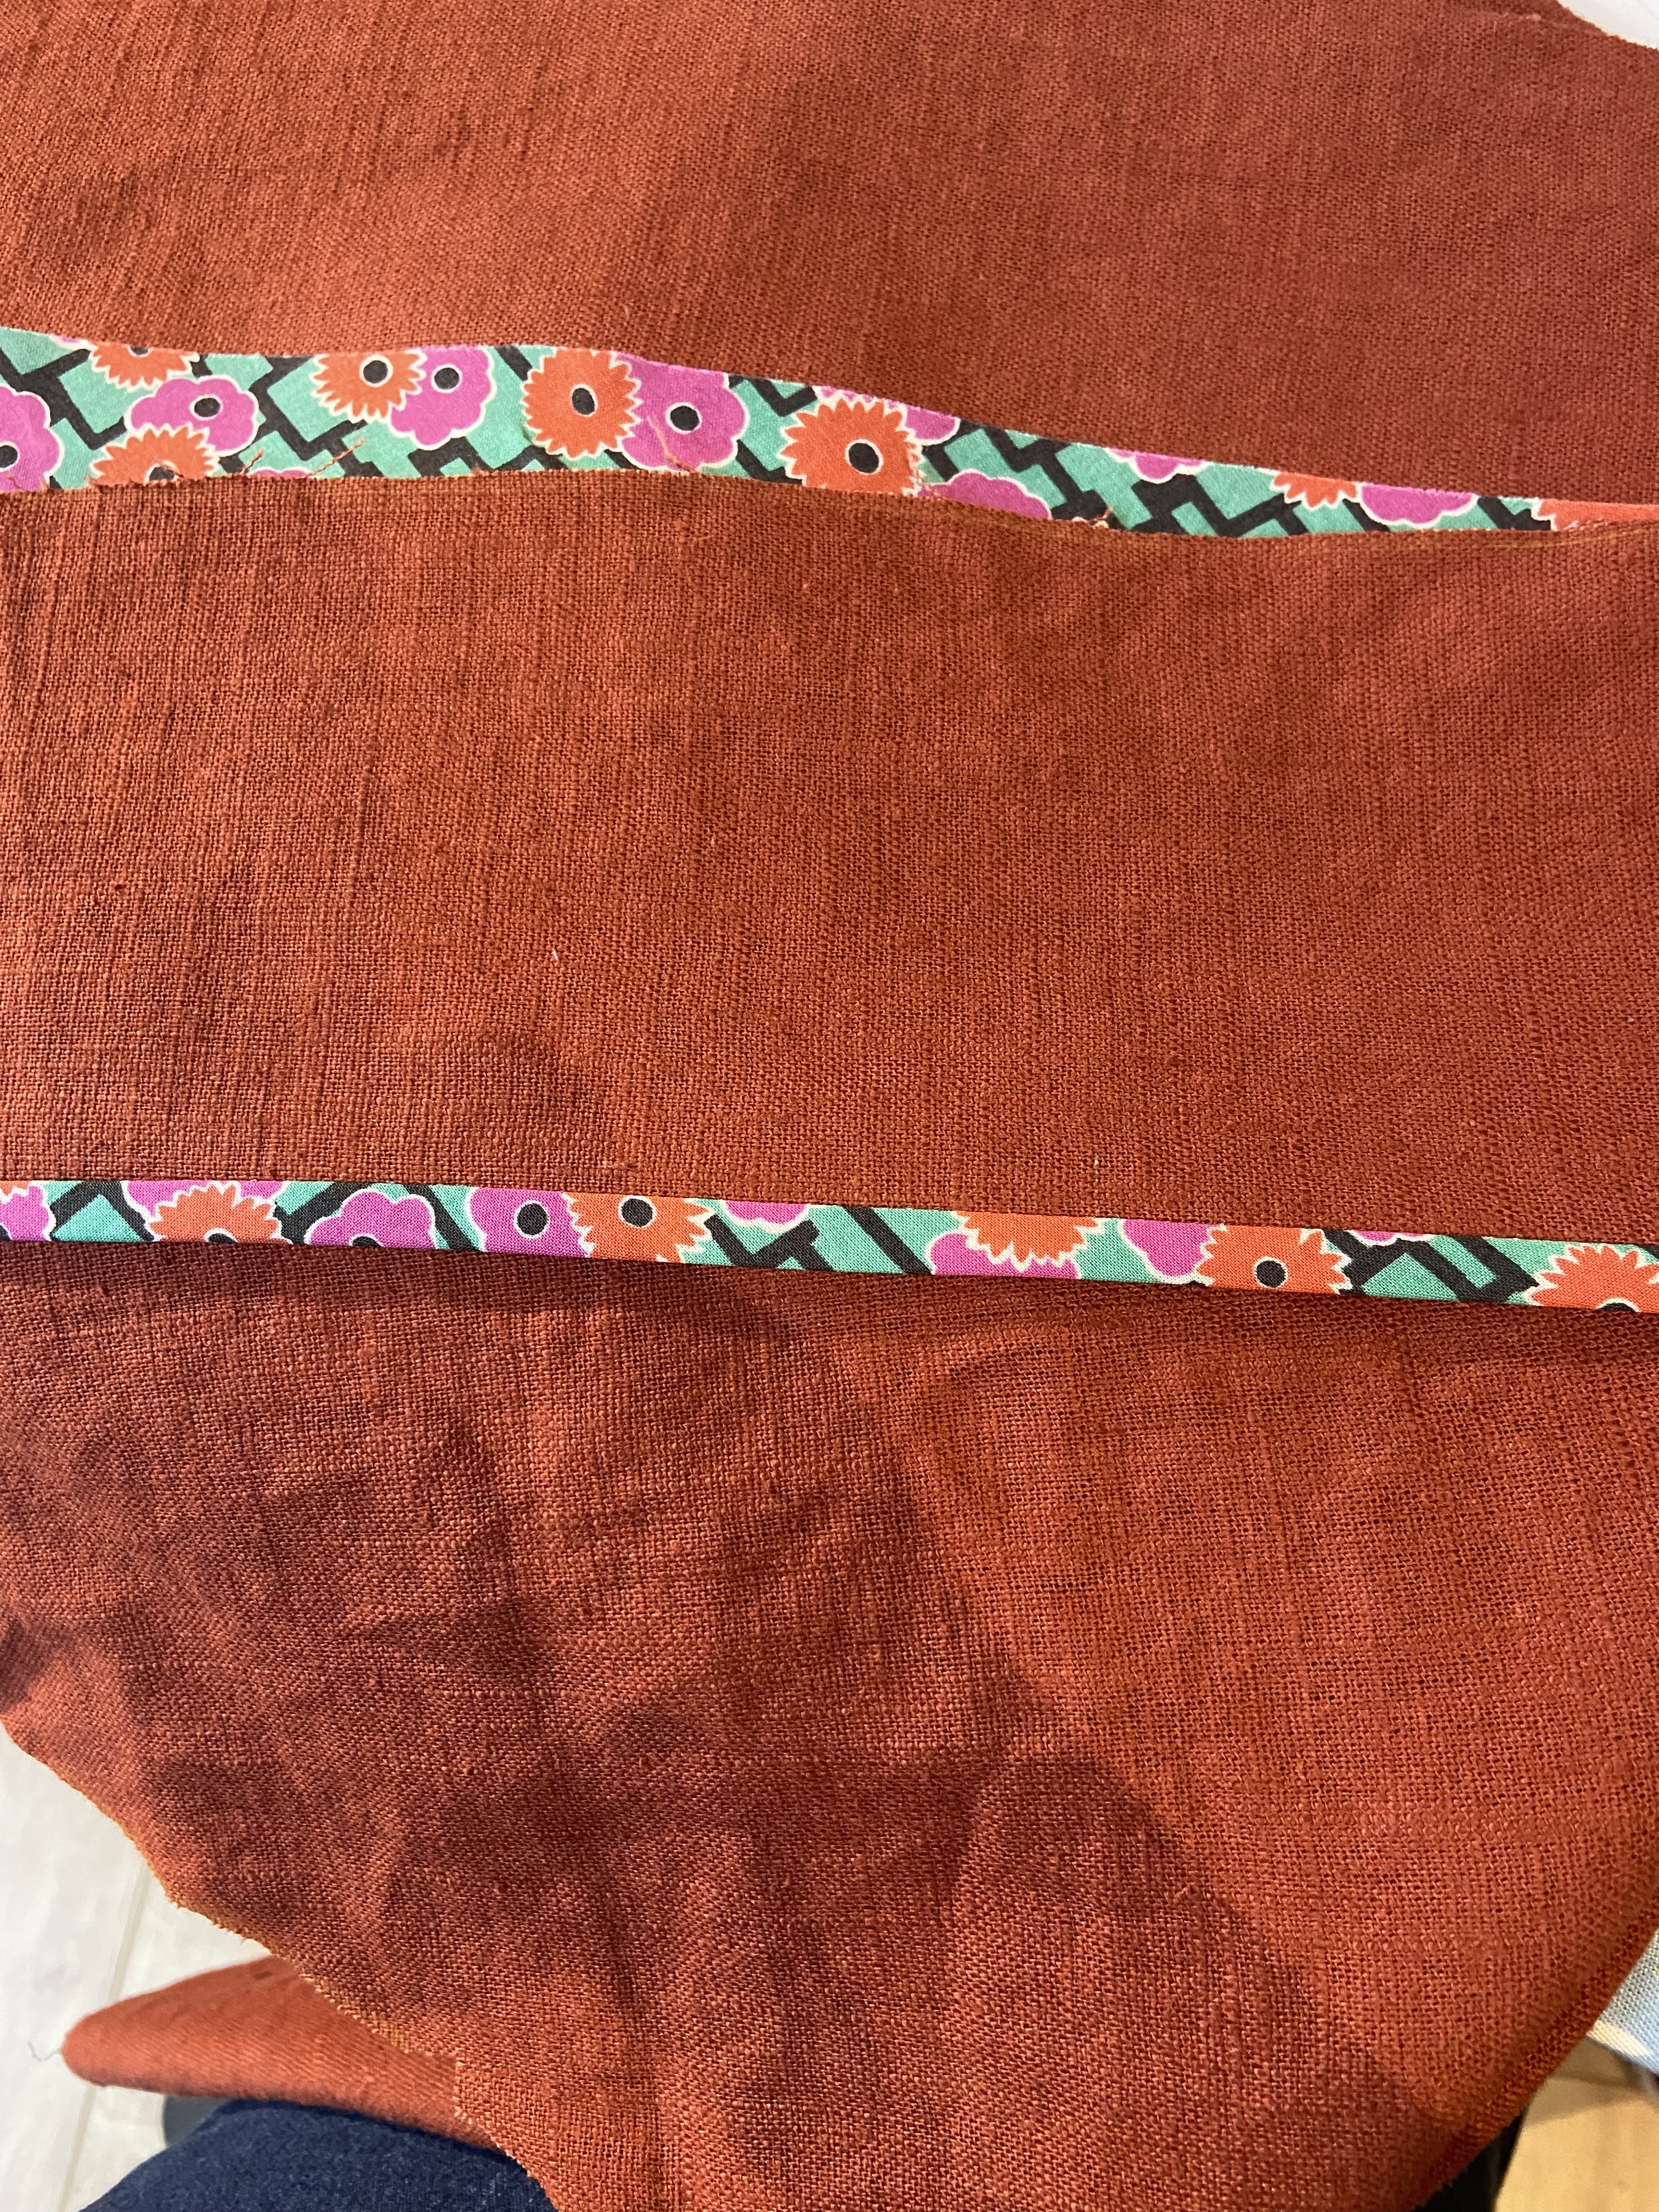
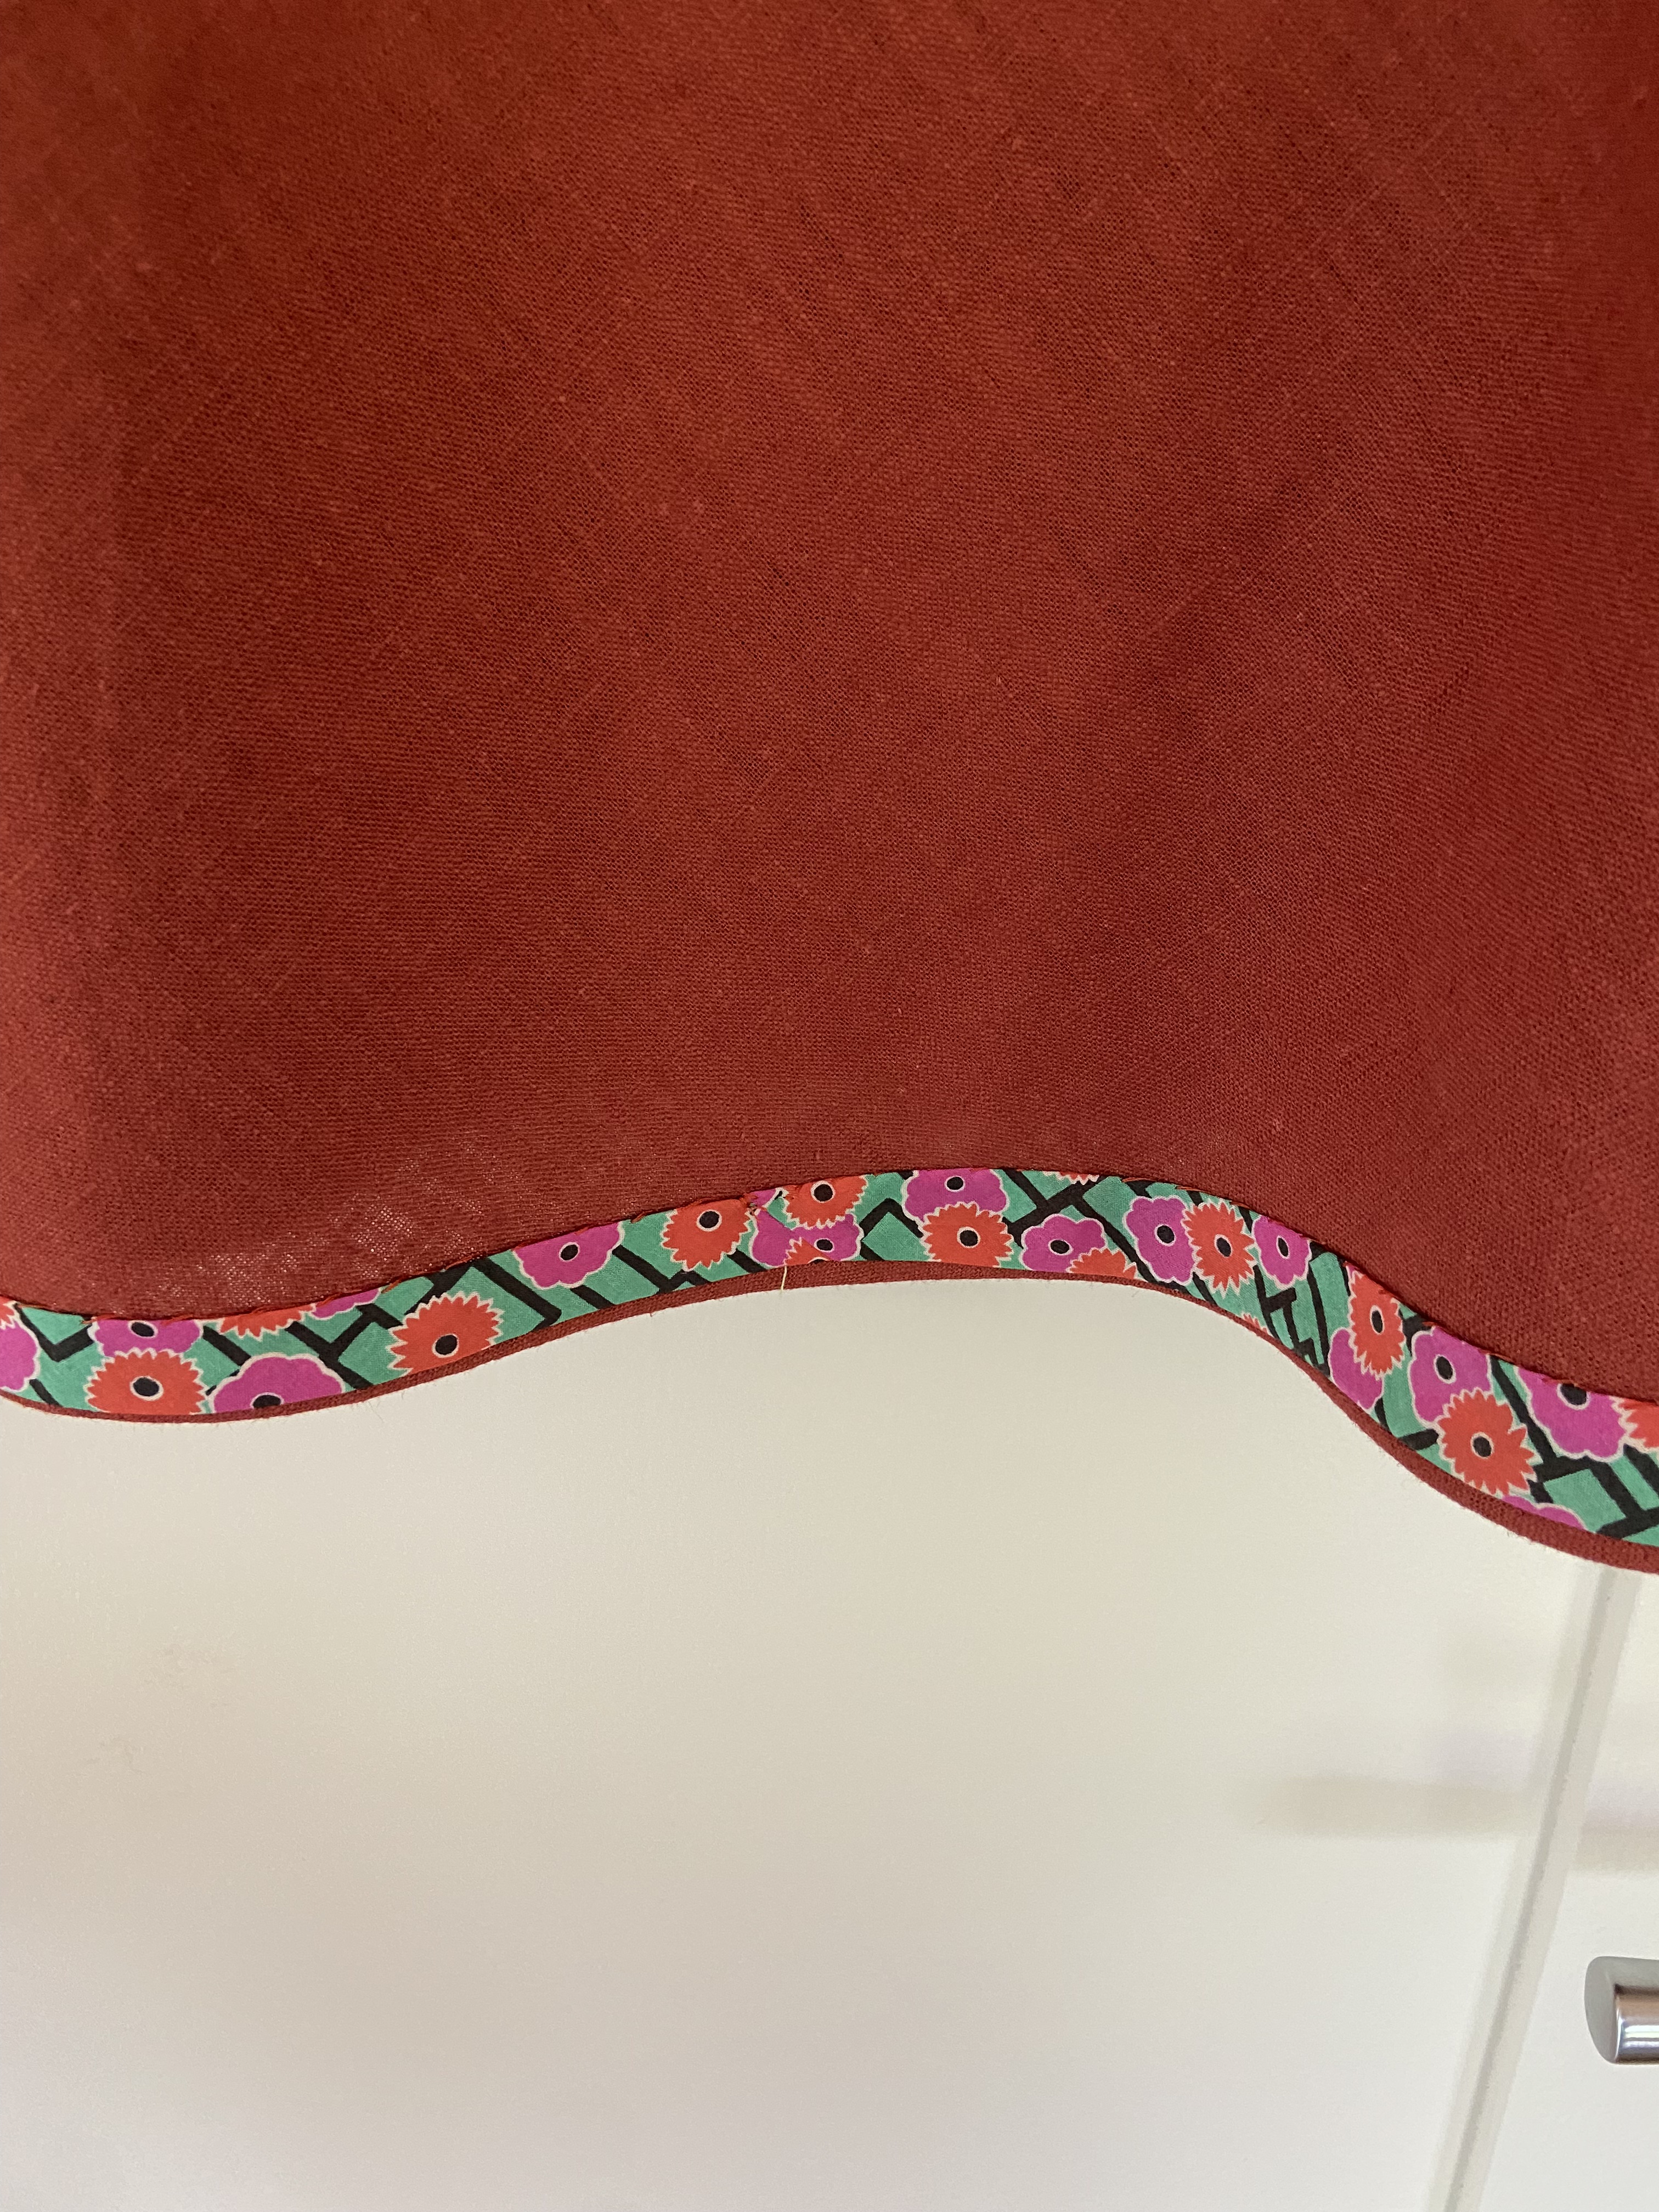
Instead of a narrow hem at the bottom, I bound the hem with bias tape, turned it to the inside and hand sewed the hem. I really like the finish this gives. I know you’re supposed to let a bias skirt hang overnight before doing the hem, but I’m too impatient to do that! But after I had cut out the skirts, I laid them on top of each other and added about 5 set of notches down each side seam. I then matched these when sewing the side seams and I think this helped keep the front and back evenly aligned.

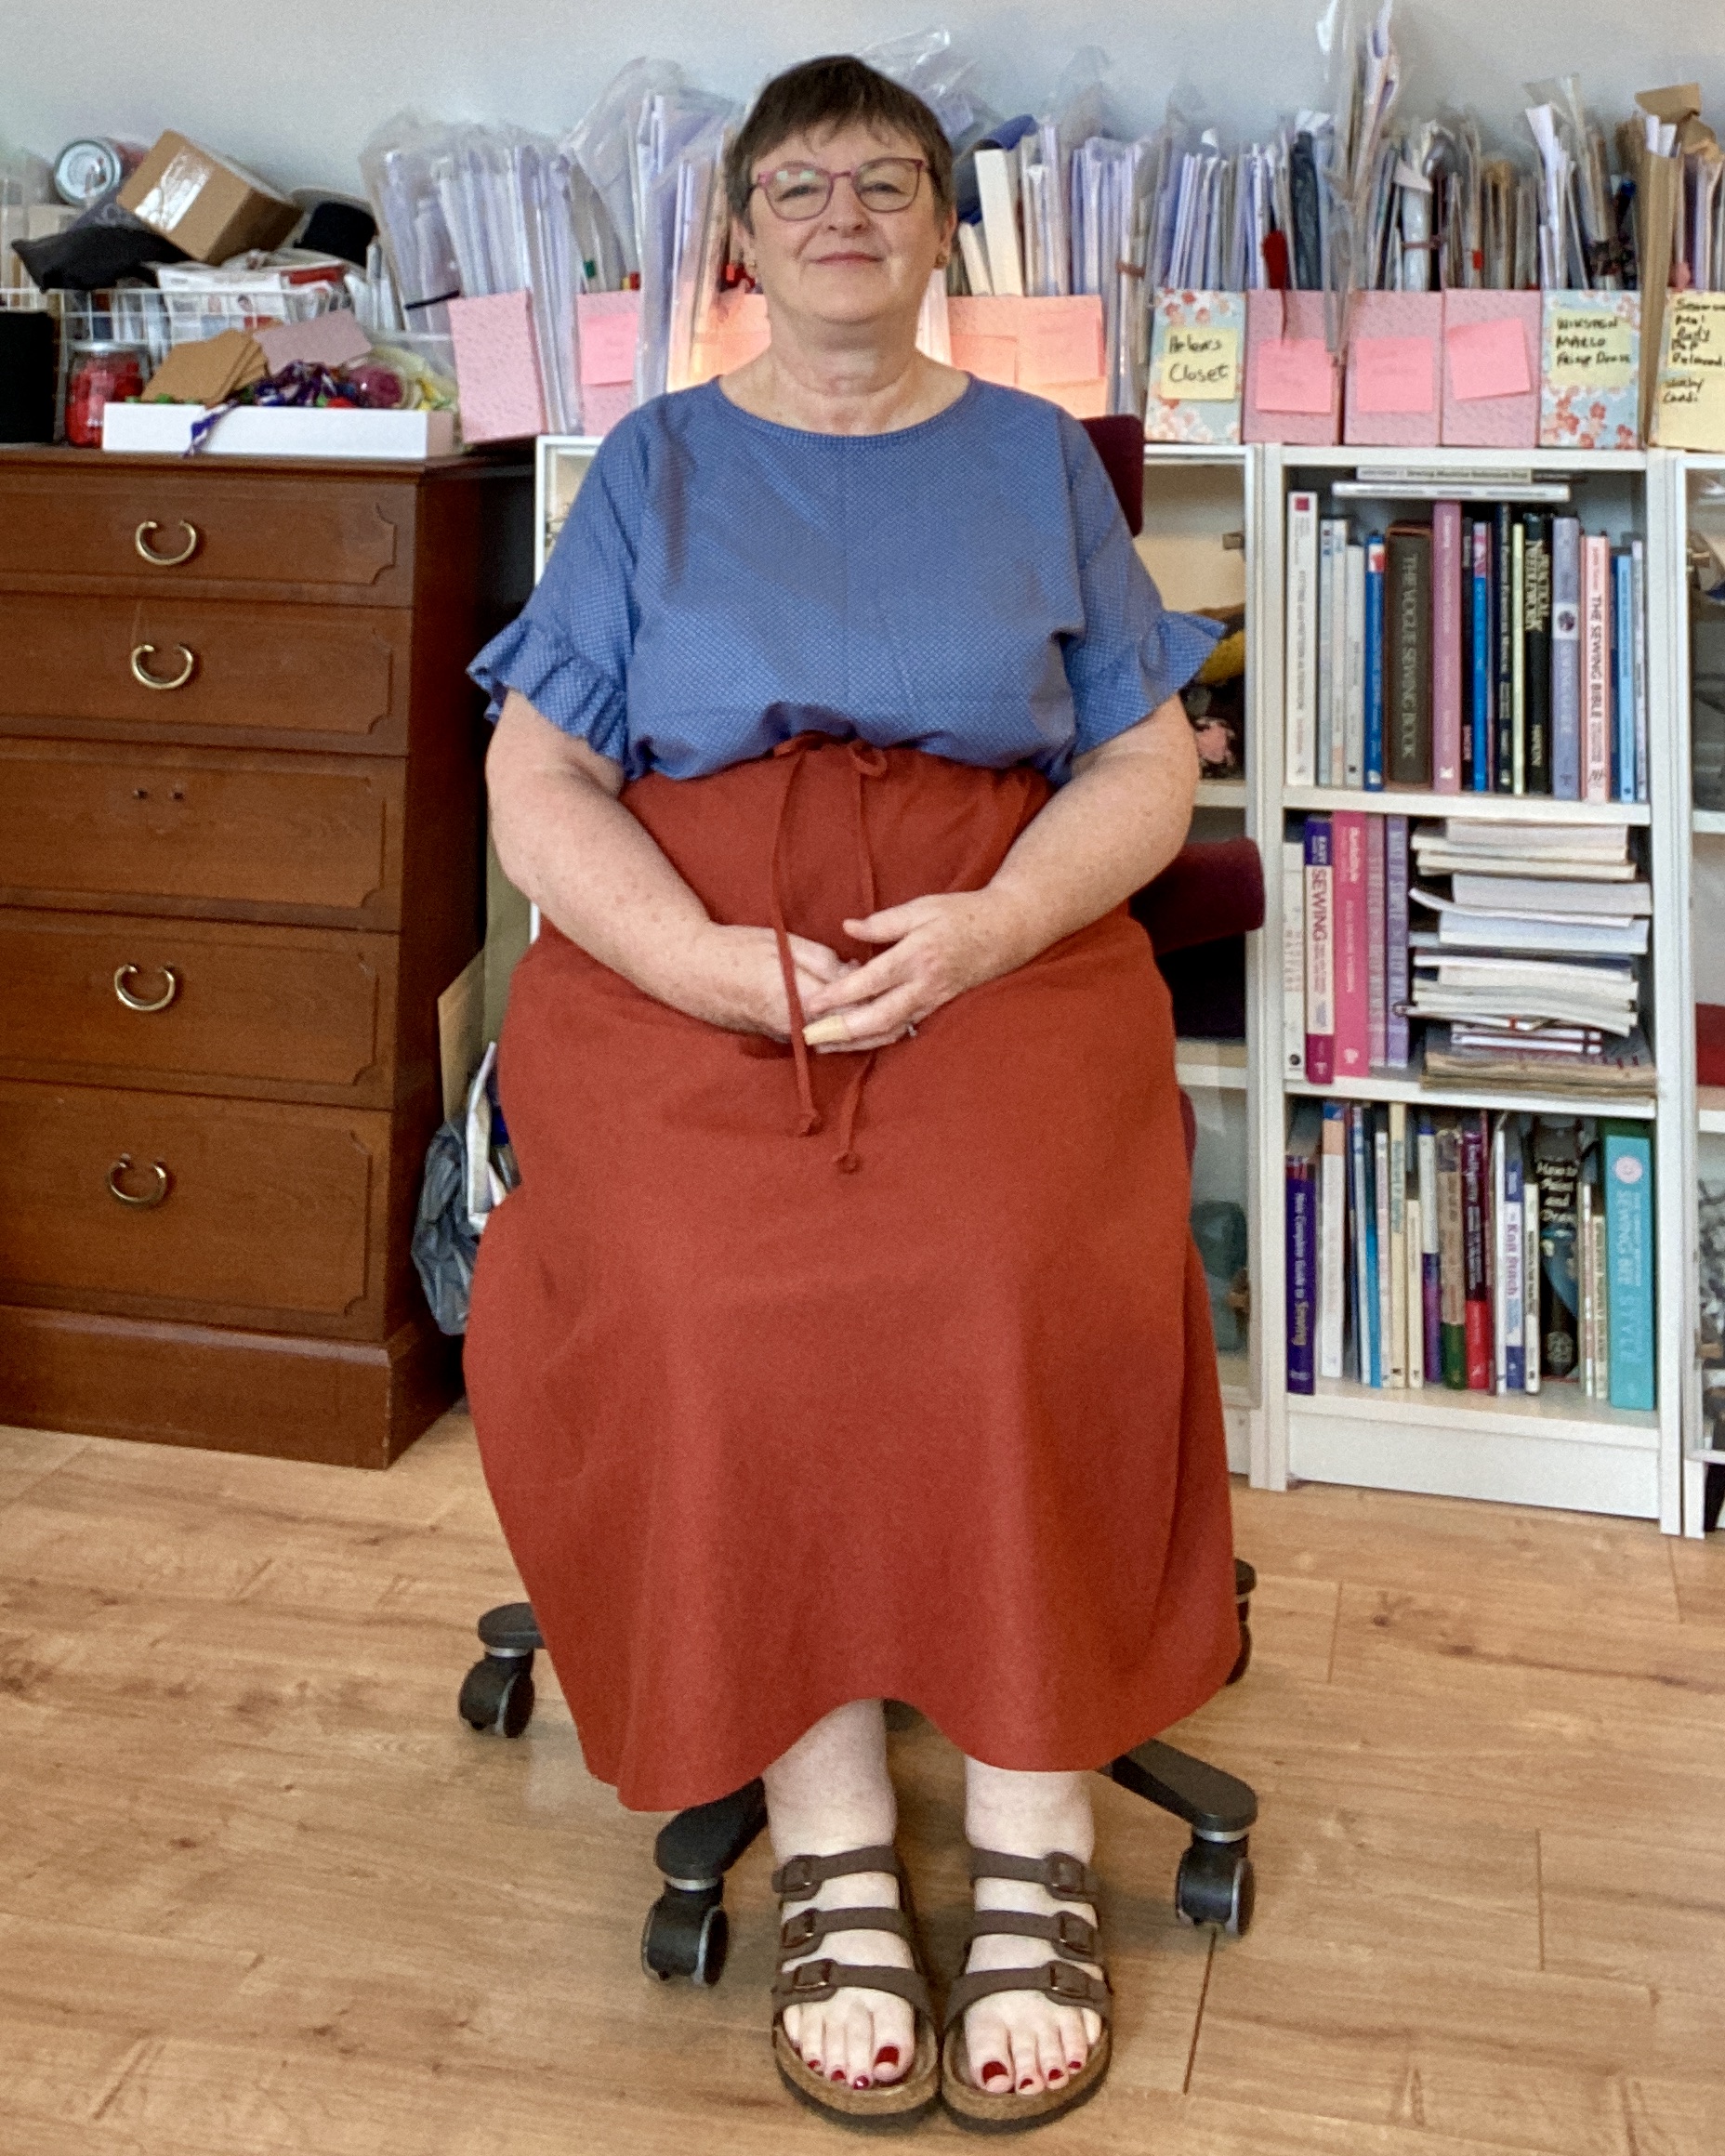
On the waistband, instead of turning the inner raw edge under 3/8”, I bias bound the edge before attaching the waistband. As usual I cut the waistband a couple of inches longer than the pattern piece, pinned it on ironed over the seam allowance at the join and then sewed that short seam. I needed to trim off only about 1/2 inch. I find this always worthwhile doing as they often come up short. The way the fabric in the waist behaves before applying the waistband depends on the weave and weight of the fabric. And how much is cut on the bias – it’s not an exact science. And yes, I had staytitched the waist before doing anything else – and I used a 1.5mm small stitch when doing this.
I like to stitch my waist elastic down in a couple of places or all the way around. I usually do this vertically at the seams, or else sew a couple of lines right around through the middle of the elastic, but of course with a drawstring you can’t do this. But the instructions have you stitch the elastic around 1/8” in from the edge of the top and bottom of the waistband leaving it clear for the drawstring to feed through – why didn’t I think of that before. A lightbulb moment! This is especially useful for cheaper, wriggly elastics. I’m finding it difficult to get my Dritz 1.5” non-roll elastic at a reasonable price anymore.
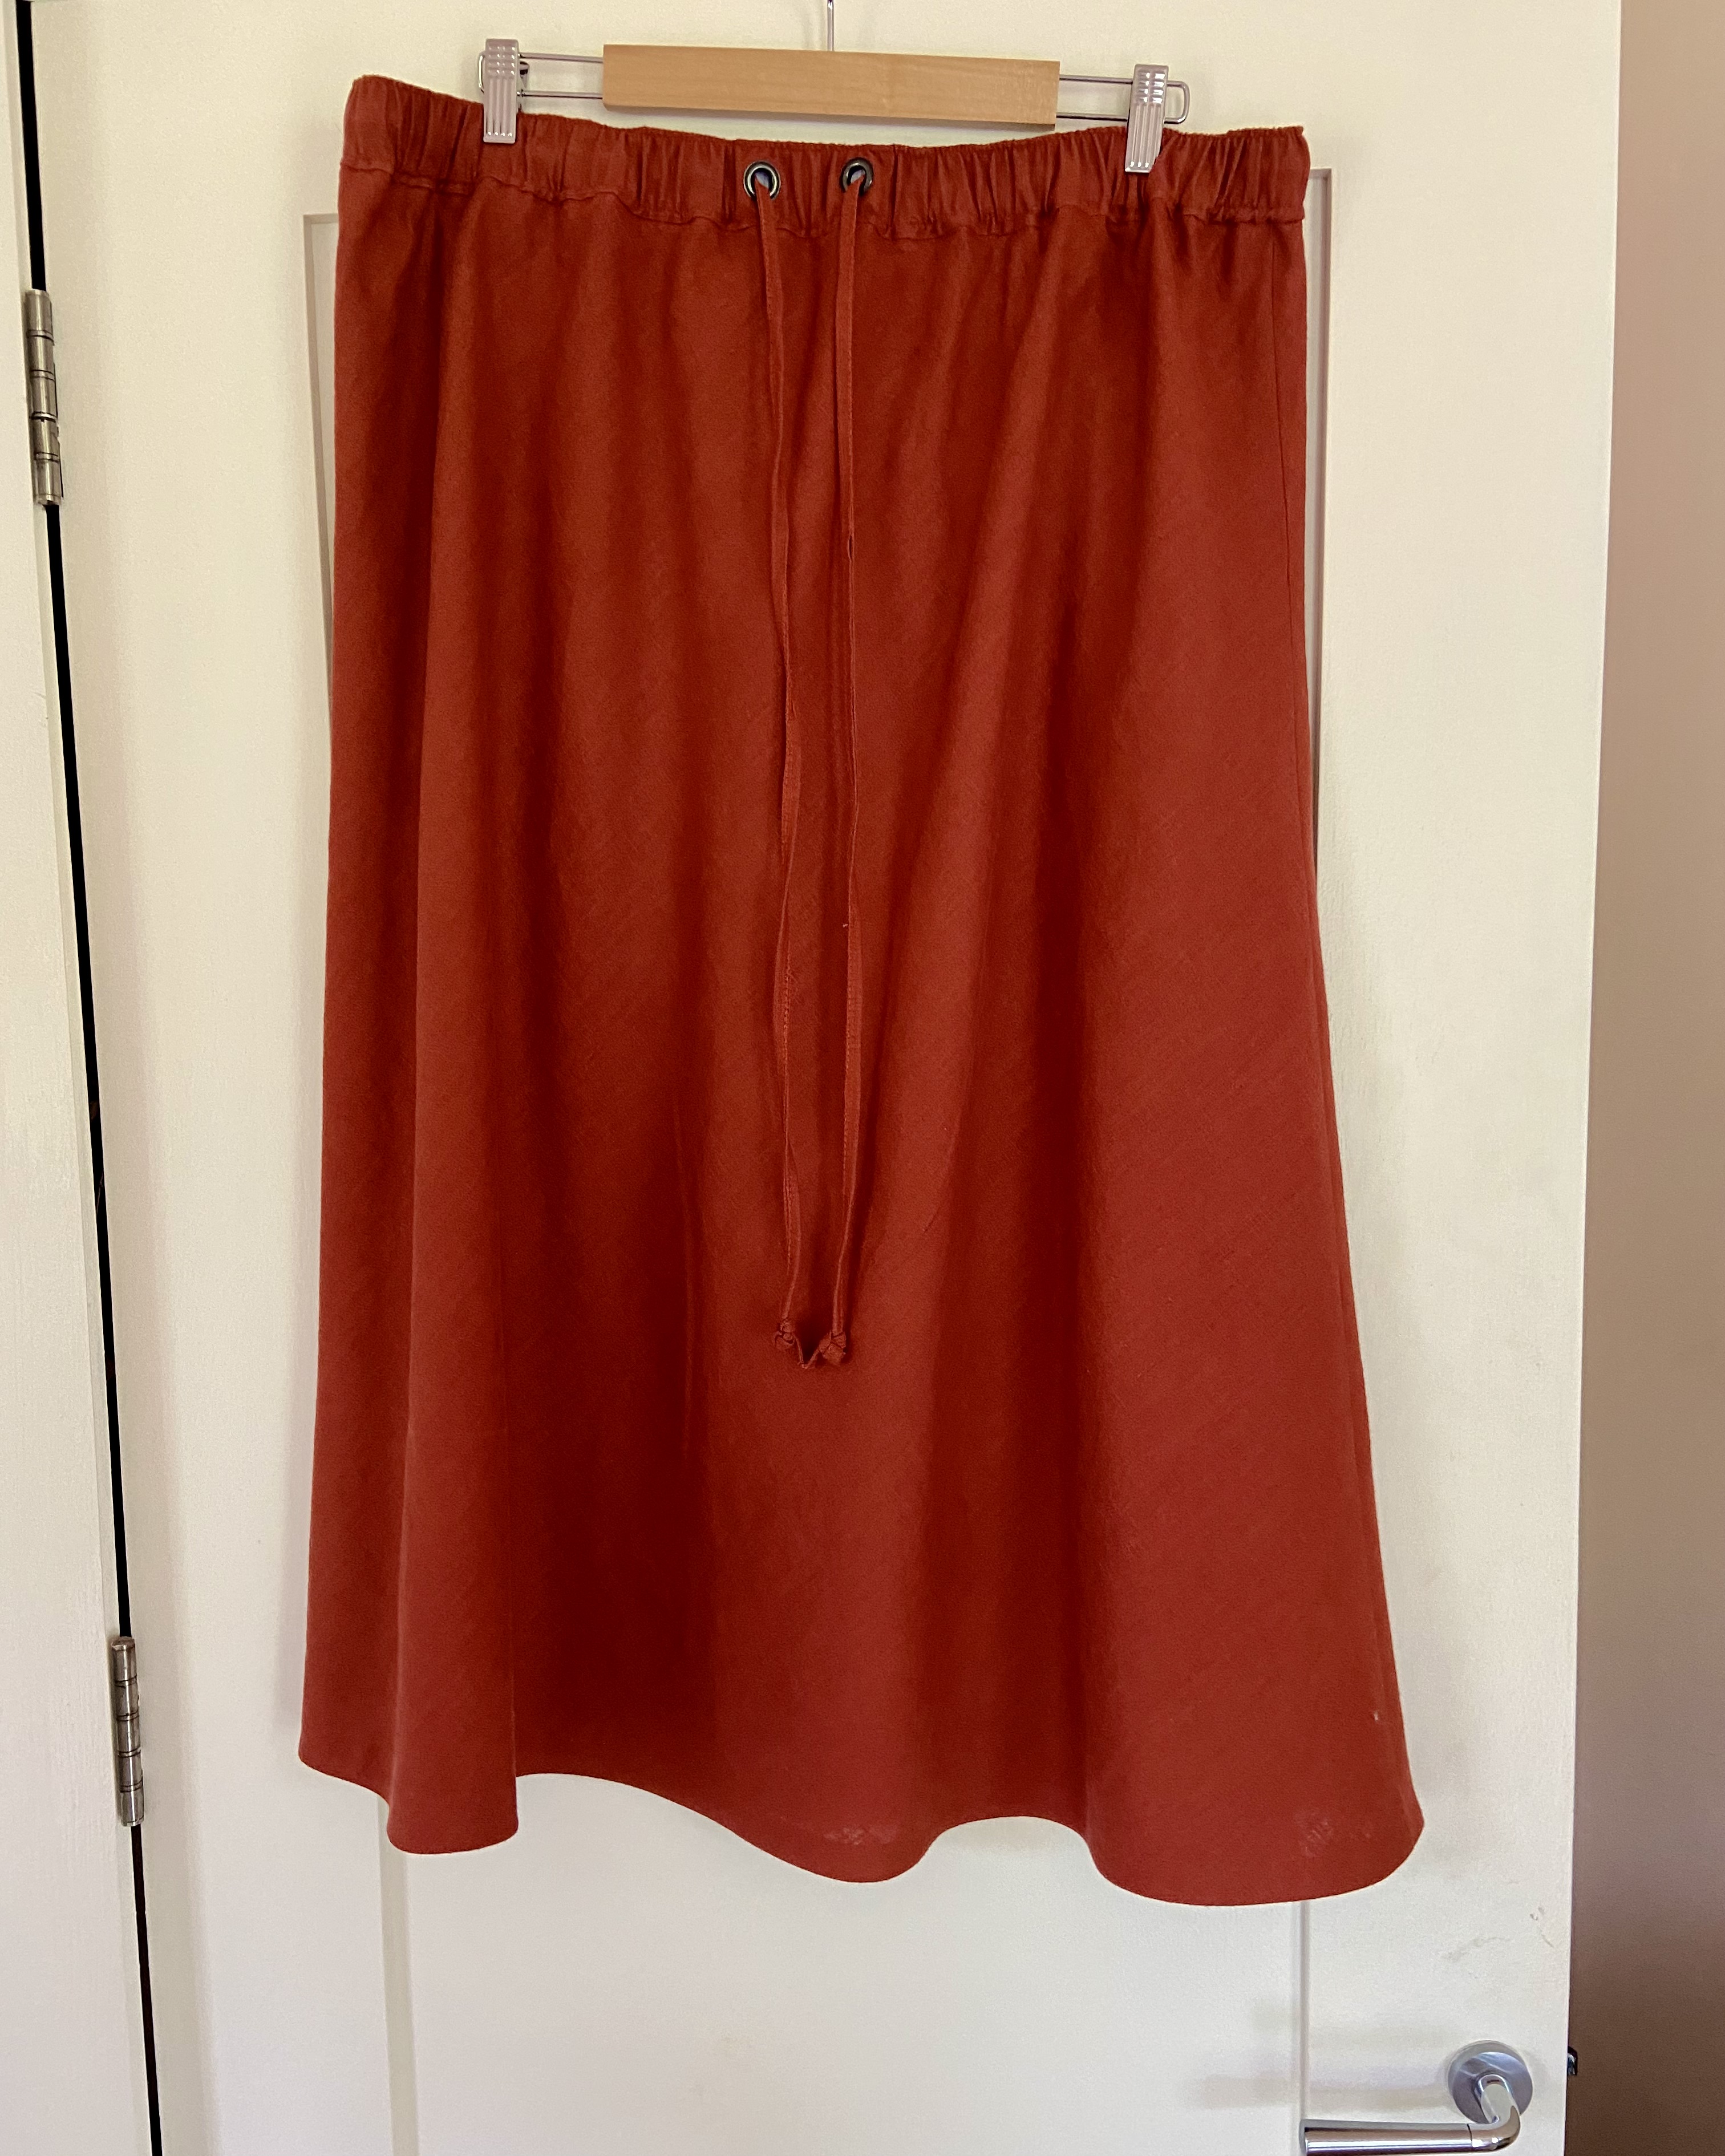
I used grommets instead of buttonholes for the drawstring, because I had them on hand and liked the look of them. I have only one size so I had to put a couple of layers of batting in between the front and back when applying the grommets. Otherwise there would have been a gap and they would have wobbled around.
The only alteration to the sizing I made was to shorten the skirt by 1”, I’m 5’5”.
Just a note that bias skirts are cut on a single layer and take a lot of space when cutting out. Mine would fit on the cutting table, so I pinned as much of the the pattern as I could to the pattern, drew around the pattern, moved more of the fabric onto the table, pinned the rest of the pattern and drew around it. Then I removed the paper pattern and cut around the line, I did this on both skirt pieces.
The blue top is the LB Pullover from Paper Theory without sleeves but with added ruffles. It’s a gorgeous-to-wear Liberty cotton.

I like how the skirt hangs on you. It’s such a lovely drape and there is some twirl. I also like the blouse you styled it with. As always, you did a great job.
LikeLiked by 1 person
Thanks so much 💕
LikeLike